Vanilla Bean Cake- a.k.a.Guilt Free Cake

Vanilla Bean Cake

When I tell people that we have completely eliminated sugar at our house I get a variety of responses – from “Good for you!” to shock and amazement “How did you do that?” I even have some people who swear they can’t live without their sugar fix, which I think is cute actually.

We originally made this choice due to Matthew’s needs but I feel that it has benefited us all. In fact, through my sugar free journey I have slowly been able to ‘convert’ some of my other family members. Not that I am on a mission to convert anyone, it is all personal choice and it is not for me or anyone else to get preachy and tell people what to do. But I do like talking about it and sharing what I have learned with others, and if it benefits them, then I am happy to have helped.

My family became interested in what I was doing as they were watching the changes I was making and how I was doing it. They became curious, so some of them decided to try it themselves, choosing to do so for different reasons. My mother has done quite a bit without sugar, now making bread, cookies, cakes, etc. She is also very accommodating when we come to visit and makes sure that she has food and meals for us that meet the no sugar requirement. Bless her!

I also have influenced my aunt and one of my sisters, so much so that they are coming to me for recipes and tips. They are learning themselves too how to adjust a recipe that they already have to meet their needs.

Once Upon a Time

My sister Cathy, currently of Vancouver, BC and part of the costume team for Once Upon a Time (I love that show!) came to me looking for a recipe for vanilla bean cake. I had come across this when working with Nina Manolson of Healthy Yummy Kids and Smokin’ Hot Mom. Cathy had tried a vanilla bean cake before without much success so was looking for a new recipe.

She tried the recipe I gave her as is but found that for her personal tastes it was a bit dry and needed a little something to spruce it up. So she adjusted and revised the recipe and now makes this moist delicious cake! Which I can vouch is true, as I got to have a piece this summer. She usually tops it with vanilla bean ice cream, but it is very good without.

It was so good that I asked her to send me her revised recipe to post on my blog and share with you folks. So here it is, enjoy! And it is a very healthy cake, dairy free, sugar free, gluten free and full of fibre, so go ahead have 2 pieces!

Vanilla Bean Cake

2 cups cooked white beans

Coconut Oil

6 eggs

3/4 tsp. liquid stevia

1 tsp. pure vanilla extract

1/3 c. honey

1/4 c. coconut oil, liquified

1/3 c. coconut flour, sifted

1/2 tsp. sea salt

1 tsp. baking soda

1.5 tsp. baking powder

1 fresh lemon

In a blender or food processor add white beans, rinsed and at room temperature (this is so they don’t cook the eggs or congeal the coconut oil), eggs, stevia, vanilla and honey. Puree well.

Then add to blender coconut oil, coconut flour, sea salt, baking powder and baking soda and puree well.

Transfer mixture from blender to a bowl. Add the zest of one lemon.  Fold in by hand.

Squeeze all the juice of the lemon into a cup and add 1 pkg.  (1 g) of stevia sweetner.  Stir and set aside until after the cake is out of the oven.

Pour mixture into a spring form pan, or a well greased 9” cake pan. Sprinkle fresh or frozen blueberries on the top.

Bake at 325 F for 55 minutes.  Check if it’s done by inserting a knife in the centre, if it comes out clean, it’s done.  Otherwise bake for  5-10 additional minutes, checking often so it doesn’t over bake.

Once cake is removed from the oven, let stand for 10 minutes.  Then, while still warm, pour lemon juice mixture over top of cake.

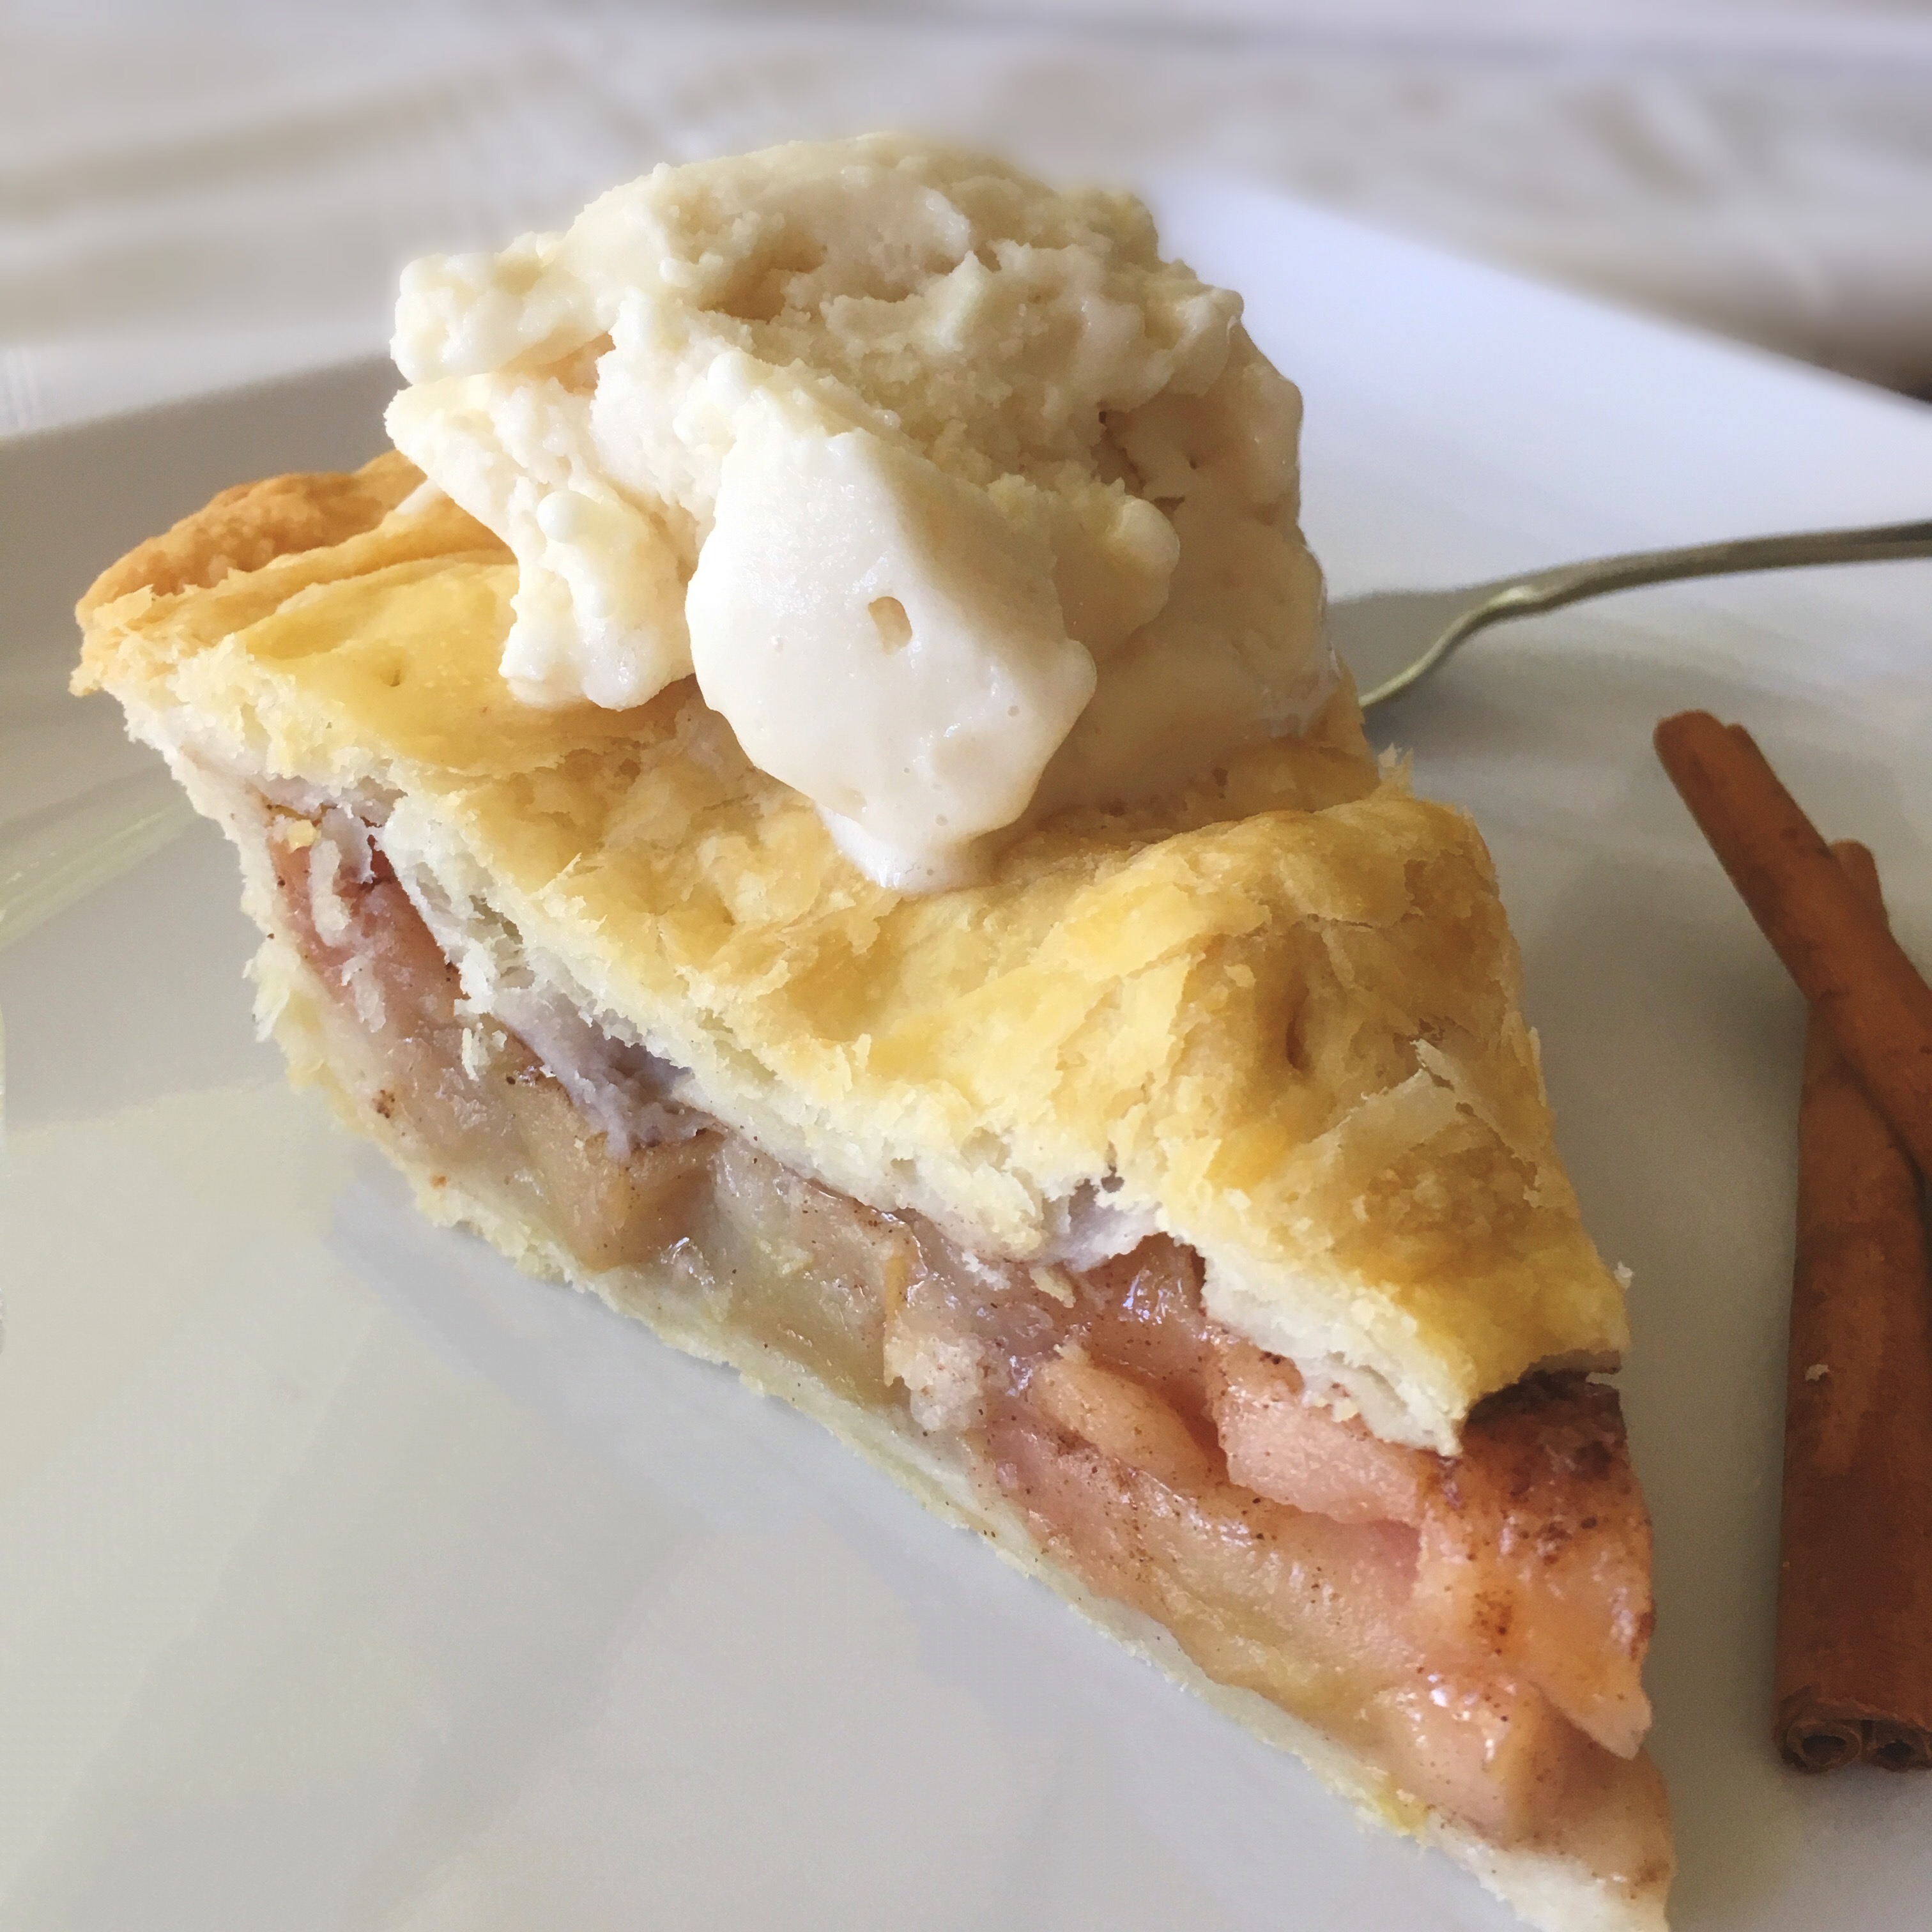
It is delicious warm and plain, or add a scoop of frozen dessert such as Organic Rice Dream Frozen Dessert.

Vanilla Bean Cake topped with yummy ice cream

Next week I will have my first guest blogger, Nina Manolson of Healthy Yummy Kids. She is a certified holistic health coach who believes and educates women and families how to live and eat well in a world that doesn’t. She has many tips and recipes on how to eat and live sugar free as well, so if you wish to continue your sugar free learning don’t miss her post next week!

Sugar Free Condiments

When we went sugar free at our house I began reading labels more diligently to ensure that we were not purchasing products with sugar in them. I believed that if we had to eliminate sugar for Matthew to have it really make a difference, we needed to do it across the board. Which meant everything, not only the obvious stuff like candy, cookies, cake, etc. but the hidden sugars as well. So in things like bread, ketchup, relish, mayonnaise, even table salt (yes it’s true), all contain sugar.

Some of these things I have been able to easily make myself. For instance, I bought a Cuisinart breadmaker and now make all our bread. Anything from whole wheat to cinnamon swirl, I have been able to find or adapt a recipe to make yummy fresh bread. And I love my breadmaker! In the past I avoided making bread because I always had trouble getting it to rise and ended up with a firm heavy loaf. With the breadmaker I simply put all the ingredients in, select the right loaf, size and crust and I walk away. In 3-4 hours I have fresh bread. That is my kind of breadmaking!

Condiments are one of those foods that we as a society use frequently that can be very high in sugar. Things like salad dressings, ketchup, barbeque sauce, and mayonnaise. Though I have found and tried some recipes in making my own, there are some products available to buy from the grocery shelf without sugar, that are excellent. Though I am very dedicated to meeting my family’s dietary needs, I do not want to spend my life in the kitchen! So when I find a product in the store that meets our requirements, it makes life a little easier.

These are the condiments that I have found, so far, that are sugar free and delicious.

Bodacious Tomato Ketchup – made by Honey Bunny, this organic tomato ketchup is sweetened with honey and is very good. I used to be a loyal Heinz ketchup user and found that other brands just did not measure up, but I find this one to be quite good.

There are also other brands of ketchup out there that sweeten it with agave and though I have not tried them myself, could be a good alternative.

Amazing Dad’s BBQ Sauce – also made by Honey Bunny this is a really good BBQ Sauce. The original flavour is the only one that is without sugar, sweetened with honey.


Vegenaise – made by Earth Island, this is a dairy free, as well as a sugar free option for mayonnaise. There is no sweetener in this product whatsoever.

Relish – I have yet to find a relish on the grocery shelf without sugar, so my only option at this point is to make my own. But I am sure there is one out there, so I will keep you posted!

Salt – I no longer buy regular table salt but have moved to buying Sea Salt. There are many brands out there to choose from, but I find Bob’s Red Mill Sea Salt to not only be a good brand but reasonably priced.

Condiments in general seem to have a lot of added sugar in them. Salad dressings are another condiment that often have added sugar. Though I have found some tasty salad dressing recipes I have yet to discover a product off the shelf without the added sugar.

In the meantime check out your local grocery store for some of these sugar free options, give them a try and decide for yourself!

PS If you have found any sugar free products such as salad dressings or other condiments I invite you to comment below and share your discoveries with us! It is always great to share resources.

Natural Sugar Substitutes

It’s been over a year now since we have completely eliminated sugar from our home. We did so because our oldest son, Matthew required it. We found that the effects of sugar on his body were too extreme, leaving him moody, angry and disruptive and it was also affecting his sleep at night. He would go to bed at a reasonable time, and I know it was reasonable because I checked around with other parents and experts, and it would take him almost an hour or more to fall asleep at night. Now as an adult I find it very frustrating when I go to bed and it takes me a while to fall asleep. I can only imagine my son’s frustrations around this.

It was a huge learning curve discovering what I could use instead of sugar and products that did not contain it. Because as we began our journey we discovered very quickly that sugar is in almost everything.

The biggest challenge was finding yummy alternatives for Matthew that equated to what the other kids were having, and all the foods that he enjoyed and was used to, such as chocolate, cake, pies and muffins. With diligence I rolled up my sleeves and have been able to find replacements for all these things, as you have seen with some of the recipes on my blog in previous posts. It was just a matter of learning what the natural sugar substitutes were that he could have and how to easily substitute them in a recipe. Once I started looking I found that there were many to choose from and I had a lot of them already in my home.

Here is what I have learned/ discovered to be great substitutes for sugar in recipes. What you choose as the substitute will depend on your recipe as well as personal preference. Many of these natural sweeteners also have great health benefits as well, such as being rich in vitamins and minerals or aiding in the prevention of certain ailments and diseases.

Honey

Honey -choose a honey that is local to you. It has been shown that local honey provides immunity for you against environmental illnesses because the bees are local to your area. Honey has many other health benefits as well such as being a natural energy booster and remedy for many ailments. I use honey as a sugar substitute in crumble and muffins as well as in my bread recipes.

Agave nectar – simply the nectar from the agave plant. Make sure you get a good quality brand as some agaves are more processed with more additives. Ojio agave by Ulitmate Superfoods is a good quality one. When substituting agave for sugar use 3/4 to 1/2 the amount as agave is 25% sweeter than sugar. You also reduce your liquids in your recipe because the agave is a liquid itself, by 1/4 cup. Agave is great in anything but I use it mostly in cakes, muffins and pies.

Maple Syrup

Maple syrup – use 100% pure. If you are using the processed kind then it is not a natural sweetener and you might as well use sugar. This is great in icing, marinades and glazes.

Stevia – is a strong leaf powder that is very sweet, also found in a liquid form. It is considerably sweeter than sugar so you use 1 tsp. stevia to 1 cup of sugar when substituting. It also has many health benefits such as reduced blood pressure and aids in digestion. Stevia is great in cakes and muffins, but also for your coffee, tea, or to sweeten other drinks.

Coconut sugar -comes from the nectar of the flowers of a coconut tree, and is available in a granulated or liquid form. Rich in vitamins such as potassium, zinc and iron. Coconut sugar is great because it melts like brown sugar, so I find that this works well in crumbles, on oatmeal or things like apple cinnamons when you want to create a syrupy texture.

Date Sugar

Date sugar -is made from dried dates and adds a rich sweetness to recipes. It does not melt or dissolve in liquids. When using date sugar substitute 2/3 cup to 1 cup of the sugar, as it is sweeter than sugar. I use date sugar in some bread recipes, muffins, pancakes or waffles.

Yacon syrup -sweetener extracted from the roots of the yacon plant. Some of yacon’s health qualities are strengthening the immune system and calcium absorption. Use 3/4 cup of yacon to 1 cup of sugar.

Barley Malt – is a wonderful replacement for molasses and is made from sprouted or malted barley. I use this in some cookie recipes, and my homemade baked beans. Yum!

Coconut Nectar

Coconut nectar – naturally sweet, nutrient rich “sap” from coconut tree blossoms. High in amino acids, minerals and vitamin C. It can be used just like agave or maple syrup in recipes instead of sugar. I have only used it so far in cookies and they have turned out delicious!

Fruit is also a great natural sweetener, using apples (applesauce, make sure there is not sugar added) or bananas can add the sweetness you desire.

The best thing to do is experiment with these sweeteners, determine which ones work best in your recipes and which flavors you prefer. It can be fun to experiment in the kitchen as long as you are prepared to ‘let it go’ if one doesn’t turn out so well 🙂 Personally I have had success with my substitutions and if you follow these guidelines you’ll have no trouble whatsoever and soon it will become second nature, just like it is for me!


Homemade (Sugar Free) Apple Pie

apple pie

It was a busy weekend at our house with the Fall activities beginning, soccer evaluations, Ju Jitsu and Leaders in Training. Rallying the kids, getting them ready and myself ready was quite the challenge, but we managed to get it all right. Well almost all. Somehow we mixed up the times for Matthew’s Ju Jitsu grading and unfortunately he missed it. He was pretty upset and now can’t grade until December, but his Dad ended up taking him for a motorcycle ride to ease his disappointment and they had a glorious time! It was a gorgeous warm, fall afternoon, with bright sunny blue skies.

In the midst of all this activity, I still had a huge basket of apples in my kitchen, and though we were diligently eating them, there were still quite a few. So Saturday afternoon while Matthew was out I decided to make apple pie. I had yet to try a sugar free version of this pie but was fairly confident after the success I had with the cherry pie in the summer (see earlier post for Sugar Free Cherry Pie recipe).

I had pulled my pie crust from the freezer earlier that morning. (I make a it from scratch, simply using the recipe on the Tenderflake® box, making a whole batch at once which is six pie crusts, and freeze it for later). This makes it a lot easier and quicker to make a pie when the crust is ready. Plus I make a killer pie crust, even my sister, who loves to cook and bake, is envious of my crust as she cannot make one as light and flaky as mine 🙂 I simply roll it out, prepare the filling with the pie in the oven within 15-20 minutes.

I used my apple peeler corer slicer once again to prepare my apples, also a great time saving device as you can peel, core and slice an apple in less than a minute. Mixed up the filling, estimating the amount of honey to substitute for the sugar, poured it over, put the crust on top and placed it into oven.

sugar free apple pieWhen substituting honey for sugar you reduce the amount of honey by 1/2 to 2/3 of the amount of sugar. Honey can be is 2-3 times sweeter than sugar so you don’t need to use as much. The amount of honey you will use will depend on the kind of honey you’re using (as some flavors are sweeter than others), and how sweet you like things. I found that using 1/2 cup of honey for the pie worked really well. Not too sweet that it overtook the flavour of the apples, but nice enough to sweeten it up a bit.

The pie turned out beautifully. Matthew jumped for joy when he came in from his ride and saw it on the counter. The twins, who were dubious at first, wanted apple crumble, not understanding or knowing what apple pie was, as they had never had it before.

Chloe especially insisted that she have crumble, but once she tasted her pie, she was sold and had 2 pieces! In fact, everyone loved it, ooed and awed and almost polished off the the whole pie! We had one piece leftover, which Matthew was lucky enough to take in his lunch to school.

I managed to put a good dent in my apples but I still need to make a few more things to use them up. I’ll make applesauce for the kids, but I may have to make another crumble or a pie…

Apple Pie

apple pie2 – 9 inch pie crusts (store bought or make your own)

5 c. apples (6-8 medium apples)

1/2 c. honey

2 tbsp. flour

Cinnamon

Roll bottom pastry and fit into a 9 inch pie plate. Let excess drape over the edge of plate.

Peel, core and slice apples and put into pie plate, arranging evenly. Sprinkle apples with cinnamon, to taste.

Mix honey and flour together. Pour evenly over apples. Roll out top pastry, dampen edges with water and place top pastry covering apples. Press and crimp edges together, then cut off excess pastry. Cut several slits in the top to allow steam to escape.

Bake in 350 F oven until apples are tender, about 45 minutes. Serves 6-8.

Enjoy!


Apples, Apples, Apples

apple activities for kids

Inspired by our apple picking the other day and with the abundance of apples in my kitchen, I decided to hop on the internet and look for fun crafts, games and ideas to do with the kids around an apple theme. Of course, I was not disappointed by the abundance of ideas out there, especially at this time of year.

After checking out a number of websites, I made a list of my favorites and have been trying them with the kids over the last few days. Here are the highlights and my faves.

Apple Crafts

apple activities

Fingerprint Apple Tree

Fingerprint Apple Tree – this craft is super easy and fun! You will need brown, red and green tempera paint and some paper. The kids place the side of their hand in the brown paint and then stamp it on the paper. Then using their index finger they dip it in the green paint to make leaves. Lastly using their pinky finger, they dip it in the red paint and touch it to the paper to make apples.

Matthew and I did ours just like the picture showed while Luke and Chloe, though they started out the same, ended up getting very creative with their tree. It was so cute to watch, both very focused, creating their tree. It was actually their first time using paints and they loved it! and have beautiful apple trees to show for it. And even though it doesn’t ‘look’ like the picture, they proudly call it their apple tree and share it with others.

Luke’s apple tree

Along the theme of apple trees, kids can also make a Pom Pom Apple Tree. Again very simple and easy. You will need brown paper, a brown marker, green paint, scissors, white glue and red pom poms. For this one I am going direct you to the website I found it on as they have done a great job of explaining how to put it together with great pictures.

There are other easy apple crafts I discovered that I like – Cinnamon Apple Wreath, Toilet Paper Roll Apple, Stained Glass Apple and one of my favorites, the Worm in Apple.

You can even do apple prints, like potato stamping, and create beautiful lunchbags, dish towels or a homemade greeting cards. A craft from Martha Stewart of course.

Cinnamon Apple Wreath

Apple Games

Hot Apple – Just like hot potato except you use an apple instead. Children sit in a circle passing around the apple while there is music playing. Children pass the apple from one to another; they want to pass the apple quickly because when the music stops if they are holding the apple, then they are out of the game. Game continues until there is only one child left.

Apple Relay – Divide the children into 2 teams. Designate a starting line and an end line.  Teams line up one behind the other at the start line. The first person on each team places the apple on their head and must balance the apple on their head while they walk to the end line and back. If they drop the apple they must stop, count to three, then place the apple back on their head and continue. Once they are back to the start line, the next person goes. The first team to have everyone on their team finish wins.

Apple Hide & Seek – this is great for younger children. Have the children sit in a circle and close their eyes. While their eyes are closed hide the apple. Once it is hidden children may open their eyes and then move around the room looking for the apple. Once they find the apple they leave it where it is hidden and simply return to the circle. The last person to find the apple can hide the apple for the next round.

Bobbing for apples

Of course there is the traditional Bobbing for Apples, which we typically do around Halloween, which is always a riot. I like the version where you have to bob for the apple, then go and use your nose to find a candy in the flour bowl. It can get quite messy but it’s a hoot!

Apple Books

An apple theme would not be complete without books about apples. From Apples, Apples, Apples to How to Make an Apple Pie and See the World
there are many stories that will teach and delight children of all ages.

apple activities

Apples, Apples, Apples is a wonderful children’s book that I discovered while doing my research on the internet. Written by Nancy Elizabeth Wallace, it’s about the bunny family’s trip to Long Hill Orchard where Mr. Miller takes them on a wobbly wagon ride and tells them all sorts of fun things about Fall’s favorite fruit. It also includes apple songs, sayings and a recipe to try.

How Do Apples Grow? is a delightful story about how apples grow from flower to fruit, ready for you to eat. Written by Betty Maestro, it is beautifully illustrated and easy to read.

Regardless of the apple activities you try, the kids will be sure to enjoy themselves learning about this abundant and delicious Fall fruit and you may even learn something new yourself!

apple activities

Chloe’s ‘Apple of her eye’

An Abundance of Apples! & Sugar Free Apple Crumble

Tis the season of apples! Fresh juicy apples right from the tree or at the local farmers market. They are sweet and delicious and in abundance at this time of year.

Apples have long been a symbol of good health and an easy grab and go snack. They are a great source of vitamin C, K and B vitamins; as well as a great source of fiber and natural sugar. They aid in the prevention of cancer, tooth decay and heart disease and are a great natural substitute for sugar in recipes as well as an enjoyable snack for the kids.

Luke and Chloe picking apples

A few years ago we planted an apple tree in our backyard. I have always liked going out into my own yard and being able to pick fresh fruit from the tree. There is just something about having grown it yourself and being able to go and help yourself that gives me a feeling of pride as well as a good feeling knowing that it is pesticide free and where it has come from.

The kids love the apple tree. Once those blooms in the spring start growing into apples it is hard to get the kids to not pick them off the tree. Matthew is now at the age where he understands that they need to grow and will get bigger, that they won’t be ready until September. But Luke and Chloe just see an apple, they are curious so they pick it. It’s pretty challenging to explain to a 2 year old that they aren’t ready yet.

Chloe placing apples in the basket

Nonetheless, we had many apples ‘make it’ to September and they are now ripe and ready for eating. They are so ripe that they were starting to fall off the tree, and I knew that in order to keep them from rotting on the ground that it was time to pick them.

So yesterday morning we went out with Luke and Chloe and picked the apples from the tree. I didn’t think there were that many, but we ended up filling a huge basket. Now the challenge with having a tree and so many apples is what to do with them. Though apples keep fairly well, they do tend to go soft eventually. And I hate to waste good apples, so I make many apple recipes. Apple pie, apple muffins, applesauce, and my favorite apple crumble. I think it is the crumble I enjoy the most, I usually double the topping so that there is more 🙂 but that’s ok.

Apple Streusel Muffins

I find crumble to be a quick and easy dessert that I can make in about 10 minutes and pop into the oven. It is great with ice cream, whip cream or all by itself. We use a non-dairy ice cream called Rice Dream or a non-dairy whip cream. I also have an apple peeler, corer, slicer, that makes making any apple dessert very easy. It peels, cores and slices the apple all at once in less than 10 seconds. I would recommend one of these for anyone who makes things with fresh apples, it saves you a lot of time and is very easy to use.

Pampered Chef® Apple Peeler Corer Slicer

My recipe, originally from my mother, I have adjusted to a dairy free, sugar free version which is just as delicious as the original. The first time I did it without sugar I used honey in place of the brown sugar which worked well. But recently I have discovered coconut sugar, which melts just like brown sugar would. We now use it on our oatmeal in the morning and for our cinnamon apples when we go camping! And when I made the crumble yesterday I used coconut sugar instead of honey and I would have to say this is now my preference. It tasted just like the one with brown sugar.

So when you make this crumble, you choose which sweetener you prefer, perhaps make 2, each with the different sweeteners and test it out for yourself. I am sure your family will have no problems eating them up!

Unfortunately for me I only used 4 apples in my crumble, which hardly put a dent in the apples I have. I am going to have to get creative over the next little while and see what else I can come up with! In the meantime, enjoy this wonderful apple crumble, whether the apples come from your own tree or the local market, it is going to be delicious!

sugar free apple crumbleSugar Free Apple Crumble 

Topping

1/3 c. coconut sugar or honey

1/3 c. flour

3/4 c. rolled oats

1/3 c. Earth Balance

Filling – 4 large apples * peeled, cored and sliced

Place prepared apples in a 1 liter/ 4 c. corningware dish. If your apples are more tart, drizzle with a little honey, then sprinkle with cinnamon. Mix topping in a separate bowl. Place topping over apples and pat firmly.

Bake at 350 F for 30 minutes in a covered corningware. Remove cover for the last 5 minutes to brown top.

*use your favorite fruit in this crumble instead of apples, such as peaches, blueberries, etc.

Serves 4

Chloe and Mum by the apple tree

sugar free apple crumble

Declutter your House, Declutter your Mind

Decluttering is a big part of our lives. I always seem to be doing it and looking for better and easier ways to do it. There is no doubt about it, we as a society have a lot of ‘stuff’, and in essence a lot of ‘things’ that get us bogged down, and prevent us from doing or creating the things in our lives that we really want.

There are all kinds of articles and guides available on how to declutter your home from top 10 tips to 30 days to a clutter free home, but not many discuss how beneficial decluttering is for our well being.

Have you ever thought of getting rid of something you really didn’t like and then said “No I can’t because my Mom gave it to me”. But you still don’t like it, so you hide it on the bookshelf or put it back in the box. But it’s still there and it takes up space, it’s draining your energy.

Renowned author, storyteller, vibrational healer and six sensory spiritual teacher, Sonia Choquette says that if there is something in your possession that you don’t like to get rid of it. If it doesn’t make you feel joyful and happy then it is a draining force in your life, it is preventing you from getting what you really want. Everything in our lives is made up of energy, we are energy, as are all the other things in our lives. We feel better when we are surrounded by good positive energy, whether it be people or objects, when we have space to move and flow.

Clearing your space is like clearing your mind, opening up and creating space for new things to come in. This weekend I had the opportunity to do a major declutter in my home. I went through toys, clothes, sorted, organized and purged. Anything that was not in use or too small went into a donation bag, anything that was broken into the trash. I organized the toys and put them together in like piles and then into containers. I cleaned and dusted shelves, wiped out baskets. At one point on Saturday night my entire house was piles of things to organize or deal with. I find that when you are doing a big clean up like that that you often have a big mess before you get to the clean, neat and organized part. It’s like the storm before the calm. You have to create the mess and lay everything out so you can see what’s what, then you are better able to deal with it.

By Sunday afternoon my piles were dealt with, donations to the car, garbage was out and things were organized and back on shelves. The house felt calm, clear, clean and spacious. And I felt good, not only that I had accomplished something but that I could live here, sit and relax and not feel like I was in the middle of chaos.

Clearing your space also creates many health benefits such as better sleep, more energy, better physical, emotional and spiritual health as well as improved health overall. It creates the ability to generate fresh energy, a positive mental and physical space as well as allowing us to release negative emotions.

Now I know that with kids and a family you cannot create piles all over the house and then clean up. It just won’t work, kids get into piles. move things around and then you have a larger mess. So start small, work on one area at a time, even if it is only a corner. Set yourself up for success, once you complete an area you’ll notice how good it feels, then move on to another.

5 Tips to Declutter with Ease

Decluttering does take time but it can be done is small amounts with great results not only for your home but for your well being. Here are a few quick decluttering tips to get you started.

  1. Start small – do an area that is manageable and that you can be successful in completing, this will encourage you to do more and not make it feel so overwhelming 
  2. Adopt the in with the new out with old mentality – if you buy something new, move at least one old item out. My rule is often 2-3 old items, especially with clothing, as my goal is to create space so I want the new item but I also want a little more space.
  3. Purge before you organize – it is good to organize, but go through and take out the items that are broken, you don’t like or no longer use. Then organize what you have left.
  4. Be ruthless! If you have not worn that sweater in 3 years out it goes. Don’t save it cause you might wear it, you won’t. If it’s still good give it away, there is someone out there who can use it.
  5. Visualize the result – visualize what you want that space, that area, the house to look like. Hold that picture in your mind as you go through everything.

Want a little extra help? Put this diffuser blend on while you clean. It will motivate and inspire you to get that clutter out!

Add the following essential oils to your diffuser:

2 drops Lemongrass

1 drop Lime

1 drop Douglas Fir

Blend by Desiree Mangandog author of I Am Fabulous

Going through things can also be a reflective time for you, a clearing of the mind. It is a way to process thoughts, reminisce and let go. There may be things mentally or emotionally that you have been holding onto that are holding you back from getting what you really want. If you clear it out of your mind, then you create space for what you want to come in.
This morning when I got up I felt great after all the work I’d done. Lighter, freer, happier. Not only was the space in my house clear, I had cleared the space and energy in my mind and body. Is there more decluttering to be done? Yes, but I feel I have made a good start and that I have opened up space for more of what I really want in my life.
So the next time you look at the ugly vase from Auntie Sue and say “Ugh I really don’t like that” maybe it’s time to move it out, as it could be the one thing that is preventing you from having what you really want in your life.


Shop our huge selection of folk art! Free Shipping Available.

Fall Activities for Kids

Fall is my favorite time of year. The vibrant colors, the leaves changing on the trees. I often find a sense of renewal and excitement in the fall. Change and new beginnings, an expectation of things to come. Now I know that spring is typically the time for renewal and new things but for some reason this applies more to me in the Fall. There is just something about the energy, the way the warm sun glints through the trees, the crisp cool mornings, and the cozy afternoons. It’s magical, inviting and I look forward to it every year.

Pumpkin Spice Latte

I also enjoy all the activities that you can do in the Fall with the kids, the Fall recipes like warms hearty stews, specialty coffees like Pumpkin Spice Lattes, the bonfires, the festivals. It creates a warmth, a coziness and welcoming feeling that I love. It’s the time of year that I start to light more candles and fill my house with scents of pumpkin, cinnamon and cloves. It’s also a great time of year to be outside enjoying the warm sunny autumn afternoons.

One of my favorite things to do in Fall is to just go for a walk, letting the kids explore and play in the leaves. The leaves are the best part of Fall. Whether we are kicking them up and dancing with them as they blow in the wind or gathering them for crafts and decorations for later. And I still love jumping in them! When I was growing up my sisters and I would love raking up the leaves, piling them high and jumping in them. Now as a parent and adult I love to jump in the leaves with my kids.

Taking the kids out for a walk is a great opportunity for them to not only have some fun but to teach them to learn about and appreciate their natural environment. There are lots of simple activities you can do while you’re out with very little equipment. If you bring a few items with you such as a magnifying glass, some paper, crayons, pencils and a cloth bag, this will get you started.

Many of these activities will engage kids of all ages. Here are some of my favorites:

Tree & Leaf Rubbings

Leaf Rubbings

Have the children pick a tree, then take a piece of paper and a crayon. Put the paper up against the bark of the tree and then gently rub over the paper with their crayon. Younger children may need assistance holding their paper. Once they are finished they can leave the tree rubbing on it’s own or then add to it and make it part of another picture. They can also do leaf rubbings with leaves they have found on the ground, but will need a flat surface to do the rubbing. If there is nothing close by then take the leaves home and they  can do the leaf rubbings there.

More Leaf Fun…

Have the kids gather a variety of leaves, different shapes, sizes and colors. (Please note to get the children to take the leaves off the ground not off the trees!) The kids will love gathering them and it is an easy way for them to explore and teach them about the different kinds of trees. Take a moment to help them figure out which leaves belong to which trees. If you aren’t familiar with which trees are which, you can get a tree identification book from the library. With young children only talk about one or two, with older more.

With their gathered leaves they can also make a bouquet to put in a vase and use as a centerpiece on your table, or cut a circle out of cardboard and glue the leaves on to make a  leaf wreath.

They can trace their leaves on construction paper using different colors, cut them out then decorate their room or a part of the house. Also using construction paper they could make their own Autumn tree by cutting out a trunk and glueing the leaves on the branches or creating leaf people out of their leaves. Younger children may need help with cutting.

Find a Tree

This is an environmental game that I do with all ages of children, from my 2 year old twins to the Leaders in Training who are 12-14. You can adjust it accordingly depending on the age of the children but the premise is the same. In partners, one is blindfolded and the other leads their partner to a tree. While blindfolded they explore the tree using their other senses. Touch, smell, etc. Once they feel that they have explored the tree thoroughly then the partner takes them back to where they started, removes the blindfold. The blindfolded partner then goes and sees if they can find their tree. With younger children use a small area with only a few trees to choose from with older you can use a larger area to make it more challlenging.

Fall Festivals

On the Jumping Pillow at the Calgary Corn Maze

Many communities Fall Festival celebrations, from pumpkin patches to hayrides, corn mazes and barbeques. We have a variety here in Calgary, from the Calgary Corn Maze, where they have a petting zoo, jumping pillow and corn cannons; to events at Heritage Park such as the Harvest Sale and Railway Days. Check out your local community events to find something that speaks to you.

Other Crafts and Activities

Twig Fairy

There are so many materials in the natural environment, especially in the Fall, to create all kinds of wonderful crafts and activities. When gathering materials for crafts please encourage the children to take things from the ground (whether it be leaves, pine cones, etc.) and not from the live trees and plants as this could damage or kill them. There are great crafts such as twig fairies, autumn looms (to display all the natural treasures they find), word searches and coloring pages. Just GoogleFall Activities and Crafts’ and all kinds of great websites will come up. Some of my favorite sites are Enchanted Learning and Family Fun.

Fall is a beautiful season, so get out and explore it, let the kids fill a bag of goodies (natural items) and then come home and see what you can do with them. Encourage the kids to create their own crafts and games from what they have found. It is a wonderful time to be creative and use their imagination and they’ll be learning about the natural world and all she has to offer at the same time!


Give Yourself Permission to Take a Break

Ever have one of those days when you really don’t feel like doing anything? Or at least not what you are supposed or need to be doing?

That was me this morning. After a long weekend of camping and relaxation I just found that I could not focus on my work this morning. I had many things that needed to be taken care of but try as I might I could not get motivated to do anything.

I tried the “well if I just do this one little thing then that will be the motivator that kicks it off. Then I’ll be able to easily dive into the rest”. Nope. Did a couple things, attempted another, nothing, nada. I even tried just sitting down and writing and seeing what came up, generated a few ideas and started working on one. Seriously no motivation, no desire, no drive. I could not focus to save my life.

Oh I wrote something, but is felt like a slog, a struggle and a real reach to develop ideas. In fact looking back at it, I cringe as it was definitely not my best work. I could tell that I was reaching.

What I really wanted to do was to go and clean out my front closet. For whatever reason the pull to do this was really strong, and though definitely not an emergency I was really feeling like I needed to do it right now! But I said to myself, no I need to get some work done and a few things taken care of. So I plowed on…

After about an hour of staring at my computer screen and coming up with what I felt was a lot of junk – I gave in. I went downstairs and cleaned the front closet – thoroughly. I remembered reading an article recently where the author was discussing something very similiar, when she felt unmotivated to do things and really wanted to do something else, she did. After a long struggle with herself she finally gave herself permission to go and watch that movie for 2 hours, or read her book. She found that in doing so, she was then able to come back to her work and do it more effectively, efficiently and well.

And I have to agree. Often when I don’t feel like doing what needs to be done, if I stop and do what I really want for a bit then I come back clear, refreshed and motivated. It takes me less time to complete the task and I am much happier while doing it!

I cleared and cleaned out the closet like mad, organizing, wiping things down and washing the floor. As I did so I started to feel better, ideas started to come to me, focus and motivation too. It was like a cleansing and clearing of sorts, not only of the physical closet but for me. The movement allowed me to clear my own energy and whatever blocks it was that I was struggling with. It allowed me to be where I was and in embracing and accepting it I was able to move through it more quickly. If I had stayed at my computer and ‘pushed through’, I can only imagine that I would have been staring at it for another hour feeling even more frustrated that I hadn’t accomplished anything.

When I was done I felt good, I felt ready. I had done what I needed to do and I now felt some motivation, flow and ability to focus. So the next time I am feeling unable to focus and not motivated, I am going to give myself permission to take a break. Go do the thing that is calling to me without feeling guilty, because that is what my body, soul, spirit needs to do right then. It will feed my spirit and lift me up. It will allow me to release or move through whatever it is that is blocking me. It will allow me to be.

I realize there may be times where circumstances may dictate that this is not possible, but I will as much as possible. Cause really when you are struggling through, are you really getting anywhere? It takes you twice as long and you are often tired and frustrated afterwards. I have been told that f you are struggling you are going against the flow (of life) and you should turn your boat around.

So next time you are struggling or feeling a lack of motivation, give yourself permission to take a break. It’s ok. You’ll benefit highly in the end.