2 Fabulous Watermelon Salad Recipes

watermelon salad

Watermelon is such a refreshing snack in the summertime. Full of vitamins and minerals, it can be more then just a cut and serve option.

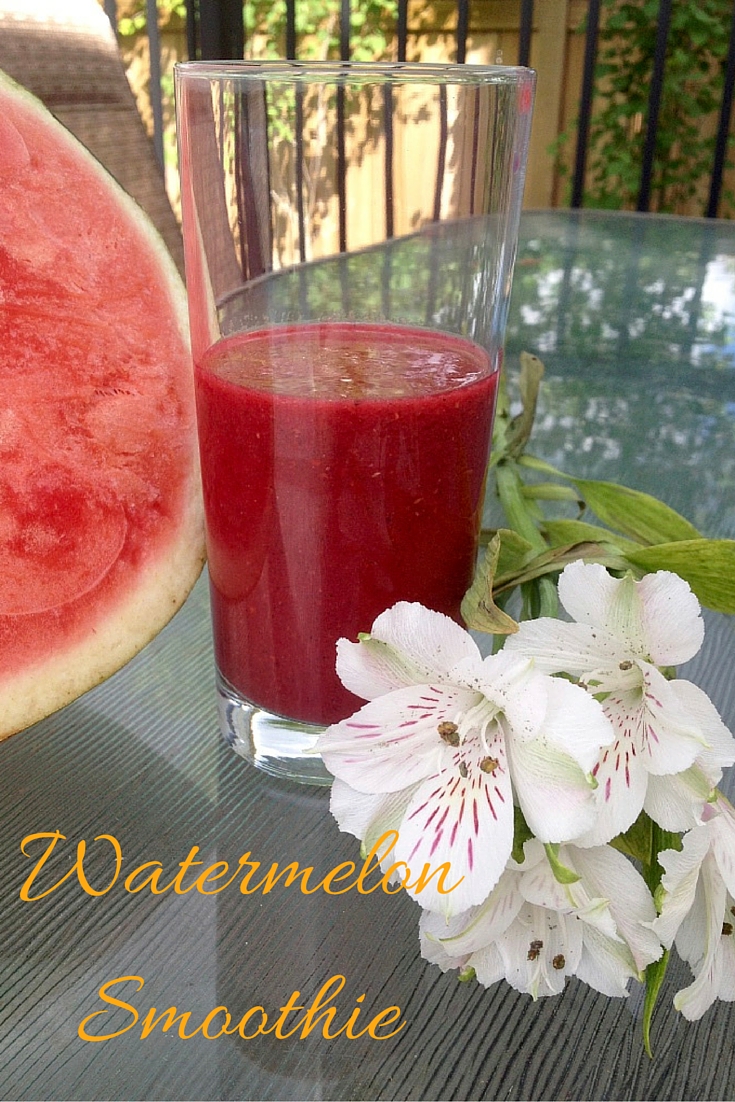
For some reason I had always thought that watermelon was just that, cut, slice and serve, that you couldn’t really do anything else with it. I have no idea why I thought that, maybe it was just the ease of preparing a refreshing summer snack. But lately I started exploring a few other watermelon recipes (like a watermelon smoothie, oh my so yummy!).

I had always heard of a watermelon salad but kind of thought it was weird. I’d often see them at an event or a buffet and pass it by as it just didn’t appeal to me. Well I had no idea what I was missing!

watermelon salad
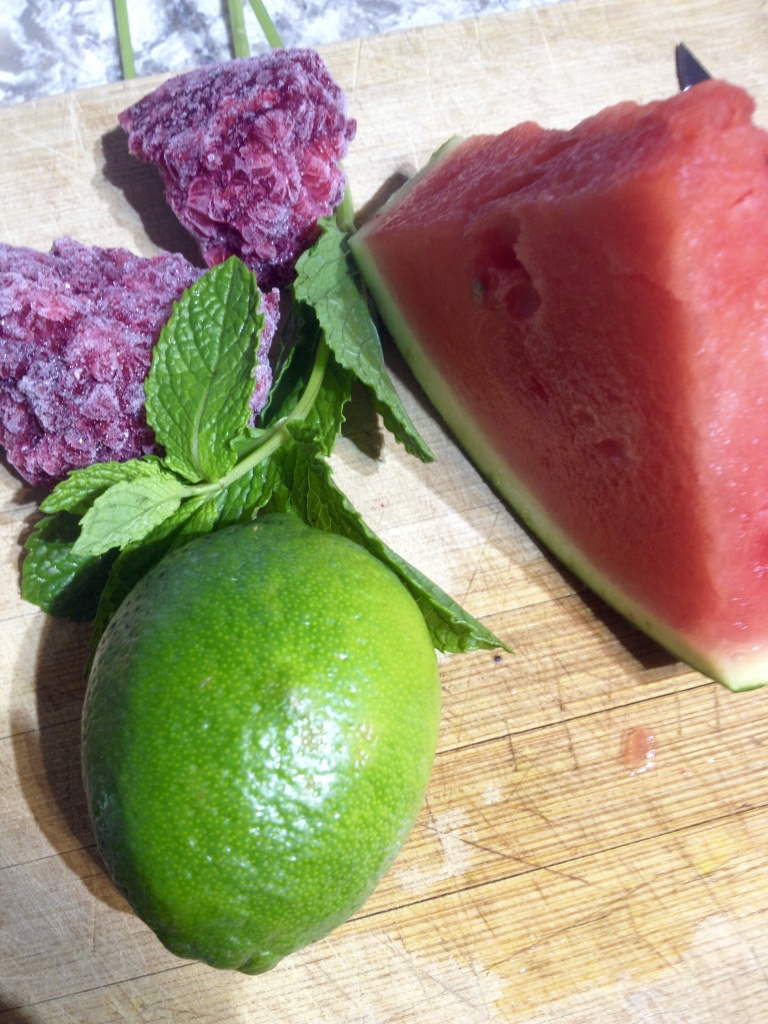
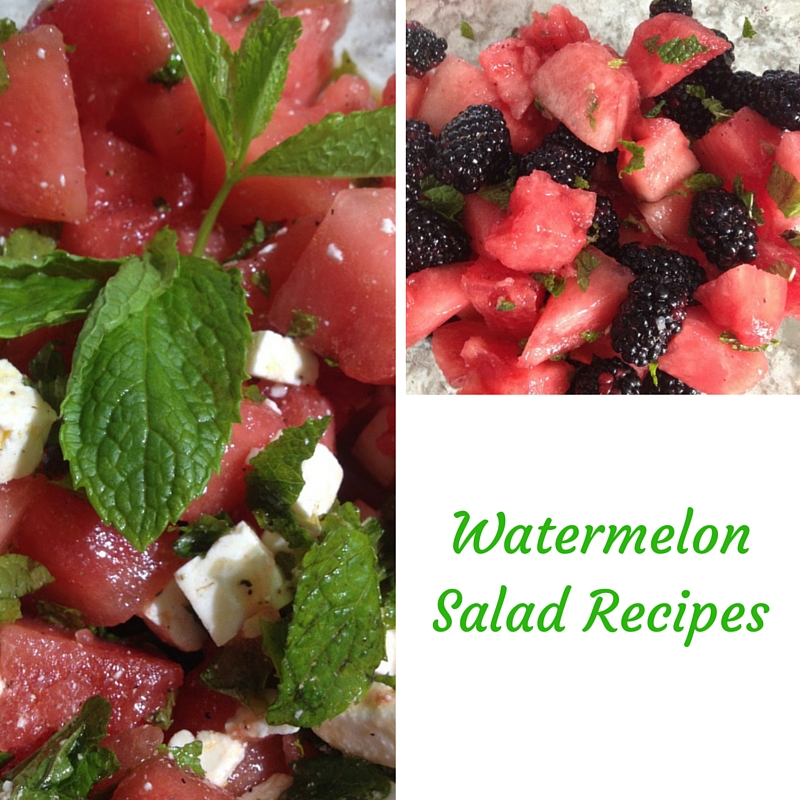
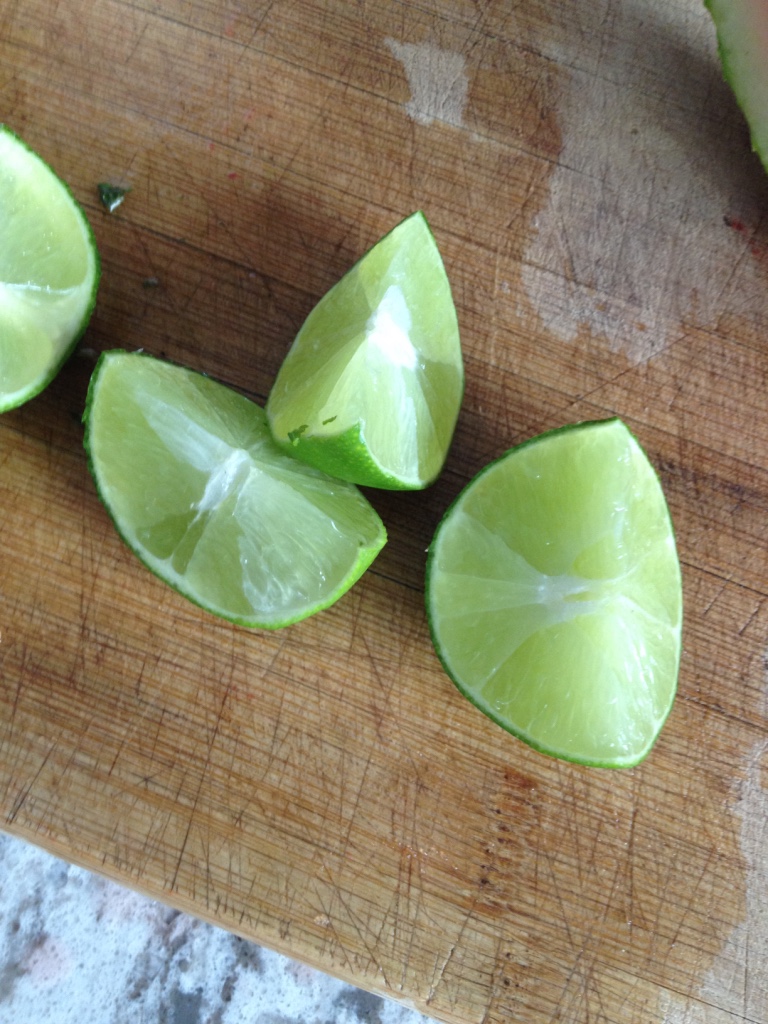
When I decided to explore watermelon recipes I knew that a watermelon salad was the first one to try! It turned out that I found two that are really good. Both are uniquely different and delicious, so I can’t really say that one is better than the other. It honestly depends on what flavors you are looking for in the moment. Both have the lovely addition of fresh lime juice, which is not only nice in the summer, but actually brings out the flavor and sweetness in the watermelon.

The first watermelon salad is the more common recipe with feta cheese and red onion (which honestly at first I thought it was totally weird to add feta and onion to watermelon), while the second is a nice crisp, refreshing fruit salad. Which I actually quite enjoyed, even though it called for blackberries. In general I do not like blackberries and usually buy them for the kids and skip them myself. But since it was in the salad I decided to try it. I actually found the blackberries to be quite lovely, they added a really unique flavor to it, and I enjoyed quite a bit.

Both watermelon salads were a hit with the kids! They gobbled them up and asked for more (I think they were quite enjoying my experimentation with these recipes). And I have to say myself, a watermelon salad is a very nice change in how watermelon is served (and it does not take long to prepare – I am all about ease, especially in the summertime!)

Both salads are best when made just prior to serving. When the watermelon sits for too long it tends to get limp and soggy. Make one hour or less before ready to eat.

Watermelon Salad

4 c. watermelonwatermelon salad

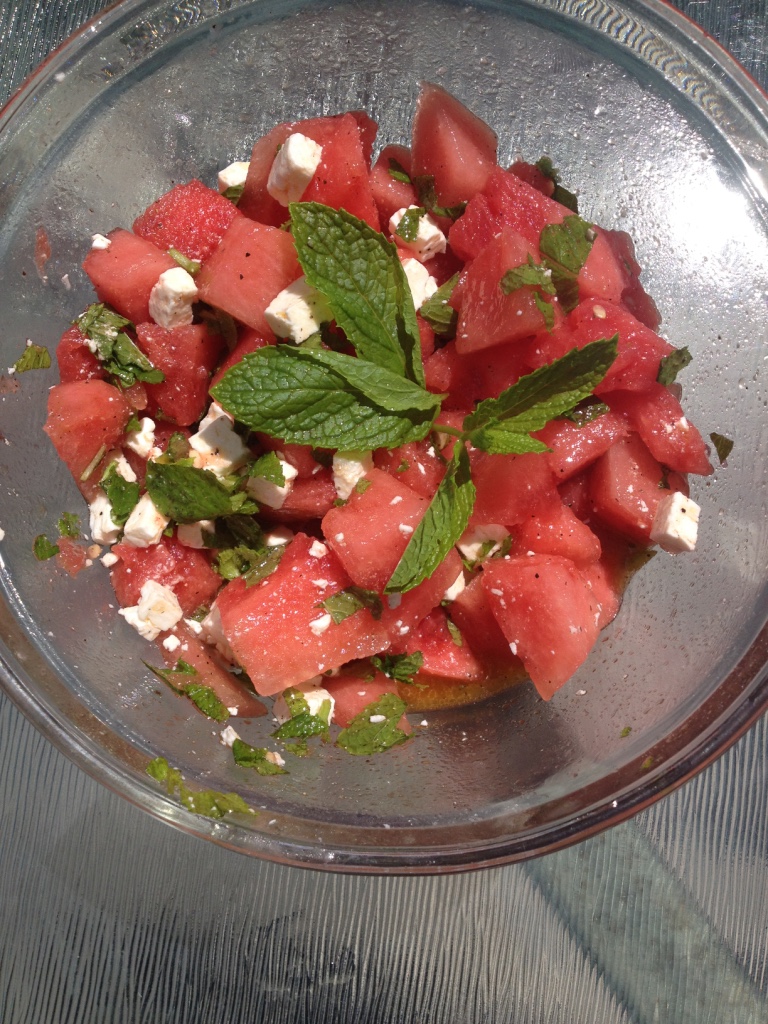
1/4 red onion, finely sliced

2 tbsp. fresh chopped mint leaves

1c. feta cheese, crumbled

1/4 c. olive oil

3/4 of lime, juiced or 2-3 drops Lime essential oil

1/4 tsp. pepper & a shake

Cut rind from the watermelon and cut into 1 inch chunks. Place watermelon into medium size bowl. Chop mint. Combine olive oil, lime juice and pepper to create dressing.

Pour dressing and chopped mint over watermelon. Toss gently to coat.

Pour crumbled feta over salad and stir gently to combine. Enjoy!

Serves 4

Watermelon Blackberry Saladwatermelon salad

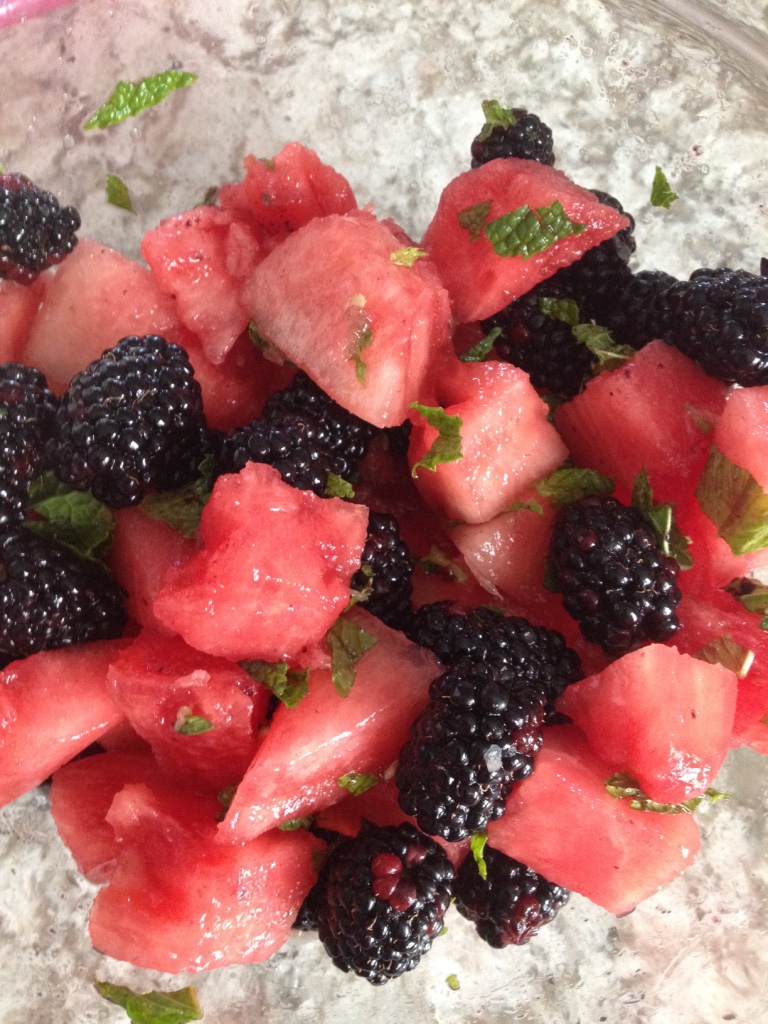
3 c. cubed watermelon

1 1/2 c. blackberries

2 tbsp. fresh finely chopped mint

Juice of one lime or 2-3 drops of Lime essential oil

Cut the rind off the watermelon and cut into one inch chunks. Place watermelon into medium bowl. Chop mint and add to bowl. Add blackberries. Squeeze fresh lime juice over the fruit. Gently toss to combine and serve.

Serves 4

Have a fantastic watermelon salad recipe? Share in the comments below

Get Dirty! Mud Activities for Kids – Outdoor Nature Activities for Kids

mud activities

Mud glorious mud! I love mud. I love playing in it, building with it, digging in it, rolling in it, squishing my toes in it. No wonder kids are drawn to it, it is so much fun to play with. Whether you are covering yourself in it from head to toe or creating something with it, it just feels good. And it’s good for us!

Mud often gets a bad wrap because it can be quite messy and a huge job to clean up. But playing in mud is actually extremely healthy for us and is part of an innate need to not only ground ourselves (connect to the Earth) but a basic biological need for our growth and development. Plus it’s fun!

mud activitiesPlaying in the dirt and mud has many physical, psychological and emotional benefits. The exposure to natural organisms in the dirt actually builds strong healthy immune systems, decreases the risk of allergies and asthma as well as decreasing anxiety, depression, stress and obesity. It allows kids to get creative and explore their natural world. Whether they are building a mud house, making mud pies or just squishing their fingers through it.

And there are so many options when it comes to playing in the dirt. When I started exploring different mud activities I was surprised at how many things there were to do. Many of them quite simple (I’m sure a child would just come up with these things but as an adult sometimes I need a little nudge in the right direction).

Playing in mud certainly does not have to be a structured activity and there is a lot of value in free play, such as discovering limits, developing creativity and ideas, testing things. I find kids can play in mud for hours without any specific goal or purpose and in that they are learning. But there is also value in guided and structured play which helps a child focus on a specific goal, leading to deeper learning, development and expanding their exploration.

When I announced to the twins that we had a ‘mud project’ to do, Chloe was all over it, while Luke was a little hesitant and said he might not do it. I said that was fine but knew once he saw what was going on he’d likely get in there. (And I was right!)

3 Simple Mud Activities for Kids

What you will need:mud activities

  • big bag of dirt
  • water
  • buckets
  • shovels
  • old clothes

We used our sand table and started by dumping a big bag of garden dirt into it. It was the perfect height for the kids and kept it contained in one spot. I had put the kids in old clothes so that I didn’t have to worry about staining or washing. We added water and off they went, immediately starting to mix with their hands.

The first thing I did was just let them mix it, squish it, shape it, do whatever they wanted with it. There were lots of oohs and awes and screams of delight at how sticky and messy it was. Chloe soon started covering herself in it.

I had set out the materials for the two other mud activities I wanted them to try so they were ready for them to move to when they were ready. These were mud painting and making mud bricks. I had explained to them beforehand what activities we were going to do so they knew what was happening. This allowed them to move at their own pace and complete the activities.

mud activitiesMud Painting

  • paint brushes
  • large sheets of bristol board

This is simply taking mud and painting with it. Get a large piece of bristol board (you’ll want bristol board or something similar in thickness as paper will get soggy fast with the water content in the mud); and some paint brushes and let the kids go to town. You may find that they’ll quickly discard the brushes for their hands and that’s ok too.

Mud Bricks

  • egg cartons

We used an empty egg carton and packed the mud into the different sections. I explained to the kids that we did not want the mud to be higher than the top of the carton and that they needed to be levelled off. Once the carton was full, we put it in the sun to let them dry and set. Curious and excited the twins wanted to know how long it would take them to dry. I told them it would likely take a day for them to be ready, then we could pop them out and build with them.

Tips to make your mud activities successful (and easy clean up)mud activities

  • do it outside
  • set up the space you want them to do it in
  • go over expectations for mud play (where to do it, what activities they could try, etc.)
  • use a large tupperware, sand table or something similar to mix up your mud
  • use old clothes so you don’t have to worry about staining or washing
  • hose them off (literally) and clean them up outside

And get in there with them! Mud play is good for us adults to. Think about it, we go to the spa and spend money to get a mud wrap, willingly. Not that I’m saying don’t go to the spa, as it has so many other benefits, but playing in the mud at home is free!. There are a chances that your kids will mud your house, they may run into kitchen and make the place dirty, in that case contact bigcitymaids.com cypress maid company, who is expert in cleaning the houses for less cost. And it’s a great way to connect with your kids and share beautiful, fun, happy memories. So go ahead get dirty! Play in the mud!

Going on a Sound Hunt… Outdoor Nature Activities for Kids

sound huntYesterday I took my kids on a sound hunt. I picked them up from school and we went straight to Fish Creek Park (a provincial park very close to our house) to play and explore. When I announced what we were doing Luke and Chloe were sooo excited. Luke even said so! He said “I don’t know what a sound hunt is but I am so excited to do it.” How wonderful! It made my heart swell how willing and open he was to the whole thing. A sound hunt, sounded exciting, it must be good.

Exploring nature through sound allows children to learn and recognize things they may not have noticed before. By engaging and focusing on sounds it allows children to connect what they hear with what they see. It also enables them to identify the many different sounds of nature. How the wind through the grass can sound slightly different than the wind through the trees. It begins to help them identify not only bird sounds, but that there are different kinds of birds. And once they hear and identify the different bird songs, their innate curiousity leads them to learning visually what the different kinds of birds look like.

As soon as we stepped out of the car Luke and Chloe were already telling me what they heard and named at least 3 things before we formally got started. They really were raring to go!

How to Set Up a Sound Hunt

What you will need:

  • notebook or paper
  • markers/ pencils
  • listening ears
  • a sense of adventure

sound huntI had brought along notebooks and markers to help record what we heard in the forest. I told them that we would be going for a walk through the park and listening for all the different sounds. We were to walk along quietly and when they heard something they were to stop, pause and then share what they heard. They set forth with their listening ears on and wonder in their eyes.

Shortly down the path, Luke stopped and said he heard wind, Chloe birds, an airplane. I said I heard our footsteps along the path. Cause although that was not a sound specific to nature it was one we were hearing in nature, and later could talk about the differences between the natural sounds and the sounds we made in nature and how they could be good or bad (a discussion about noise pollution).

sound huntThey did very well. We’d walk for a bit in silence, they announce some things they heard, chat for a bit about it, then we’d continue along in silence. The listening quickly lead to the visual connection and more discoveries and exploration. Our natural response when we hear something is to turn towards the sound and look. First we heard the squirrel and then turned to see him scampering by. We heard a bee buzz by, then spotted him digging around on the ground. We were able to watch him for a bit, which was quite fascinating and wondered what he was looking for. He was madly using his feet to search for something. After a bit, he flew off but not too far and we were able to watch him land and dig again. Also noticing that as he flew low to the ground searching for the ‘right spot’ to dig that he actually created enough air movement to move the pine needles on the ground without touching them. It was super cool!

We discovered and learned about woodpeckers and how they peck for insects in trees, examining the holes they left behind. We found chickadees after we heard their call and Luke even imitated their call. We even heard the noisy crow cawing over and over but actually didn’t see him.

chickadeeAt one point, we did stop along the path and I asked Luke and Chloe if they could tell the difference between the wind through the leaves and the wind through the grass, as there was a slight difference. At first they couldn’t but as I pointed out the subtle yet distinct differences they were able to identify them as well.

We heard many sounds. Gophers squeaking (they thought it was neat they squeaked), squirrels chirping, bees buzzing, wind, different kinds of birds (at least 3) and more. One of our favorite sounds was the creek gurgling by and Luke and Chloe were specifically on the hunt for this sound. They knew it was here from being to the park before and kept saying “Where is it?” not resting until they heard and found the creek.

When we did find it, after wading in and playing a bit, we sat by the creek and took out the notebooks. They each spent a few minutes writing or drawing the different sounds they heard in their books. Recording what they had heard and starring their favorites. Taking these extra few minutes to have the kids record what they have heard helps solidfy it and increases retention. It also gave us another opportunity to sit one more time and listen. Seeing if there were any new sounds that they had not yet heard on our sound hunt so far.

sound huntWe spent over an hour in the park playing, listening and learning. And when we returned to the house it was amazing how calm, grounded and happy they were. Chloe stayed outside and blew bubbles, while Luke came in and relaxed doing a guided children’s mediation. The whole experience was amazing! and we definitely reaped the benefits of our outing.

The other neat thing is is that after our adventure, I have heard Luke talking about and sharing it with others. Telling them how much he enjoyed it and what he learned.

Exploring with kids through nature is such a rich and exciting experience. By having them focus on identifying sounds not only heightens their sense of awareness but quickly leads them to connecting visually, engaging their other senses and deepening their exploration.

Like to do more with sound outside? Check out this idea on Making Outdoor Sounds

A Refreshing Twist on Watermelon – The Watermelon Smoothie

Watermelon SmoothieThe other day my youngest son said he had an idea to make a watermelon smoothie. We love watermelon especially in the summer! It is such a nice refreshing snack. For us, we usually just slice it and eat it, I had never really thought of doing anything else with it. Sure I had heard of people putting watermelon into salads or other recipes but I had never thought of putting it into a smoothie. It just seemed odd to me.

But really, why not? You can put basically anything into a smoothie and with the right combination, can be absolutely delicious! And we love smoothies at our house and enjoy trying different combinations. In fact, I have been experimenting this year with creating my own smoothie recipes. It’s fun figuring out what goes well together and what might not. When I create a really good one, I get very excited. Like when I created this yummy green smoothie in the spring with grapefruit, orange and dandelion greens- yum!

The other thing I didn’t realize is that watermelon is actually chalk full of vitamins and minerals like Vitamin A, potassium and magnesium to name a few. Plus it has many health benefits benefiting cardiovascular health, anti-flammatory and antioxidant support. Here I thought it was just water and that you didn’t get much else out of it. Even better!

So I set out on a hunt for watermelon smoothie recipes to see what was out there. There are many that are a combination of watermelon and strawberries (which seemed quite popular), some with almond milk, even some with coconut water (which I am going to have to try that one). But the one that I was drawn to the most was this combination with raspberries, fresh lime and mint. All favorite ingredients of mine. I love mint and am really into lime lately. I also liked that it was described as ‘the most refreshing smoothie, ever‘. It quickly made me think of hot summer days when you’re looking for something a little more than just a glass of water. I could see myself, sitting on the deck, smoothie in hand, relaxing and enjoying the hot summer sun…

When I whipped it up this afternoon I was not disappointed! It was fabulous. I could not believe how delicious it was and even though it was not super hot that day, I could see how enjoyable it would be on a hot summer day. Not to mention I love the rich red color and how sweet and fresh it tastes. I can’t wait to make it for the kids who were away for the weekend, especially my son, to not only thank him for the fabulous idea, but to see how much they enjoy it as well.

Watermelon Smoothiewatermelon smoothie

1 c. watermelon

1/2 c. frozen raspberries

fresh lime juice (squeeze 1/4 of a lime) or 1 drop lime essential oil*

2 sprigs of fresh mint

Put all ingredients into blender. Mix until well combined and is smooth. Pour into glass and enjoy!

*note: if you’r using lime essential oil ensure that it is safe to ingest as all brands of essential oils are not created equal and not all are safe to take internally

Serves 1

Flower Printing Activity – Outdoor Nature Activities for Kids

flower printing activityThis flower printing activity not only teaches children about nature through art but also introduces some basic science concepts in a fun and engaging way.

We are all drawn to flowers. Vibrant colors, beautiful scents and sometimes intricate patterns in the blossoms and leaves. Children especially want to reach out and touch flowers, check out what they are like, exploring texture and getting their noses in there to see what they smell like. How often have you seen a child bent over sniffing a flower? (You can picture it right now can’t you?)

Flower printing is a way to deepen this experience for the child and allow them to learn and explore even more with their senses while adding art, creativity and imagination.

flower printing activityWhen I introduced this activity to my kids, my daughter was very excited about it (she’s my artsy one), while my son wasn’t so sure about it. But it did not take long before he became engaged, creating with colors and experimenting with designs.

I made sure that I had a variety of colors, even going out and buying some cool neon paints in addition to the basic colors. I also made sure that I had a variety of textures and shapes of flowers for them to try. I had purchased an inexpensive bouquet of flowers but you could use blossoms from your garden or even some of the natural flowers in your backyard. (I had pulled some dandelions and toad flax from our driveway as additional options). I would discourage going out and picking wildflowers for this project as one of the important things when teaching children about nature is that it is also important to preserve it. Appreciate it, take a picture, but leave it for others to enjoy (explain to the children that if they pick wildflowers they may not grow back and then others cannot see them anymore).

We used big poster paper for our flower printing but you may also use a regular size piece of paper to create your project. The nice thing about art is the sky is the limit when creating!

When we were finished we ended up with two very different pictures, both beautiful, unique and something they can be proud of.

Flower Printing Activity

flower printing activityWhat you will need:

white paper or poster board

tempera paint – variety of colors

blossoms (variety of shapes and sizes), leaves and stems of flowers

paint brush

pallet for paints (we used a large piece of cardboard, but small paper plates also work – you want the paint on something that is large enough that you can dip the flower in flat)

  1. Cut blossom off flower
  2. Dip in paint color of choice *you do not need a lot of paint on the blossom just enough to cover it
  3. ‘Stamp’ the blossom onto your paper, press down gently and lift – you will be able to stamp with the blossom to make more than one print before you need to dip it in the paint again *tell the kids to press gently, if they press too hard their flower will break
  4. If you’d like to choose a different color paint, take a new blossom and dip it in the paint, repeating above process.
  5. Once you have ‘printed’ all your blossoms, you can then add stems and leaves if you like. You may do this two ways, one is to simply paint them in with a brush. The second is to put paint on the stem or leaf and then press it onto the paper in the spot you want it like you did with the blossom. Do this as many times as desired.

flower printing activityThe other thing I love about this flower printing activity is the many learning benefits and basic science concepts that children are introduced to by doing it. It enhances eye and hand coordination, fine motor skills, introduces them to scientific concepts such as observing, communicating, experimenting, patterning, and investigating. Not to mention the sensory engagement! Plus it is fun! I did this activity again with one of my preschool classes and it was amazing to see the variety in their creations and how engaged they became. Not one flower print was the same and they were all beautiful.