St. Patrick’s Day Shamrock Smoothie

shamrock smoothie

I remember growing up waiting for those delicious shamrock shakes that you could get at McDonald’s only around St. Patrick’s Day. I loved those things! They were so yummy! Smooth and creamy. And I also love just about anything mint so they were a hands down winner for me.

What I didn’t know then (and honestly as a kid probably did not really care) was how bad these things were for you. Full of sugar and all kinds of additives I don’t really want in my body, health wise they were not the best choice. But I never forgot them, and I still got excited every year when they announced that the Shamrock Shake was now available at McDonald’s for a limited time – though I did not go to get one.

Little did I know that there was actually a healthy alternative I could not only enjoy without guilt but that I could easily make at home! Full of healthy fats and delicious greens this healthy version of a shamrock shake was just as creamy and delicious, if not better.

shamrock smoothieI made this discovery quite by accident a couple of years ago when I was looking for something else on the internet; and I came across the concept of a Shamrock Smoothie. When they boasted that they tasted just like the shakes that you got at McDonald’s they had my attention. So I took a peek, and I experimented a little, tweeking the recipe to suit my needs and tastes. Adding in a little of this and taking out a little of that and then voila! I had created my own version of the perfect Shamrock Smoothie, which was now good for me and I enjoy every St. Patrick’s Day (See more info at modernechild.com).

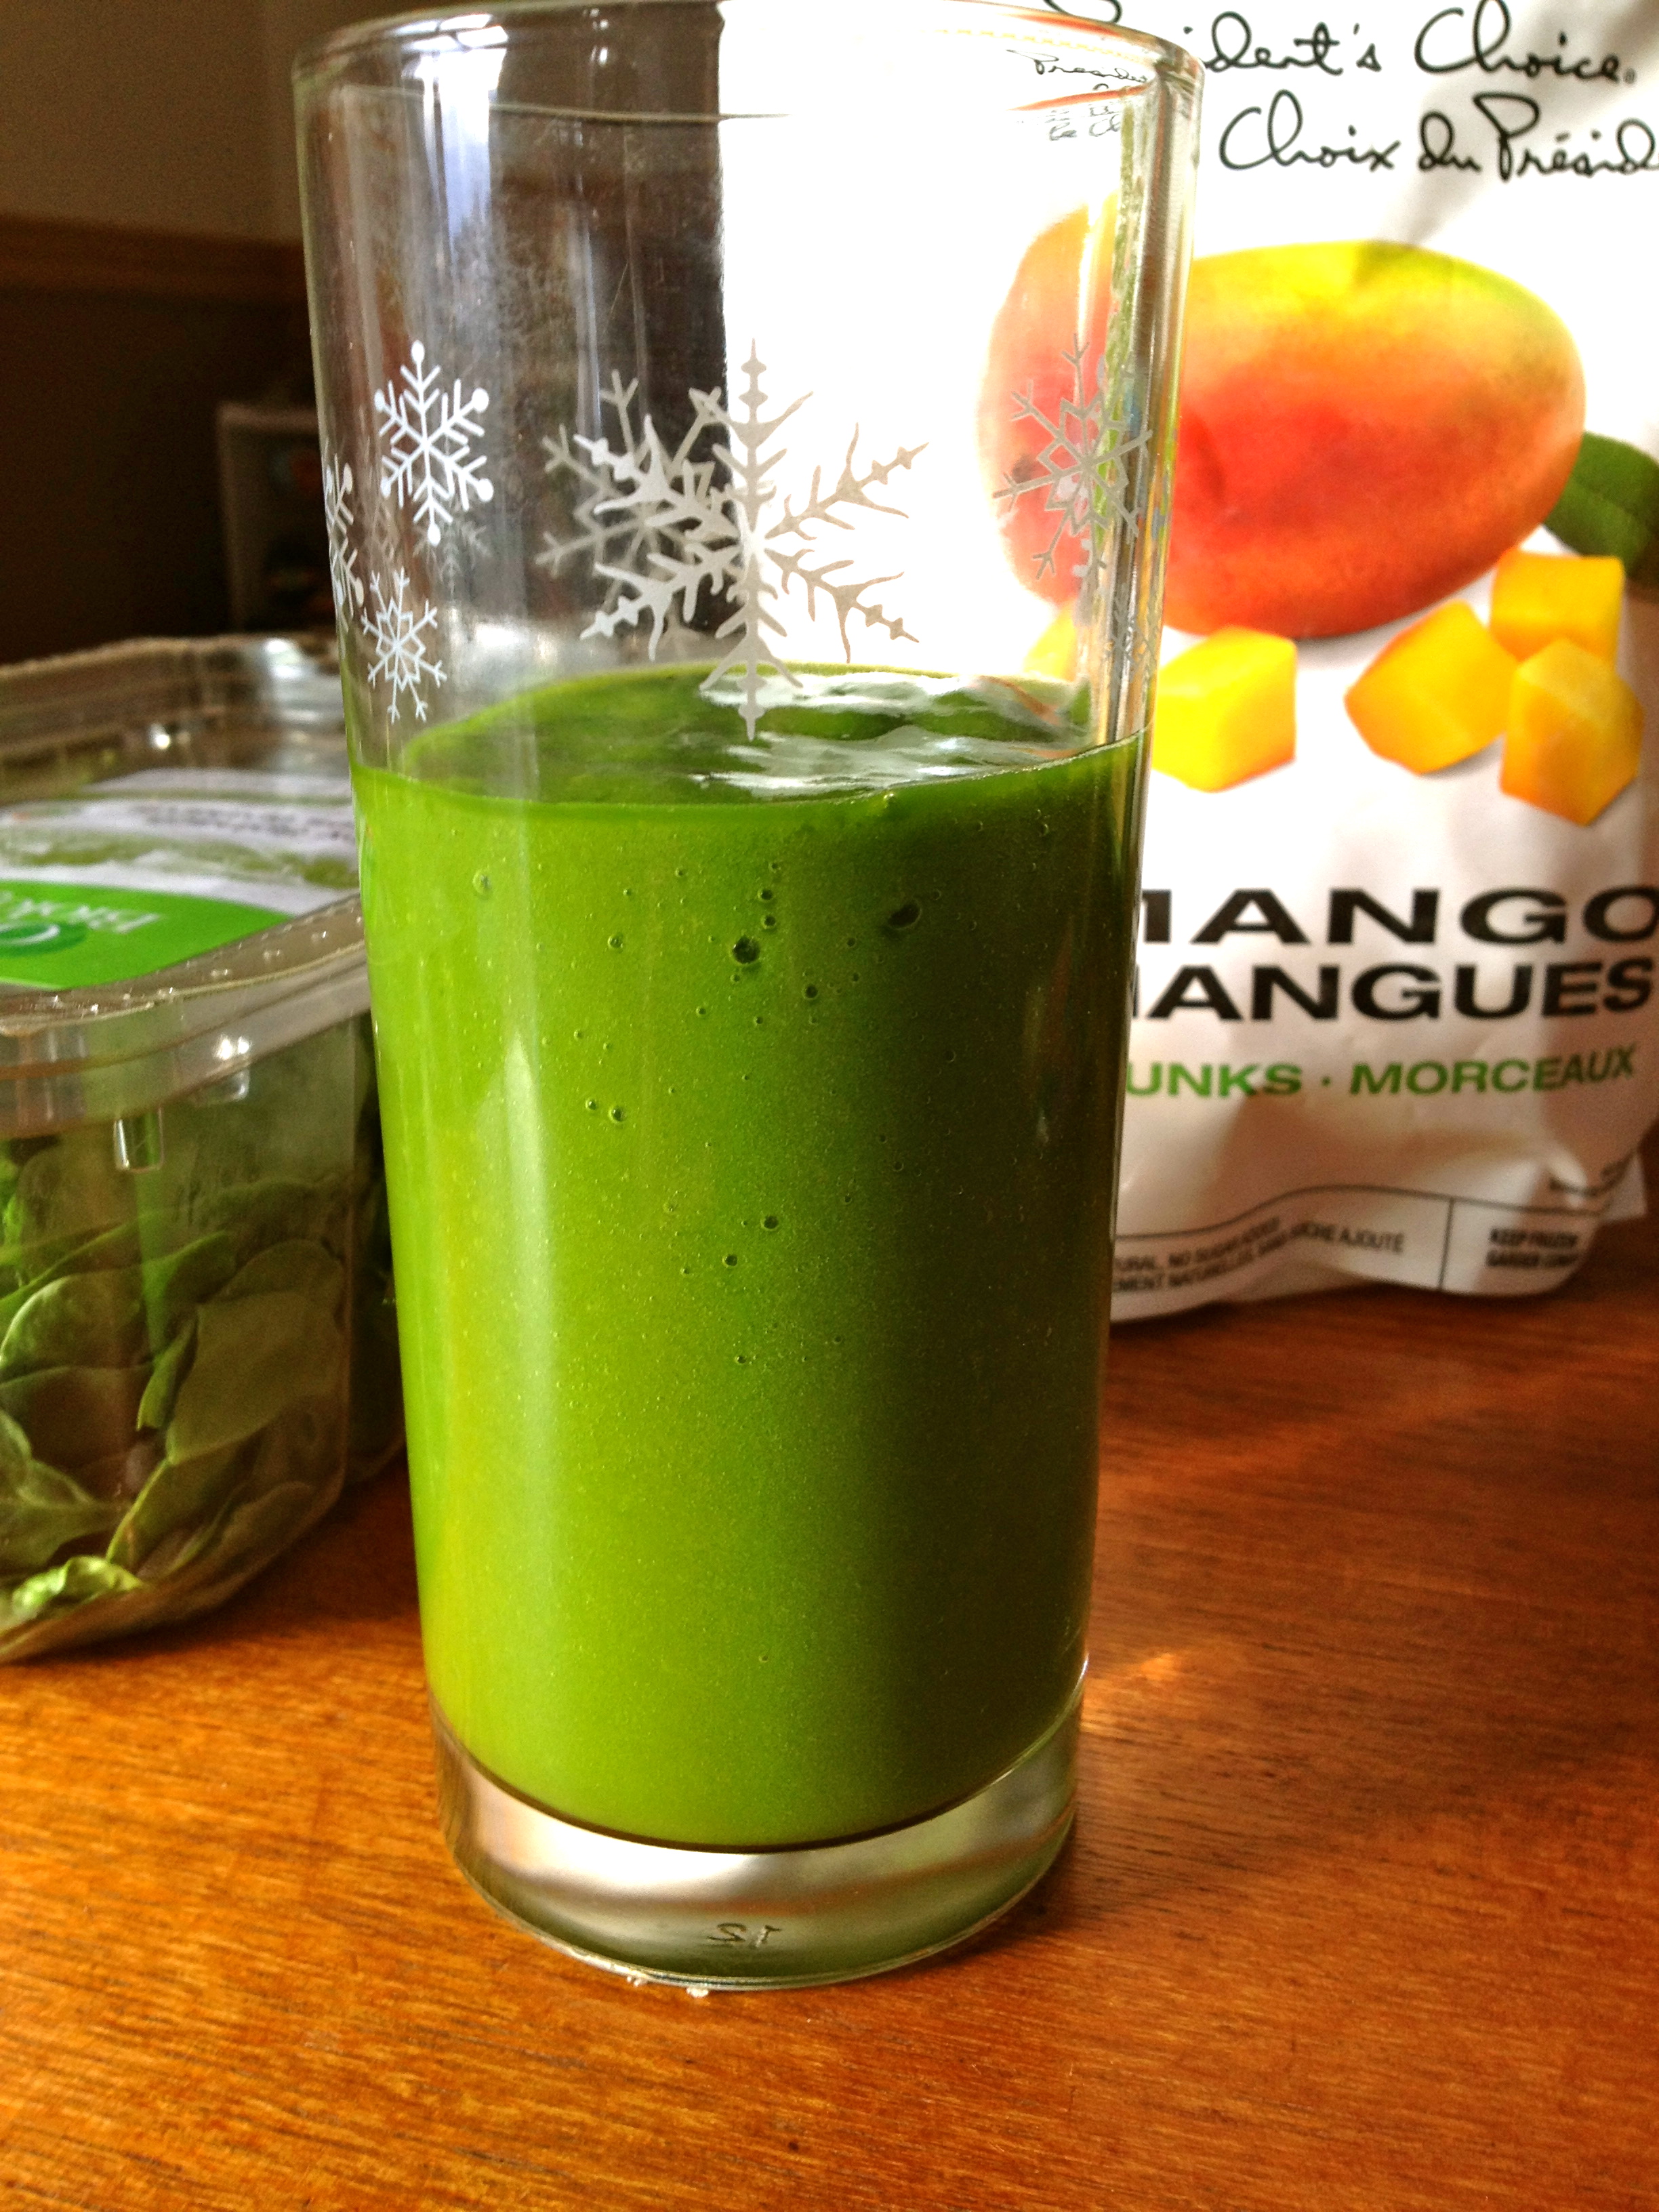
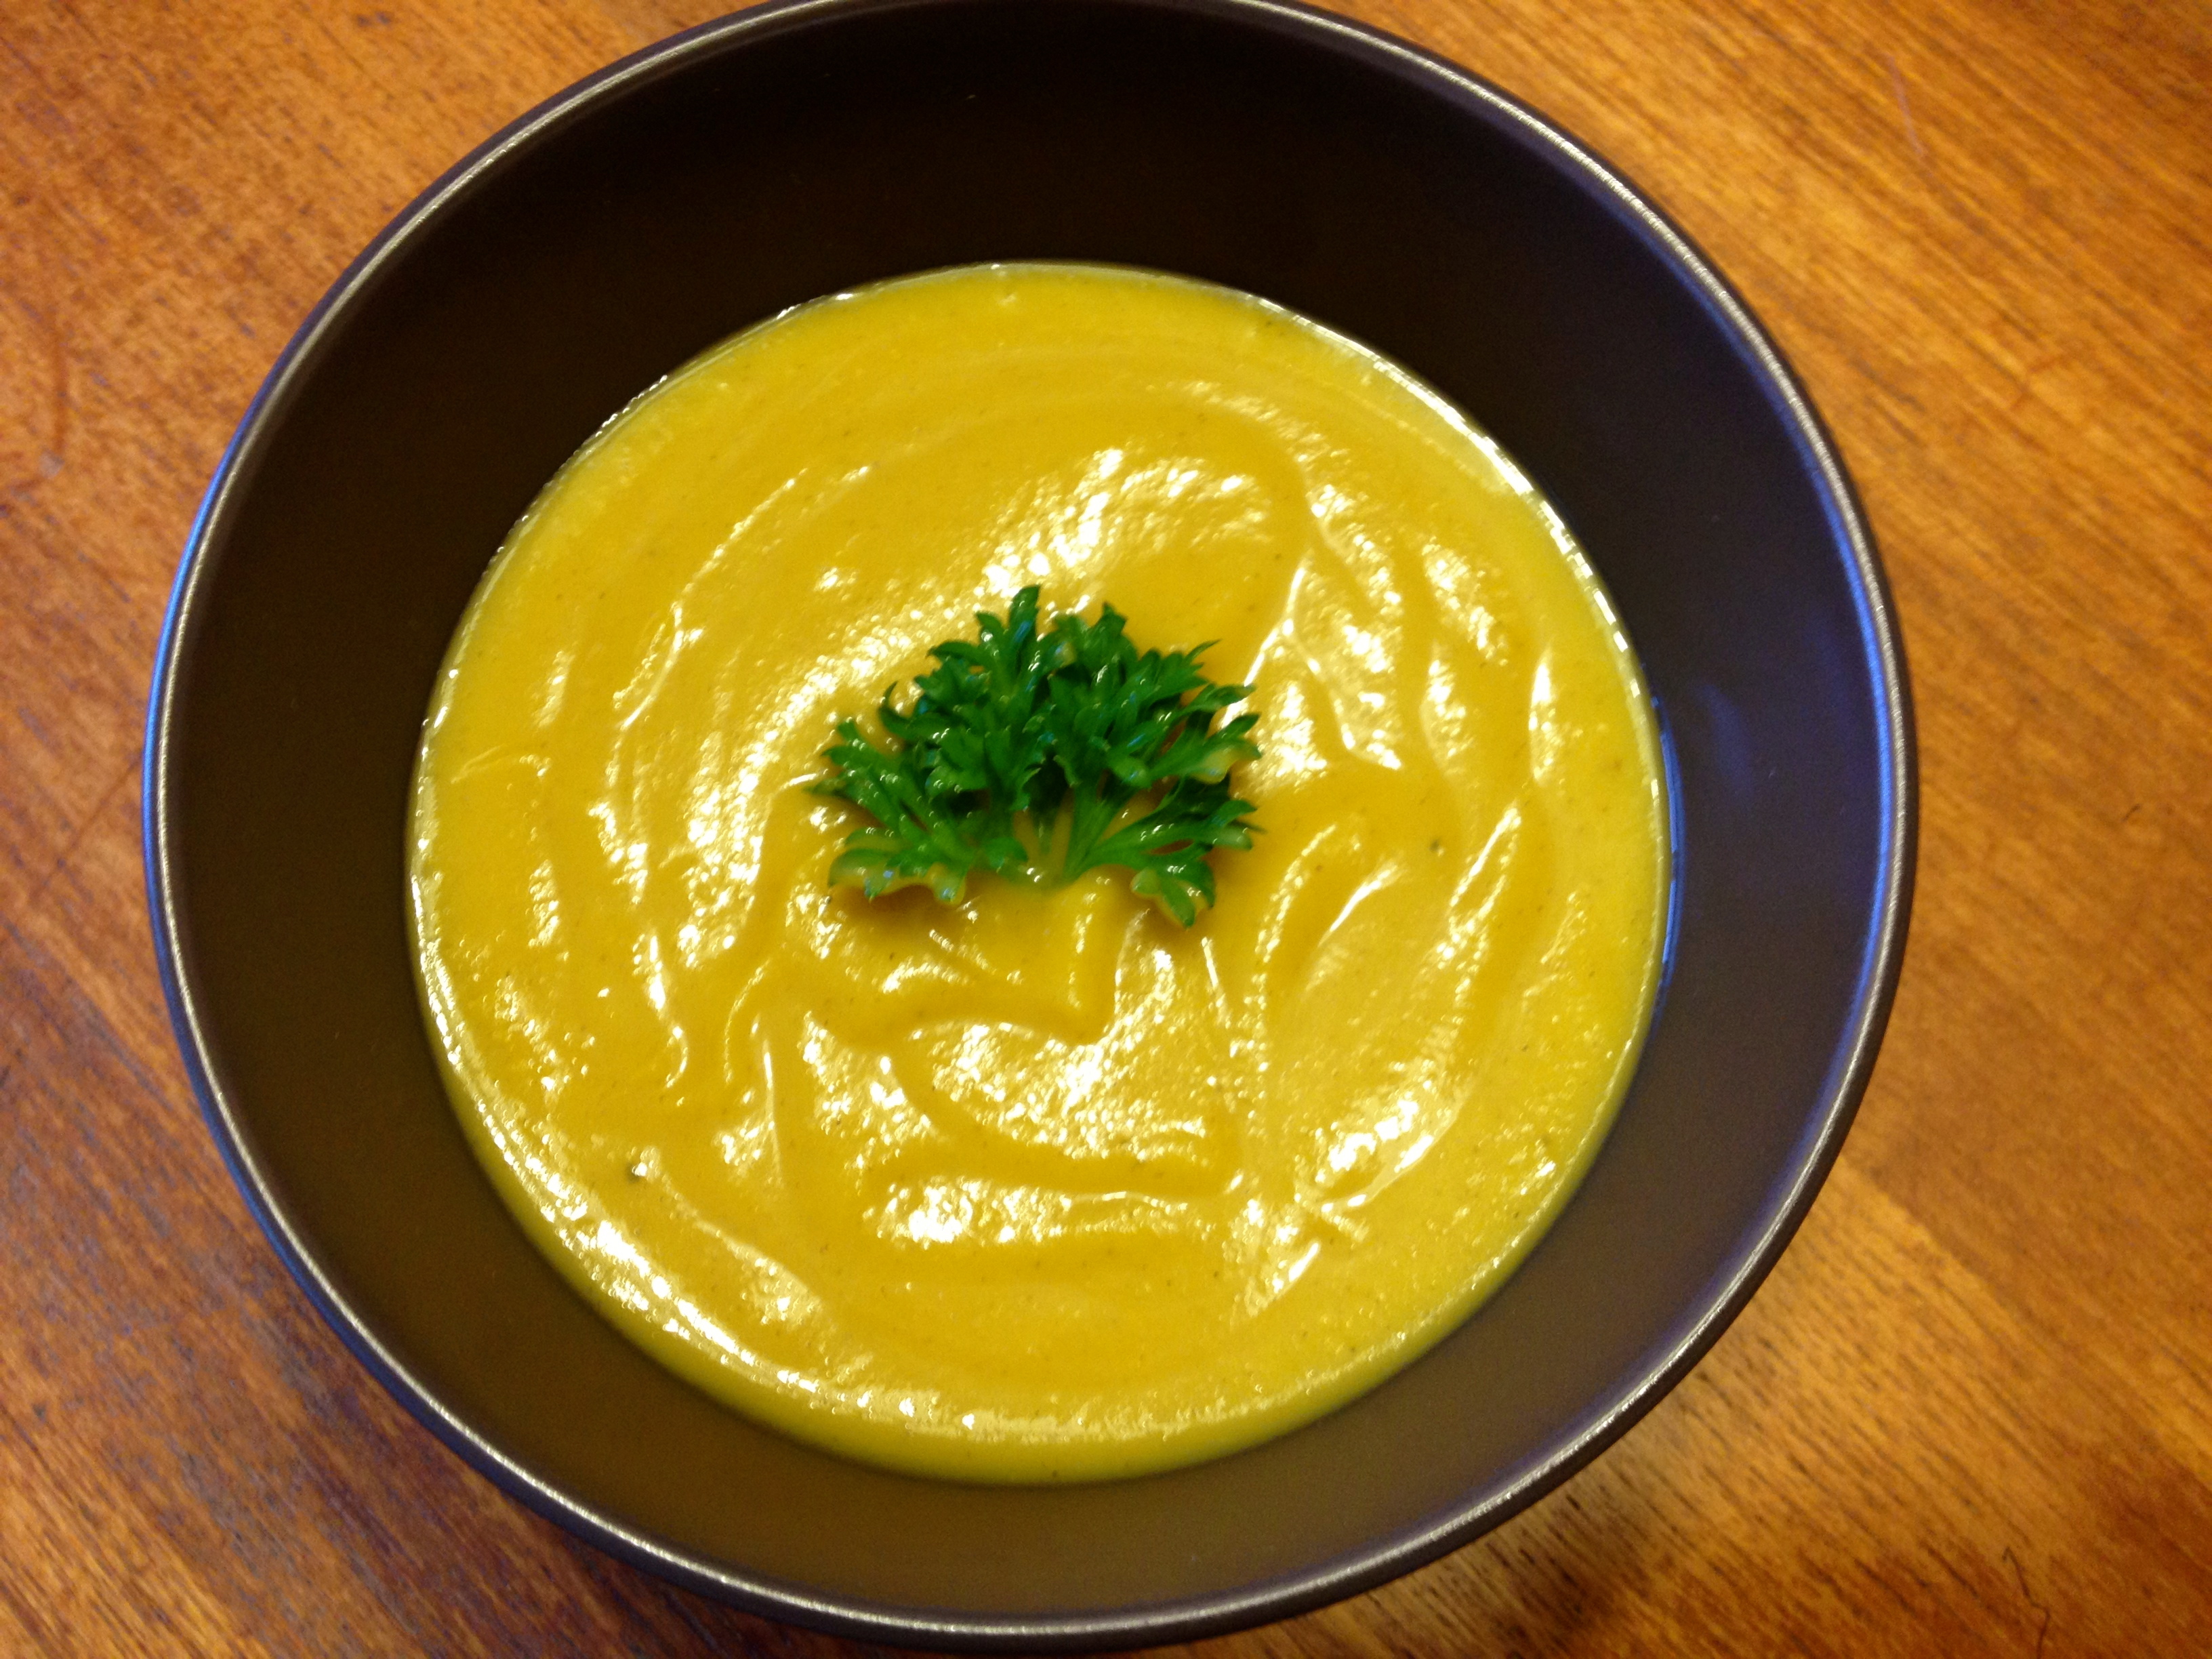
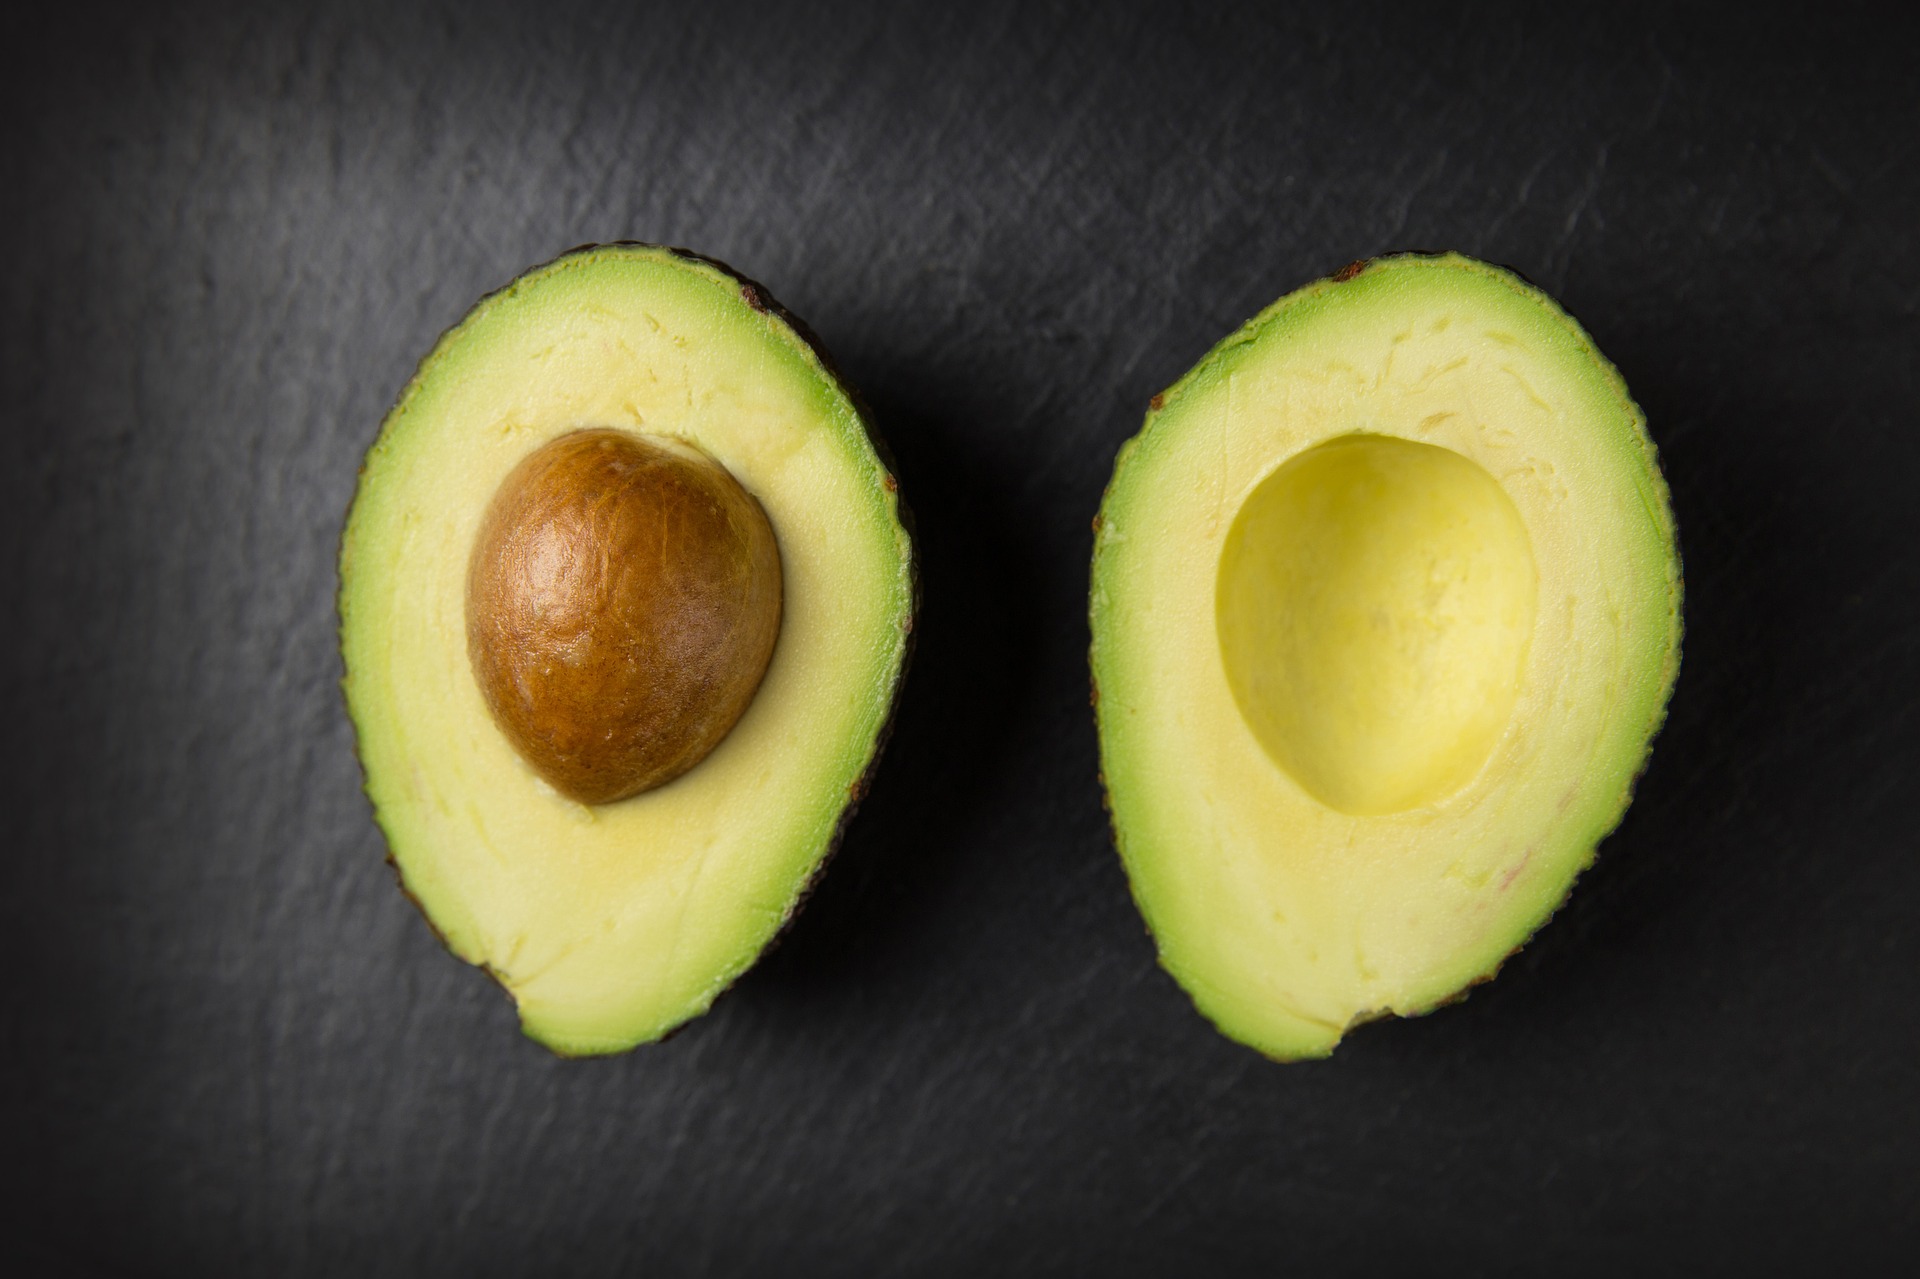
I love that this recipe combines avocado which not only makes it rich and creamy but provides healthy fats with coconut milk and mint, two more of my favorite flavors. This thing is so thick and delicious it is the perfect healthy snack that doesn’t taste so healthy for St. Paddy’s Day 🙂

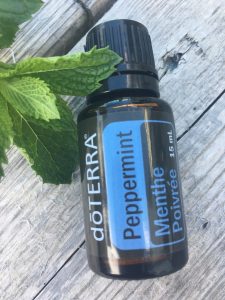
I also love the addition of peppermint essential oil in this recipe as I am now reaping all the benefits of peppermint essential oil in my already yummy healthy drink. I have to say to that the dollop of coconut cream on top, though optional, really is a must to make this smoothie just a little bit fancier without much effort. Oh and don’t forget the sprig of mint either!

So give this recipe a try this St. Patrick’s Day and enjoy your own Shamrock Shake guilt free. And if you share it with the kids, it’s a great way to sneak in some avocados and greens in a way that they’ll gobble it up and ask for more!

St. Paddy’s Day Shamrock Smoothie

1 banana

shamrock smoothie1/4 of an avocado

1/2 c. full fat coconut milk

1-2 drops peppermint essential oil

1/4tsp. vanilla

1 handful of spinach

dollop of coconut cream – optional

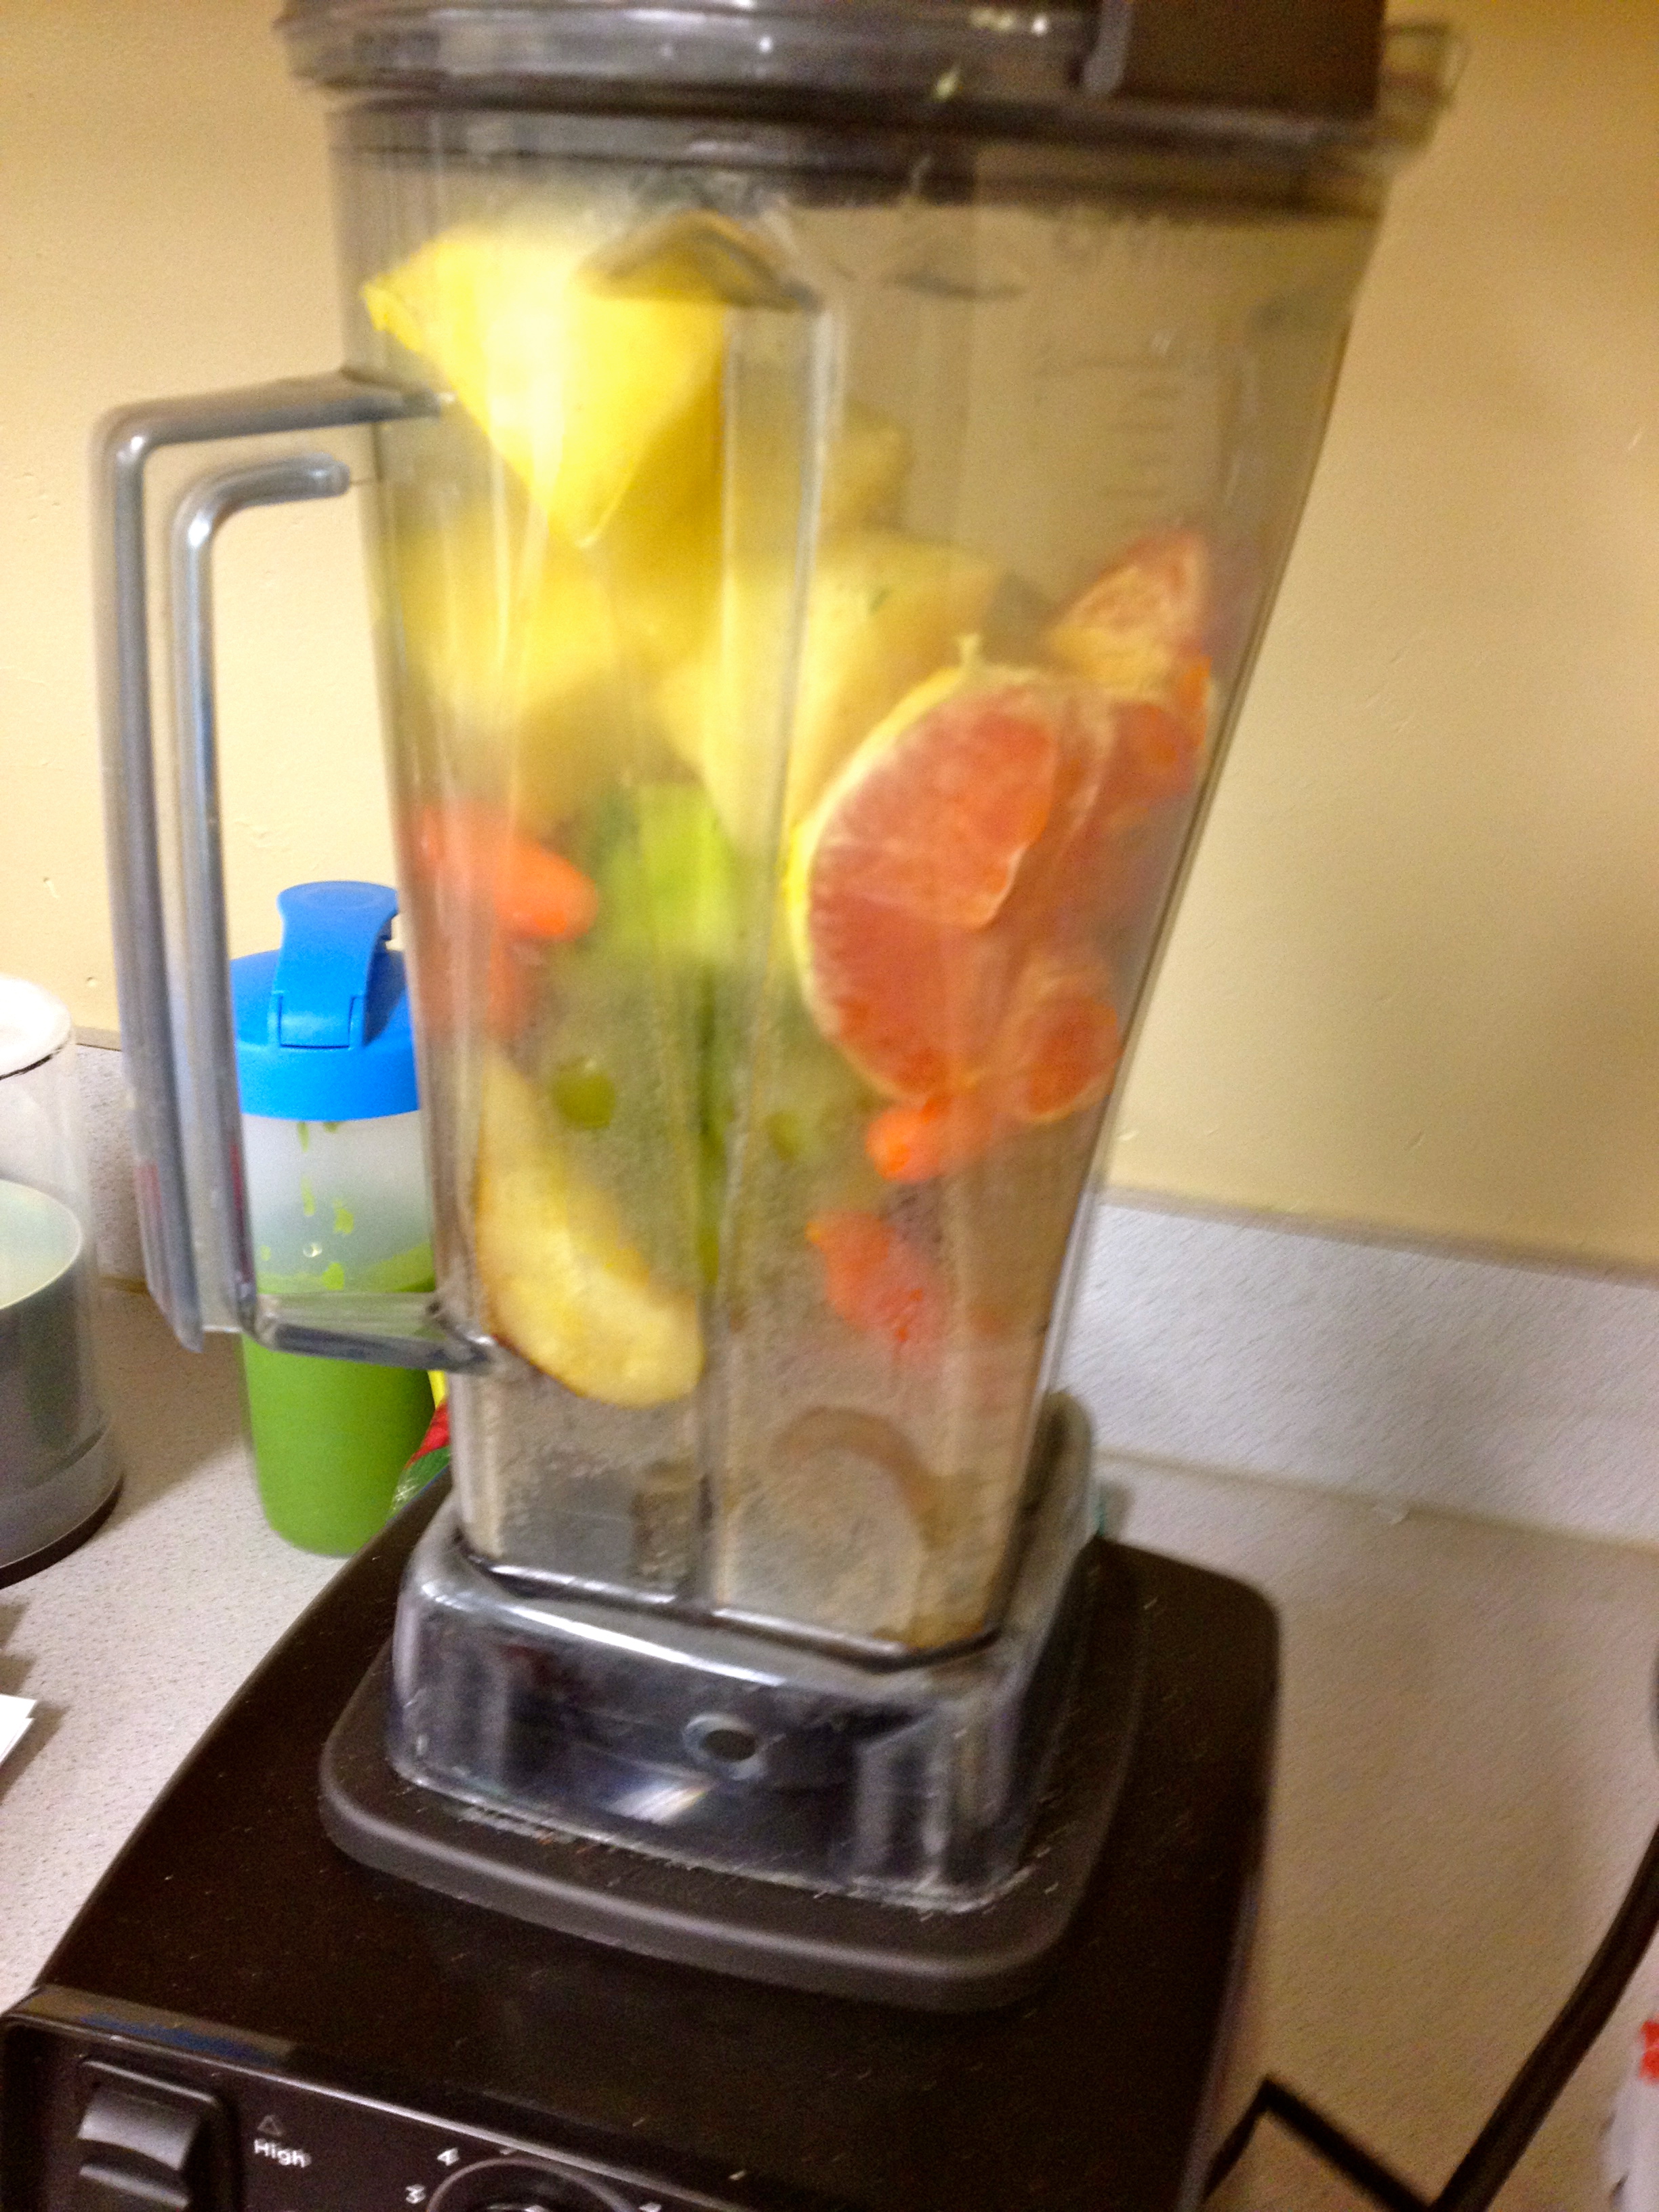
Put all ingredients except coconut cream in the blender and blend on high until smooth. Pour into glass and top with dollop of coconut cream. Add a spring of mint if desired and enjoy!

Serves 1


Frozen Sweet Treats – The Fresh Fruitsicle

frozen sweet treats

One of the things that is great about summer is the delicious frozen sweet treats that you get to enjoy on a hot summer’s day. Creamy fudgsicles, ice cream, freezies, slushies, popsicles and more all offer a refreshing cooling treat.

The trouble is with most frozen sweet treats is the amount of added sugar (and color) that is in them to make them ‘sweet’. Don’t get me wrong, I love a sweet treat just as much as the other guy, but in eliminating refined sugar at our house, we have learned not only how to naturally sweeten our treats, but also that we don’t need it as sweet anymore. Our tastebuds have adjusted and we enjoy the natural flavors and sweetness of fruit (and foods) without the added sugars.

frozen sweet treatsWhen I was growing up it was not uncommon for my mother to make popsicles simply by pouring fruit juice into popsicle molds and freezing them. As long as the juice was unsweetened we were already enjoying a yummy cooling sugar free treat.

When I became a mother I made these kinds of popsicles for my kids as well. The thing is, I often found that once you sucked on them for a while, all the juice was gone and you were left with ice on a stick. I was looking for a frozen sweet treat that would have flavor all the way through and of course, naturally sweetened.

My first discovery was Grasshopper Popsicles, a mixture of blackberries and spinach, yes I said spinach, and a few other ingredients to put it all together. For a while this was our staple popsicle, which the kids really enjoyed. It was my mother when visiting one summer, who introduced us to this simple creamy popsicle that has added a little more variety to our popsicle pickings.

The Fruitsicle, as she calls it, is a fruity, creamy, dairy free, sugar free popsicle that is super easy to make. You just put all the ingredients into the blender and mix, then pour into the popsicle molds and wait for it to freeze. (The waiting is the hardest part, my kids were continually asking me if they were ready yet).

The Fresh Fruitsicle

1-2 cups fresh strawberries, trimmedfrozen sweet treats

1 ripe banana, peeled and cut into chunks

½ cup coconut milk

1 to 2 tablespoons raw honey

Put all ingredients into blender and blend until smooth. Pour mixture into popsicle molds and freeze for 6-8 hours or overnight.

*if you’d like your popsicle to be a little sweeter simply add more honey or more strawberries to the mix

Makes 8-9 popsicles depending on the size of your popsicle mold

Easy Strawberry Banana Dairy Free Ice Cream Recipe

One of the things I definitely miss going dairy free is ice cream. A regular staple at my house when growing up; we often had it after supper, asking my parents hopefully if we could have some. Unless we were out, they usually said yes. Knowing that this was one thing I could not give up completely I set out to find some dairy free ice cream recipes.

dairy free ice cream recipeWhen I first started searching for dairy free ice cream recipes I thought that I would always have to make it in an ice cream maker using some kind of dairy free milk and natural sweetener. But what I have discovered is it can be even simpler than that. In fact it is so easy to make a great creamy, dairy free sugar free ice cream that as soon as you’re done reading this post, you’ll probably hop up and make some. Five minutes, maybe less, honestly you’ll be done.

Not to say that using an ice cream maker and an alternative dairy free milk is not a good option. In fact, I have some super yummy ice cream recipes made with coconut milk, like the peanut butter ice cream, that is so creamy and delicious it is worth the few extra minutes to make it. But sometimes you just want a quick treat. Not too much work and not too much thought being put into it. This is why I like this recipe for a dairy free strawberry banana ice cream. Super simple, super tasty and the only thought you have to put into it is do I have frozen bananas?

Dairy Free Strawberry Banana Ice Cream

This easy dairy free ice cream recipe gives you a nice soft serve ice cream in less than five minutes

dairy free ice cream recipe1 frozen banana (*peel banana before putting into freezer)

1 c. frozen strawberries

Put frozen banana and frozen strawberries into Vitamix blender. (If you do not have a Vitamix, a high powered blender of some kind is recommended due to the fruit being frozen and to prevent burning out your blender. If you have a standard blender, just proceed slower or blend fruit in smaller amounts to prevent burnout). Turn Vitamix on starting at low speed and slowly turn up to high. You may need to use tamper to push frozen fruit down to thoroughly mix. Once you have a soft serve consistency ice cream is ready to serve. Scoop into bowls and enjoy!

This dairy free ice cream recipe can also be made with different kinds of fruit, substituting the strawberries for raspberries or mango, etc. We have found though that the banana is a key part of the recipe in order to get that nice ice cream consistency and should always be present.

This is also a great recipe to make with kids as it is super easy for them to help with by putting the fruit into the blender or turning it on under the direction of an adult. It’s perfect for a hot summer day when you want a yummy cool treat and super quick to make. With just a little pre planning by having frozen fruit ready in the freezer you can literally whip it out in no time!

How Many Ways Can You Make Hot Chocolate – YYC Hot Chocolate Fest

YYC Hot Chocolate FestWarm delectable chocolate and sweet cherries delight the palate, filling the senses and warming the soul…aaahhh heaven. The Black Forest hot chocolate, one of 36 possible heavens in the YYC Hot Chocolate Fest this February. A fundraiser to support Calgary Meals on Wheels, this is the 5th year various coffee shops, restaurants and chocolatiers in Calgary roll out their signature hot chocolate recipes and compete for the best hot chocolate in town.

I was very excited to discover this event this year (and wondered why I had not heard of it before). Throughout the month of February you can try as many hot chocolates as you like, then go online to vote for your favorite, as well as leave comments and participate in the additional contests.

Hot Chocolate Fest

Black Forest

I have had the pleasure of enjoying 3 so far, the Black Forest, Australian Summer and the Creamy TLC, all different and unique, all with flavors that are hard to compete with. My goal is to try them all, which will be a challenge in itself in just 28 days, but it’s hard to resist when there are flavors such as Red Velvet, Tiramisu and Butterfinger Peanut Cup to enjoy.

I realize this means that there may be some days where I will have to have two or three hot chocolates just to make sure that I get them all in before the 28th, but sacrifices have to be made, and happily I will make this one.

Hot Chocolate FestI love the idea behind this Hot Chocolate Fest, (especially with chocolate involved!), it’s fun, gets the community involved and is a great way to create awareness. It also supports local businesses, encouraging people to explore the unique coffee shops and niches in Calgary, it’s creative, expressive and supports a good cause! It is also a great social event, one where you can invite friends to join you, and create more of a network online. Who doesn’t love hot chocolate? (yes I realize that maybe someone doesn’t, but many of us enjoy the thought of a nice warm drink on a cold day. It means cozy, it means social, it means tastes buds coming alive with the different and unique combinations to enjoy).

The other thing I love about the Hot Chocolate Fest is many of the vendors offer dairy free options for those of us who wish to do so. When I ordered my Black Forest at the Higher Ground Cafe, I could choose from soy milk, almond milk or coconut milk. Now this did mean no whip cream and my cherry sunk to the bottom, but it was great that this option was available so I could participate too, and my body would be happy with me.

A Hot Chocolate Fest just gives me an all around good happy feeling, making me feel all warm and fuzzy inside. So whether you are tempted to try one or try them all, go out and check out the YYC Hot Chocolate Fest. Don’t forget to pick up your Hot Chocolate Passport from one of the vendors and check off each one as you go along to enter for additional prizes. I might see you out there. Come back here and share what your favorite was. Happy Hot Chocolate Drinking!Hot Chocolate Fest

Sweet Butter Tarts

IMG_6483I received a little inspiration the other day from my sister. She was making pies and butter tarts asking for advice and how to’s as it had been a while since she had made them. Of course I helped her and gave her lots of tips.

She sent me photos of her and the girls (my nieces) creations and it made me a little jealous. I love butter tarts, they are definitely one of my favorites and I hadn’t had one in years! They are so sweet and delectable, nice flaky pastry and yummy sugary sweetness as it melts in your mouth.

Why though hadn’t I made these in so long? I mean pastry challenges aside (I never enjoyed rolling them out and cutting small circles, found it finicky), there was really no reason why I could not make these things. Yes we have chosen to eliminate dairy and sugar from our diets but why had I not adjusted this recipe? I hadn’t even looked at the recipe to see if it could be!

IMG_6471With mouth watering I decided to least attempt it. I mean what was the worst that could happen, I’d end up with a batch that didn’t taste so good and might have to put in the garbage? But if it meant I might be successful and enjoy butter tarts once again 🙂

So I pulled out the recipe and took a peek. I balked at myself for having left this for so long. This transformation was going to be super easy! It was a simple substitution of Earth Balance, coconut sugar and coconut milk and voila! it was done.

I waited in anticipation as they baked, hoping that I was right and they would turn out. Once they were out I did my best to let them cool at least a little, before I tasted one. Omg! it was absolutely delicious and honestly I could not tell the difference between this one and  the original recipe. Perfect!

I then shared the butter tarts with the kids who loved them and gobbled them up, quickly asking for more. Of course I love these so much I could easily gobble two or three at once, but I resisted, knowing perhaps I could have one for breakfast tomorrow…

And now I am going to share them with you. This is a dairy free sugar free butter tart recipe that you can enjoy without the guilt and really will not notice the difference or compromise on taste.

Butter Tarts

1/3 c. Earth Balance Vegan Spread, meltedIMG_6485

1 c. coconut sugar

2 tbsp. coconut milk (full fat canned coconut milk is best)

1 egg, beaten

1 tsp. vanilla

1/2 c. currants

Make pastry as per directions. (I use Tenderflake and follow their recipe on the back) Roll out pastry to desired thickness (usually between 1/4 to 1/8 inch depending on preference) and cut into 4″ circles. Place pastry circles in prepared muffin tin. (*If tin is not non stick I would highly recommend greasing each opening lightly with Earth Balance. There is nothing more annoying then being unable to get your tart out of the pan without it breaking!)

Combine all filling ingredients in a medium bowl. Fill each pastry circle about 2/3 full. Do not over fill as filling bubbles up when baking and can overflow. Bake at 450F for 8 minutes, then reduce oven temperature to 350F and bake until pastry is lightly browned, no longer than 5 more minutes. Remove from oven and let cool.

*Tip – if you’re filling did overflow while baking it is a good idea to gently run a knife around the edge of the tart before it completely cools. This prevents the filling from hardening and sticking, making it difficult to get the tarts out of the pan once completely cooled.

Makes 12 medium sized tarts

Enjoy! (Now I’m going to make some more… writing this post has definitely started my mouth watering)

Coconut Curry Chicken with Pineapple

IMG_3328I love barbequing! I love how it’s little dishes, less mess and usually very delicious! In fact, I enjoy barbequing so much that we usually bbq year round! Regardless if it is -30 or plus 30 C. (Thankfully it is not usually -30 C around here in the winter, but it is often below zero).

I know! You are probably thinking that this woman is crazy; but I’ve been out there in my winter boots flipping burgers or tending the steaks. Breath coming out in white whisps as it floats into the air. I never worry about the weather forecast or if it is ‘barbeque’ weather, as it is always barbeque weather for me!

It wasn’t until recently though that I actually learned to barbeque. Yes we were barbequing year round but it was my husband who was doing it. In fact I had never even made something as simple as the burgers! I would always mix the ground turkey or chicken and make the patties but never actually cooked them myself. I have no idea why I did this. Perhaps I thought it was the ‘mans job’, or perhaps it was just my way of diveying up the jobs, regardless up to a couple of years ago actually doing the cooking on the barbeque was a whole new thing to me.

Barbecue-gaz-1They say bbqing is an art and I would agree. Certain meats need lower temperatures and longer times, while others do better on a medium to high heat. I learned a little from my Dad and remembered what he said to do as I watched him barbeque over the years. And I did a little figuring it out myself. Overall I am a very good barbequer and I sometimes even take over that task when I am at my parents house!

The one thing about barbequing though, especially if you do it as often as I do, is variety. I believe there is more to barbequing than just burgers and steaks, so I like to explore other recipes are and what other things you can do. I have found that the barbeque has way more options for cooking on it then I originally thought, expanding my repertoire of dishes quite a bit. (Did you know you can do pizza on the barbeque? I did try it once, not so successfully mind you, but it can be done!)

A lot of barbeques these days come standard with rotisseries as well, which opens up a whole other path of options for you, such as roast chicken, roast or lamb. My mouth just waters at the thought of it….

One of my favorite recipes that I have discovered for the barbeque is Coconut Curry Chicken with grilled pineapple. Originally from Clean Eating Magazine, it is really easy, very moist and tastes delicious. It only takes a few minutes per side to cook and voila! dinner is ready. Just add rice and a nice salad (or other vegetable) and you have a complete delicious meal. The only trick is it does require a little bit of pre-planning as you need to marinate the chicken for a couple of hours before cooking it on the barbeque.

The kids love it and my oldest usually gobbles up two chicken breasts on his own (yes he may be a growing boy but he can also be a bit of a picky eater, he will not eat things he doesn’t like no matter how hungry he is). I find the pineapple slice on the top really makes it, the flavors going very well together.

So whether you feel like barbequing tonight or saving this recipe for warmer weather, you’ll want to give this tasty coconut curry chicken a try. Completely dairy free, sugar free and gluten free, it is a dish that will be enjoyed by all.

Coconut Curry Chicken with Pineapple

4 boneless chicken breastsIMG_3324

**1 1/2c. coconut curry marinade

1/2 c. unsweetened coconut

4 fresh pineapple rings

Place chicken in a large ziploc bag. Add coconut curry marinade and seal, squeezing out as much air as possible. Refrigerate for 2-6 hours.

In a non stick skillet, heat coconut on medium heat until lightly browned. Transfer to a plate to cool.

Turn BBQ on and heat to medium high. Lightly oil grate with olive oil (I find best is to brush on with heat resistant pastry brush). Remove chicken from marinade and pat dry with paper towel. Place chicken on grill and reduce heat to medium low (I find with chicken a little lower heat and a little longer time, keeps it moist and prevents it from drying out). Grill chicken until cooked through, about 3-5 minutes per side.

If you have room on your grill with the chicken place pineapple rings on and cook until lightly charred, about 2 minutes per side. If you don’t then you can do the pineapple at the end quickly once chicken is cooked.

To serve, sprinkle toasted coconut on chicken and one ring of pineapple on top of each  chicken breast.

Serves 4*

*I have found the marinade can easily accommodate 5 or 6 breasts and creates less waste

**Coconut Curry Marinade

2 c. coconut milk

2 tbsp. curry powder

2 tsp. sea salt

1 tsp. black pepper

In a medium bowl, whisk all ingredients together. Can be made ahead of time and stored in an airtight container in the fridge for a few days. Can be used on chicken, pork, seafood and vegetables.

To Drink Gingerbread

IMG_4491I know Christmas is over. And New Year’s is done too. And this is really something more suited to the Christmas season. But I couldn’t resist posting this martini I created over the holidays. Yes I created it!

I was on a gingerbread kick over Christmas, looking for different ways to enjoy this delectable Christmas flavor. I had already discovered and tested gingerbread waffles, gingerbread muffins and of course gingerbread cookies (classic). Earlier this Fall I was delving into the martini world, trying some Halloween ones, pumpkin one, and a few others. I thought there must be a gingerbread one I can make.

So I hopped on Pinterest, my new favorite go to for recipes and looked it up. I found a number of recipes but most of them had Baileys in it and I wanted to avoid the dairy. There were some that were almost but not quite. So I decided to experiment, I took parts that I liked from different recipes and combined and adjusted them, creating my own version of the gingerbread martini. Dairy free, not quite sugar free, there’s just a teensy bit in it, I tried to get it completely sugar free but couldn’t quite do it (maybe down the road I’ll figure it out get it completely sugar free). Though honestly you would never know, this is a very sweet martini and extremely delicious.

Once I got all the components right and tried it, I phoned my Mum to share. She immediately wanted the recipe and went to try it herself. 20 minutes later she phoned back with one word, “Yum”.

Now I realize it is not the Christmas season when gingerbread is most popular but I could not sit on this delectable recipe for an entire year! Besides isn’t gingerbread good any time of year? Valentine’s? or Christmas in July.

Give it a try. If you like gingerbread you’ll love this. Enjoy!IMG_4493

Gingerbread Martini

1 1/2 ounces (3 tbsp.) vodka

1 ounce (2 tbsp.) gingerbread syrup*

1/2 ounce (1 tbsp.) Creme de cacao

1/2 ounce (1 tbsp.) unsweetened coconut milk (I used Silk unsweetened coconut milk)

Put all ingredients in a martini shaker filled with ice. Shake to mix. Pour into martini glass. May adorn glass with mini gingerbread cookie if desired.

*Gingerbread Syrup

IMG_4497

Gingerbread Syrup

1/2 c. water

1/2 c. coconut sugar

4 tbsp. barley malt

1 tsp. ground ginger or 1-2 drops Ginger essential oil

1/2 tsp. ground cinnamon or 1-2 drops Cinnamon Bark essential oil

In a small saucepan, mix together water, coconut sugar, barley malt, ginger and cinnamon (If using essential oils for your spices do not add these here). Heat over medium heat, stirring frequently, until sugar dissolves. Remove from heat. If using essential oils, stir these in now. Measure your drops in a teaspoon (just in case you get one too many!) and stir in. Taste to ensure you have the amount of spice you’d like – add another drop if desired. Let syrup cool before using in drink. May be stored in an airtight container in the fridge for up to 2 weeks.


A Few of my Favorite Muffins

8I have fond memories of muffins growing up. This may sound a little weird but I was a competitive swimmer for many years and that meant early morning practices before breakfast. My mother would often make muffins and after practice we’d have muffins and juice before being dropped off at school. As a result, my Mom tried all kinds of different muffin recipes, so that we could enjoy variety and not get bored with the same old banana muffins 3 times a week.

IMG_2690One of my favorite muffin recipes was one that was filled with jam. Though not quite as tasty as a jam filled donut, I loved these because of the ‘surprise in the middle’. I also found them to be quite tasty and very moist due to the yogurt that is in the recipe.

Of course when we moved to eating dairy free I had to forgo these muffins for a while. Until recently, when I discovered some of the non-dairy yogurts out there. Though most varieties are made from soy, you can find brands that are made using coconut or almond milk as well.

With this discovery, I was now able to recreate these delectable muffins! Of course I had to experiment a bit as I needed to substitute the sugar as well and although most natural sugars can be substituted one for one, I find that when you are also altering another ingredient sometimes the sweetness factor needs to be adjusted to.

This was the case with these muffins as though the kids gobbled them up the first time I made them, both my older son and I felt they could be a little sweeter. So the next time I made them I experimented a little adding a little more coconut sugar then the recipe called for. As I result, I did eventually find the perfect combination.

nancys-cultured-soy-plain-58308The yogurt I use is Nancy’s Organic Cultured Soy, plain. Though they offer many different flavors as well. It is a little thicker than dairy yogurt but definitely works. (Also works fabulously in the Cheesy Greens Macaroni dish that I make, which is soooo good!) I have yet to try a coconut milk yogurt but imagine that this would work out the same.

So if you’re up for a yummy nutritious treat with a surprise in the middle, give these muffins a try. And if you do use the coconut milk yogurt come back and comment and let others know how it worked out.

Jam Filled Muffins

1 1/2 c. flour

1/4 c. + 1/8 c. coconut sugar

2 tsp. baking powder

1/2 tsp. baking soda

1/2 tsp. salt

1/4 c. Earth Balance vegan spread

1 c. non dairy yogurt

1/4 c. almond milk (or favorite non-dairy milk)

1 egg

1/2 tsp. vanilla

Favorite sugar free jam

In a medium bowl blend dry ingredients. In a small saucepan melt Earth Balance. Take saucepan off heat and stir in yogurt, almond milk. Beat in egg and vanilla. Add liquid mixture to dry ingredients and stir until moistened.

*Line cupcake pan with liners or grease well. Spoon in half the batter. Place about 1 tsp. of jam in each muffin, then top with remaining batter.

Bake at 375 F for 15-20 minutes.

Makes 12 muffins.

*Note: I have found with these muffins if you have the cupcake liners that that is best due to the jam sometimes overflowing a bit.

Butternut Squash Soup

IMG_2432A couple of weeks ago I was visiting my sister in Vancouver, having a little me time and also there to attend my friend Stuart’s 40th Surprise Birthday; she made this fabulous Butternut Squash soup. Now I have not been a huge fan of squash in the past but this soup was really yummy!

I had found that the texture of squash was not always to my liking, it felt kind of grainy on my teeth so I avoided squash in general. But lately I have been finding many recipes with squash that I and the kids have quite enjoyed. Like Spaghetti Squash with chicken and pears from Clean Eating Magazine, Acorn Squash with harvest rice stuffing and now this soup!

Butternut Squash

Butternut Squash

It is a dairy free, sugar free and gluten free soup, of which I think I had 3 bowls for dinner that night and then another 2 for lunch the next day!

I found the flavors delicious with coconut milk and cinnamon. The original recipe calls for 2 butternut squash but that day my sister used acorn and butternut squash and it was very tasty.

I was so excited about this soup when I returned home I went straight to the store to buy what I needed. Unfortunately, as life would have it, I did not make it until the other day as I could not get all the ingredients I needed, and then of course there was time and real life to get back to – you know 3 kids, running a household…

I made it with the 2 different squashes which I think just adds lovely flavor and served it to the twins for lunch. Both of them gobbled it up, asking for a second bowl, while I scarfed, I mean enjoyed, my own soup.

It is super easy to make as well and easily frozen if you don’t wish to eat it constantly for a week.

Butternut Squash Soup

2 medium butternut squash, or 1 butternut and 1 acorn

1 pink lady or royal gala appleIMG_2458

1 medium onion

1/4 c. Earth Balance vegan spread

900 ml chicken broth

1 c. coconut milk

1/2 tsp. dried sage

generous pinches of cinnamon and salt

1 tbsp. maple syrup (optional)

Chop and peel squash; cut in half and seed, then chop into small pieces. Chop onion and apple.

In a large saucepan over medium heat, melt Earth Balance, add onion and apple and saute until onion is soft. Add broth, squash, and coconut milk. Bring to boil and simmer for 20-25 minutes.

For the last 5 minutes add sage, cinnamon and salt. Squash should be very tender when done.

Use immersion hand blender in pot to blend until smooth or ladle soup into blender and whip on high until pureed. Pour back into pot and reheat if necessary. Serve.

You may add optional garnishes such as maple syrup drizzled on top, vegan sour cream, slivers of apple or dried sage.

Soup will keep well refrigerated for 5 days or in the freezer for up to 3 months.