Spooky Halloween Crafts for Kids

Getting into Halloween just wouldn’t be complete without a few spooky crafts for the kids to make. Besides the sweets and treats it is just as much fun to dress up, decorate and get the kids to add their crafts to the decor!

We put up pumpkin lights, ghosts and skeletons in the yard. I also have some Party Lite candle holders like a haunted house, jack and jill-o-lanterns. They are totally cute! We even have one of those ‘dancing’ stuffed toys that sings the Monster Mash. Luke and Chloe really like the haunted house and want to play with it. I made the mistake of letting them look at it the first day it was out. Though they were very gentle, there was a lot of crying when I put it back on the shelf.

We’ve had lots of fun though this week with Halloween crafts. Easy to make for little ones they add some spooky fun to our Halloween decor.

Bat Wreath (prominently displayed on our front door)

This craft is super easy and adds a nice flare to your front door. Bat WreathYou’ll need ring of cardboard, black construction paper, scissors, glue, small piece of wool.

Trace a small plate and a large plate onto a piece of old cardboard. Cereal boxes work great.

Cut strips of construction paper (about 1 1/2 inches by 4 inches), glue the strips into rolls, like making a paper chain. Glue the rolls of construction paper onto the wreath. If you like you can use other Halloween colors, like orange, purple, green if you don’t want to use all black.

Fold a piece of black construction paper in half and cut out half a bat shape (this will make the wings symmetrical). Use white pencil to draw on face.

Handprint and Footprint Ghosts

This craft is a great way to capture some memories of your little ones at Halloween. Put the date on it and you have a great hand and foot memory from one of their first Halloweens. 

You’ll need black paper, white paint and a black pen.

Dip child’s hand in white pain and place it on the black paper, fingers together to make a print. Do the same thing with their foot.

Let the paint dry and draw on some ghostly faces with the black marker. Cut out the ghosts leaving a thin rim of black around the edge. If you’d like to hang them up punch a hole in the top, or use them as unique invitations to a party.

Paper Plate Spider

You’ll need 2 sheets black paper, paper plate, black paint, white paper, black pen, glue.

Paint the plate black and let dry.

Fold each sheet of paper in half lengthways; then in half again. Cut along the folds so that you end up with 8 strips. Pleat the strips like an accordian.

Glue or staple the strips of paper to the plate to form your spider’s legs.

Cut two circles from white paper as eyes. Draw on the pupils and stick to the spider.

Lift Flap Haunted House

You’ll need construction paper (purple, orange, green, black and yellow), glue stick, scissors, utility knife (for use by adults only).

Draw a house on colored construction paper. Draw a large triangle on green to make the roof, draw a large rectangle on purple for the house and a small rectangle to make the chimney. Cut out pieces.

With a black marker draw a window on the roof, 2 windows and a door on the house. Have an adult cut using the utility knife, around the windows and doors leaving one side attached so that they will open.

Glue a scrap piece of paper to the back of the house and roof, using the same colors – do not glue the windows/door shut. Glue the house to a piece of black construction paper.

Using the other colors of construction paper make pumpkins, ghosts and bats to put in the windows. Glue them in and around your haunted house.

Lift the flaps to discover what’s inside!

There are so many creative things out there you can do for Halloween. Whatever craft you decide on the kids will love creating them and will enjoy another aspect of this spooky holiday!

A Halloween Breakfast -Pumpkin Pancakes

pumpkin pancakes

Last year I made Pumpkin pancakes Halloween morning for the kids.  I found these mini Halloween pancake molds at Williams Sonoma -in the shape of a cat, pumpkin, bat and ghost. It came with the pancake recipe so I thought I would try it out. It was so fun! It was a great way to start the day and to make it fun especially when meeting our no sugar requirement.

I am planning to make them again this year, except I will make them the night before and reheat them in the morning. Because Halloween falls on a school day, I would have to get up quite early to make them fresh and I am having a hard enough time getting up on school days as it is 🙂 It’s way too early for me.

Tips for Using Molds for Pumpkin Pancakes

When using the molds there are a few tips and tricks that I would recommend in order to make your pancake making experience successful.

First, is to buy a pancake pen. They are also available at Williams Sonoma and it is well worth the money spent. You fill the pen with batter on one end and then you squeeze it out of the tip on the other when you are ready. It has a cover on the “pen” end so you can stand it up with the batter at the end and ready to go. This is way easier and faster than spooning it into the molds.

Second, make sure that your griddle or pan is hot before you start and that you grease the pancake molds with a little bit of oil. They are non stick molds but you still need that extra grease to keep the batter from sticking, especially in the corners. And even with that I found that I had to gently push around the edges with a butter knife to get them to come out. And grease them EVERY time you put in a new batch of batter.

Third, don’t overfill the molds. If you use the recipe below they will puff up so only fill them about halfway. If you overfill them they will be hard to get out regardless if you grease them.

pumpkin pancakes

Fourthly, they do have little handles on them to help you take them out, but they become hot as they are metal like the rest of the mold – make sure you use a pot holder or oven mitt to handle them.

Interestingly last year I discovered I had no pot holders as I never found them to be useful and were just taking up space, so I gave them all away. Now I have found a reason to have at least one around, as using an oven mitt is too bulky and awkward to handle the molds. Fortunately I found a Halloween pumpkin pot holder on sale after Halloween last year, so I’ll put it to perfect use.

My last tip is be patient with yourself and give yourself enough time to make them; hence doing them the night before. I have to admit they are a bit finicky to make but once you get the first few under your belt you get the hang of it and it becomes easier. By the time I was done my batch I could get the pumpkin and the ghost shapes out without having to use my butterknife around the edges.

And oh they are delicious! The kids loved them. They found the shapes super fun and now ask for them each year.

So try something unique this Halloween for breakfast; even if you don’t have the molds the kids will still gobble them up. You could Hallloween -ish by simply make faces on them using pieces of fruit like sliced bananas, blueberries, strawberries, apples, etc.

I adjusted the original recipe to sugar and dairy free to meet our needs and is the recipe posted here.

Pumpkin Pancakes

1 1/2 c. flour (I used half whole wheat and half white)

1/4 c. date sugar

3/4 tsp. baking powder

1/2 tsp. baking soda

1/2 tsp. salt

2 tsp. cinnamon (or 1 drop Cinnamon Bark essential oil)

1/2 tsp. ginger (or 1 drop Ginger essential oil)

1/4 tsp. ground allspice (or 1 drop OnGuard essential oil)

4 eggs, separated

3/4 c. canned unsweetened pumpkin

1 1/2 c. almond milk or other preferred non dairy milk

4 tbsp. melted Earth Balance

1 tsp. vanilla extract

100% pure maple syrup (for serving)

In a large bowl whisk together flour, date sugar, baking powder, baking soda, salt, cinnamon, ginger and allspice. Set aside.

In another bowl, beat the egg whites until medium peaks form. Set aside.

In another bowl, whisk together the egg yolks, pumpkin puree, rice milk, Earth Balance and vanilla until well combined. Whisk the pumpkin mixture into the flour mixture just until the batter is smooth and no lumps of flour remain. Fold in egg whites in 2 additions.

Heat griddle over medium heat until a few drops of water flicked onto the surface skitter across it. Lightly grease the griddle and the inside surface of the mini pancake molds. Set the molds with handles up on the griddle and heat until hot.

Pour 1/4 c. pancake batter into each mold. If necessary use a butter knife of small spatula to spread the batter into the corners of the molds. Cook until bubbles form on top and the batter is set, 3 to 4 minutes. Remove molds, and flip the pancakes over. Cook until golden brown on the other side, about 3 minutes more. Keep warm until all pancakes are cooked. Makes between 24-32 pancakes.

*Please note that if using essential oils in this recipe to ensure that your essential oil brand is safe to take internally. Not all essential oil brands are created equally and some use synthetic fillers and chemicals in their processing of the oil or added to the oil itself. Due to no governing regulations on producing essential oils a company can say they are 100% or Organic. Due your due diligence and research the brand you are using to ensure your safe usage.

Enjoy! And Happy Halloweening!

Fun Healthy Halloween Snacks

healthy halloween snacks

Getting around the sugary treats at Halloween can be a challenge. But with a little creativity you’ll find that not only will your kids love the alternatives you provide but you will have a lot of fun making them.

Halloween is one of the best holidays to get creative! There is so much you can do, especially with your snacks! You can carve and shape your food into something gruesome! healthy (without all the sugar) and that the kids will enjoy.

Last year I planned a whole menu of healthy Halloween meals and snacks, starting with pumpkin pancakes for breakfast, pumpkin smoothies for afterschool snack and spooky mini pizzas with a veggie man for dinner. It was awesome and so much fun!

Matthew’s class also decided that they were going to have a Horribly Healthy Halloween, and as a group decided not to bring in sugary treats for the class party. So everyone who brought food had to make sure that it was sugar free. They had veggie trays, fruit, cheese and crackers. Our contribution of Witches Teeth and Boo-nanas were a big hit and the kids gobbled them up, with the Boo-nanas being the favorite!

I’ve found that it is really easy and fun to go healthy at Halloween if you choose to. And I have found that the kids will eat what is put in front of them and the things that look fun and cool are the ones that go first, regardless if it’s healthy.


Witches Teeth healthy halloween snacks

Apples

Slivered Almonds (if you can’t do nuts use shelled sunflower seeds)

Quarter and core an apple, cut a wedge from the skin side of each quarter, then press slivered almonds in place for teeth.

Tip – If you are not going to serve them right away, baste the apples with orange juice to keep them from browning.


Boo-nanas 

Bananas

healthy halloween snacksUnsweetened shredded coconut

Raisins

Orange juice

Popsicle sticks

Depending on the size of your banana, cut them in half or thirds. Dip peeled bananas in orange juice, then roll them in the shredded coconut. Add raisins for eyes. Insert a stick in the bottom to make them “float”. Can be served as is or frozen.


Tangerine Pumpkins

tangerine or mandarin oranges

stalk of celery with leaves – cut into small pieces

This is the easiest and fastest fun treat yet! Peel your orange, do not take it apart and section it, keep it together. Cut small piece of celery and stick it in the middle of your orange (there is a natural hole there). Use a celery leaf and stick that in beside your stem. Voila! Donehealthy halloween snacks

Spooky Drinks

Make your own juice ie. apple carrot and then add some carbonated water and a few peeled grapes. The kids will think it’s gruesome, but they will love it and likely squeal with glee!

Nina Manolson of Healthy Yummy Kids shares many healthy Halloween recipes such as Caramel Apples (my favorite!), Banana Candy and many more. They are easy to make with ingredients that you likely have and use in your home already; and your kids will love them!

Looking for more? There are lots of websites out there that have many ideas for healthy, fun, cool snacks and meals for Halloween. If you google “Healthy Halloween snacks for kids” you’ll have a plethora to choose from. Enjoy and have a spooky, fun and healthy Halloween!


Save on Music, Books and DVDs at Indigo.ca

A Horribly Healthy Halloween – Tips for Sugar Free Halloween

sugar free halloweenSince eliminating sugar from our diet holidays have taken on a very different look for our family (yet we still enjoyed pumpkin pie at Thanksgiving! -sugar free of course). There is so much sugar and sweets that come with each holiday that it can be challenging to get around. The key is to find alternatives that meet the child’s needs without making him feel different or like he is missing out.

Halloween is no exception, in fact I would venture to say that it is the worst holiday connected to candy and treats. I remember Matthew asking me shortly after we eliminated sugar if he would be able to go trick or treating for Halloween. Thinking ahead, I already had an answer for him and told him yes he would be able to and then I told him the plan.

These are the things that we will be doing this Halloween to ensure it is sugar free and still enjoyable.


Tips for a Sugar Free Halloween

Go to a Candy Buy Back (or do the Switch Witch)

sugar free halloweenMatthew will go trick or treating this year but he will take all of his candy to an event called the Candy Buy Back, put on by a local dentist here in Calgary. It is the day after Halloween and they give the kids $1 for each pound of candy that they bring in. They have all kinds of prizes and they wear their Halloween costumes again.

We have done this for the past couple of years and he uses the money he receives to buy a book. So he still gets to participate in the “main activity” of Halloween and get something that he wants and is able to have.

Now some people may be upset by this as they go out and spend money on candy to give to kids and then they go and sell it. I do see their point but it is a choice and once you give it away who knows what happens to it. You could buy something else that is non candy and give that out (and people are starting to do that), decide not to hand anything out, or be ok with it. If we as a society want things to change then it has to start somewhere and the method may not be preferred but at least it is a start.

Have a Healthy Fun Supper

sugar free halloweenThere are also other things that you can do to eliminate or reduce the amount of sugar your child ingests this Halloween. Nina Manolson of Healthy Yummy Kids, suggests that for supper that night you prepare a full healthy meal that the kids will enjoy with a nice healthy yummy sweet at the end (you can make the cookies, cakes and treats without the sugar- check out some of my sugar free recipes). I take it one step further and make it a fun Halloween themed supper. This is basically taking healthy foods and getting creative and making them spooky. In the past we have done Monster Face Pizzas, Monster Brains and Skeleton Veggie tray.

This will not only satisfy their craving for sweets but they will also feel full, and therefore when offered candy to eat, they won’t eat it because they are not hungry. (Nina also suggests this strategy for afterschool outings and birthday parties).

Attend a Halloween Community Event

sugar free halloween
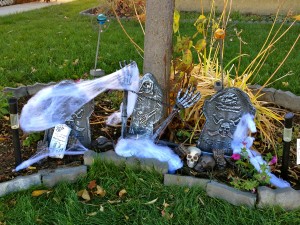
It is also important to remember that there is more to Halloween then just the candy; there are many events and activities around it. If you look at the history of Halloween it originally had nothing to do with candy -it is society that has added the “treats” over the years.

When attending an event, the kids still get to dress up, and there are usually games, crafts and other activities. There are many special events in the community (for instance in Calgary, we have the Boo-roofic Bash, Ghouls’ Night Out, Haunted Houses, etc). There are dances and classes that you can wear your costume to with other activities. Yes there are likely candy and sweets available but there are more to these events than the treats and it is easy enough to skip the treats if you choose to.

Decorate your Home for Halloween

There are loads of Halloween crafts that the kids can make and then use as decorations to put up. You can also add in things like Halloween soap dispensers and towels, spider webs on mirrors, a graveyard and skulls in your front yard. You can get really into this (just check out Pinterest for great easy ideas!) That is all part of the fun and demonstrates another fun aspect of the holiday that is not candy related. My son is already asking me if we can put out the Halloween decorations (and has been since September).

I feel that Matthew will have a very enjoyable and healthy Halloween this year and I don’t think that he will feel like he missed out at all. It really is easy to do and I encourage you all to give it a go yourselves. You will eliminate all those wired and moody kids the next morning!

As for the twins, we dressed them up last year, but did not go trick or treating. So they are familiar with the event and love to dress up! We might take them out this year to a few neighbors, and we’ll contribute their candy at the Candy Buy Back, because for them it is all about the costume!


Shop Calendars.com for Great Deals!

Luke and Chloe’s First Haircut

Luke's First Haircut

One of the many milestones in your child’s life is their first haircut. Along with their first tooth and first word, this monumental event is one that all parents fuss over and get excited about.

With Matthew, my first child, I was so excited to take him to his first haircut I took him when he was just over a year old. With the twins, however, I waited much longer. They are just over 2 and a half now and I finally took them. I delayed it because Luke had these little curls at the back and I was afraid that if we cut them he would no longer have those cute little curls. And for Chloe, the way her hair was growing in she didn’t really need it.

When you take them is different for each child, depending on how fast and thick their hair grows in and what you as the parent want. It was when Luke started brushing the hair out of his eyes to see, that I knew that I could delay it no longer. Chloe too was doing the same.

I took them to Beaners, a local haircut place for kids. It is decorated in bright colors, has lots of fun seats for the kids to get their haircut in – cars, motorcycles, and animals – and a ball pit.

Now it’s always a concern when you take your child to have their hair cut for the first time about how they are going to react. Though Matthew never screamed or had a problem with his hair getting cut, I was a bit concerned as I had heard many children in there, screaming like they were being tortured and killed. And that is a horrible experience even if it is not your own child.

Chloe's First Haircut

I was lucky, Luke and Chloe were fine. In fact they were excited to go and though Luke may have been a bit quiet and shy, he didn’t fuss and he sat very nicely while the lady cut his hair. Chloe was awesome as well, a little more interactive and smilely than Luke.

Luke sat in the Jeep, Chloe on the dog, and both got great haircuts. Of course Chloe being the girl, got a ribbon and sparkles in her hair, though Luke totally would have said yes to having them to if asked. We took lots of pictures and all went smoothly.

I know it is not always this easy for all children and parents. For whatever reason some kids are just not comfortable with getting their haircut. So here are some tips for parents who are concerned, how to make your child’s first haircut a happy and memorable event.

Chloe an Luke after their haircuts

  1. Go at a time of day when it is best for your child; when they are well rested and fed. We went in the morning, which is the best time for Luke and Chloe.
  2. Go to a place that is for kids; like Beaner’s. The staff are used to and familiar working with children and how they may react. The place is also fun, brightly decorated and has things that are of interest to children.
  3. Tell them where you are going beforehand. If children know what to expect this could make a big difference. Tell them what to expect and get them excited about it!
  4. If possible, have the child watch someone else get their haircut. Luke and Chloe have often come when we have taken Matthew for his haircut, so they knew what it was all about. They had watched Matthew sitting nicely while his hair was being cut, so they knew what to do.
  5. Take a favorite toy for the child. Something familiar to comfort them if they are feeling uncomfortable.

At Beaners, Luke and Chloe also got a “First Haircut” Certificate with a lock of their hair attached to it. Most kids places will do this for your child’s first haircut. It’s fun and it’s nice memorabilia for their baby book.

Your child’s first haircut does not have to be a traumatic event, it is easy to make it a happy ocassion for everyone, including the staff at the hair salon 🙂


Autumn Turkey Chili

One of the things I love about Fall is all the savory dishes that there are. The soups, the stews and all the fresh harvest vegetables that we have to put in them. Yummy! My mouth is watering just thinking about it.

I call them cozy foods, foods that are not only good for you, but make you feel warm and cozy inside. The smells wafting through the house as it cooks and the pleasure of sitting down to a nice warm meal.

Many of these meals I make using my slow cooker, which I also love! With busy schedules and activities, it is so nice to put something into the slow cooker in the morning, pretty much forget about it, and presto! ready for you at suppertime. Plus it adds to the anticipation of the meal as those flavors I was talking about, that waft through the house all day!

One of my favorite slow cooker recipes is Autumn Turkey Chili. I love how it combines fresh apples, butternut squash and coconut milk to create an amazing flavor and taste. It is chalk full of vegetables and spices – a really unique combination – that at first when you look at it you might not think so, but trust me it is delicious! Everyone loves it! And it usually makes enough that we can have it over 2 meals.

I found this recipe on the Crock Pot® website, where they have a large variety of slow cooker recipes. The only thing that I have modified in the recipe is the amount of chili powder, which I cut in half, as though we enjoy spice and flavor, we do not like it too hot 🙂

It does take a bit of time in the morning to chop and prep the vegetables and turkey, about 20 minutes, but it is well worth the time spent for the result at the end of the day!

Autumn Turkey Chili

1 onion, chopped

1 carrot, chopped

1 stalk celery, chopped

2 cups apples, diced

2 cups butternut squash, diced

4 cloves garlic, finely chopped

1 pound ground turkey, cooked

2 tablespoons chili powder

1 tablespoon ground cumin

1 teaspoon dried oregano

1/4 teaspoon salt and pepper, each

10 ounces chicken broth, canned, undiluted (I use 10 ounces of homemade chicken broth and this works well)

8 to 12 ounces coconut milk, canned

2 tablespoons tomato paste

1 cup black beans, canned, drained and rinsed

coconut flakes and cilantro, to garnish

Combine all ingredients (except garnishes) in slow cooker. Cook on HIGH 4-6 hours or LOW 8-10 hours. Open the lid for last 45 minutes of cooking to thicken if desired. Mash the squash with the back of a wooden spoon to thicken further if you wish.

Serve with rice or mashed potatoes, or just by itself.

Note: Use can use 4 cups diced cooked turkey or chicken in place of ground turkey.)

Enjoy!

If you try this recipe, please come back to the site and leave a comment. It’s great to share recipes and experiences with others!

Gratitude Activities for Kids

In yesterday’s post I talked about how being grateful for what we have in our lives increases the good that comes to us; and how important it is for us to teach gratitude to our children.

We are all very good at teaching them to say please and thank you but I believe that there is more to it. A deeper meaning that we can convey; so this morning I set out in search of activities that you can do with kids to teach them not only to be grateful but the value of being grateful. Kids love hands on stuff, games and activities. Not only do these things help them develop their motor skills, but it a great way for them to learn and helps the concept you are teaching stick. And presented in a variety of ways makes it fun for them and for you.

Gratitude Journal

I already mentioned creating a gratitude journal which works for both adults and children. But what I discovered today is to make it more interesting to the kids you can do a number of things. Let them decorate their journal either the cover or the first inside page. This allows them to be creative and to make it their own. For younger children, get them a binder or duotang to decorate. Then instead of writing what they are grateful for they can draw pictures and put them in their binder.

Gratitude Activities

The Best thing about..

Divide the kids into 2 teams. Pick a team to go first. Read a list of things or people, like Grandma or trees, and each person on the team has to say one good thing about that person or thing within 3 seconds. If everyone is successful then the team gets a point. If they are not then the other team gets a chance to answer about the same person or thing.

I Love

For each item kids have 3 seconds to complete the phrase “The thing I love about _____ is ______.” Use things like, dogs, birds, Mom, my brother, where I live, etc. Create your own list. You could have the kids create the list with you beforehand and then play the game.

Thank you Circle

Have all the children sit in a circle. Toss a bean bag to one of the children. They stand and list one of the things they are grateful for, then they toss the bean bag to someone else and they stand up and say what they are grateful for. Do this until everyone in the circle has had a chance to speak.

Gratitude Jar

Have children decorate the jar using buttons, ribbon, glitter, etc. Have little slips of paper prepared and each day have the children write down one thing they are grateful for and put it in the jar. Parents can help with writing for younger children. Set a deadline, such as one month later or a special event like Christmas. On that day have everyone sit down and read together all the things that everyone is grateful for from the jar.

Thank You Notes and Letters

Some may say that thank you notes are passe, but there is something to be said when someone takes the time to send you a card or a letter saying thank you. Encourage your kids to write thank you notes, not just for gifts they have received but for something they are grateful that someone did for them in the last 24 hours. Like “Thanks Mom for making my lunch”. This is important as it teaches children to not just be thankful for material things but for acts of service from others. And it teaches them to be grateful for all the little things in their lives as well, which in turn will create more good things for them.

Children can make their own thank you cards, there are a variety of simple ideas that they can do, either drawing, coloring or with glitter and glue. When writing the card encourage the child to explain how the person made them thankful. Then send the card to the recipient.

Older children may choose to write a letter, which may include a little more detail and description of the event. They can also add pictures or decorate it if they like.

Gratitude Crafts

There are many simple crafts that children can do to express gratitude. There is the Leaf Garland, where children write or draw what they are grateful for on a leaf and then hang it up. A similar concept is a thank you sunflower where they use the petals to write on. You can also do a gratitude tree or chain.

These crafts are simple, easy and colorful. With most of them only requiring some construction paper and a marker.

Gratitude Books

A really great way to teach children about being grateful is through books. Most children love to sit and listen to a story; so it is easy to pick books that incorporate this theme.

One of my favorites is The Giving Tree by Shel Silverstein. It is about a tree that gives and gives and gives to a little boy until the tree has nothing left but a stump, but even then has something to give.

Bear Says Thanks by Karma Wilson

Bear has come up with the perfect way to say thanks—a nice big dinner! When Bear decides to throw a feast, his friends show up one by one with different platters of delicious food to share. The playful text and charming illustrations bring to life this celebration of family and friendship. Children will love discovering the special gift Bear has to share.

I’m Thankful for Each Day by P. K. Hallinan

This story combines a child’s delight in the physical world and his thankfulness to God for the pleasure of each day – for summer days, autumn’s orange pumpkin haze, for the breezes, for peace, and for life itself.

Teaching children to be grateful is easy and fun. Being grateful is a wonderful thing, it lightens your mood and brings many wonders into your life. Regardless of your age, gratitude improves the quality of life by focusing on what you have. Counting your blessings is easy to do each day and is easily shared with children. Teaching them to be grateful at a young age will create a life long perspective of gratitude. If we teach them to be grateful not only will they be happier in their lives but they will help create a beautiful world where we will all experience the peace and happiness we desire.

The Art of Gratitude

Many of us spent this past weekend celebrating Thanksgiving. Spending time with family and friends sharing a savory meal of turkey, veggies and pie. It is a time when many of us recognize and acknowledge the blessings in our lives and give thanks.

It’s great. It gives me a warm fuzzy feeling just thinking about it. But it makes me wonder, if it feels so good and makes us happy, why do so many of us wait until the holidays to express our gratitude? Wonderful things happen everyday, in every moment that we should be grateful for.

Oprah Winfrey

Studies have shown that the more grateful you are for things in your life, the happier you are and the more good things will come to you. Leaders and prominent figures in the world are leading the way by talking about gratitude and it’s effects on their lives. Sixteen years ago, Oprah Winfrey started a gratitude journal, in which she writes down 5 things everyday that she is grateful for. She believes that this is one of the best things she has ever done in her life.

Being grateful is easy. If you appreciate and love what you have you will receive more. Even the simplest things, like someone holding the door open for you, or bringing you flowers, smiling. We often forget how some of the simplier things in life can bring us such joy and beauty. When we take note of them, they increase. We become more alive and receptive to the goodness that is in our lives and it keeps us living in the present moment.

I know there are many challenges in life and there are days when you wonder how you can be grateful for anything. On those days especially it is important to identify things that you are grateful for. If the kids have been screaming and you have been going crazy, then all of a sudden you have 5 minutes of silence and the kids playing happily, be grateful! Say thank you – you’ll get more!

Being grateful changes your state of being, brings a sense of peace, contentment and more overall happiness in your life. If you practice being grateful everyday, then everyday will be beautiful and wonderful, no matter if it seems like the world is falling down around you.

The key thing is to write down the things you are grateful for. Writing them down creates more power in your words; and your hands are a direct connection to your heart, so writing them down strengthens this connection. Creates more love and genuine appreciation.

I know you may be sitting there grumbling that this is all mumbo jumbo, so if you don’t believe it do an experiment. Start a gratitude journal and write down 3-5 things every day that you are grateful for. Do this for a week and notice what happens, notice how you feel, notice what has come to you. Then do it for another week and notice again. You may find that things not only are improving in your life but that your overall sense of well being has improved.

And it is easy to teach this to your kids. Most families are very diligent about teaching our children to say please and thank you, but if we can teach them to do a bit more then this will open them up to such beauty in their lives.

Yesterday when Luke and Chloe came home they noticed the snowsuit and snowpants that I had brought up. They had not seen these before so to them they were new. As soon as they saw them they were both saying, “Oh! thank you Mommy!” like they were the best things in the world. They immediately were trying them on, oohing and awing. It was a totally simple thing but they were showing gratitude. No one prompted them, no said they had too. They just did. I feel that if we can all nuture this in each of our children we will create a very different world.

With young children you can ask them at the end of each day before they go to bed what they are grateful for. With older children you can have them tell you but also write them down in their own journal. I believe that if we share what we are grateful for it increases, spreads out like the ripple effect. And doing it before bed is a wonderful time to do so because ending your day with things you are grateful for and make you feel good, happy; you are more likely to wake up in the morning feeling the same way. And isn’t that a great way to start your days? for you and the kids?

Gratitude is not a new thing and there are many ways to express it. But it is important that we do, everyday, not just on holidays or special occasions. It’s all part of creating what we want in our lives, focus on what is good and you will create more good. And I am guessing that we would all like more of the good things in our lives.

Why you should stop convincing your kids to eat healthy food (and what you should do instead) by Nina Manolson

Nina in her family kitchen

Have you ever had these thoughts?

“I made a really healthy meal, but I couldn’t convince my kids to even try it!”

“I’ve basically given up going to the effort of making a nice nutritious family meal because my kids just complain and want chicken nuggets anyway.”

“I’m just done with battling with my kids about veggies, it’s easier to just give them what I know they like.”

I totally get it!

As a Health Coach and Family Wellness Expert I hear those sentiments all the time.

And really, who wants food wars? Everybody loses in those situations, right? Your kids get grumpy, you get cranky, and they don’t eat any healthier. What could have been a time of connecting over a nice meal, ends up as a stress-fest!

The bottom line is that you can’t force your kids to eat healthy food.

So, what do you do when you want the best for your kids and you know that means healthy food choices.

Well first things first:

Stop the battle.

Yup, just stop fighting about it right away. Seriously it doesn’t help. I’m not saying give up your ideals of making healthy food happen in your family, I’m just saying stop arguing about it.

I have a better strategy for you.

Let’s change the food culture in your family.

Instead of being in a “healthy-food is serious business” mode, use my B.E.E. method to switch it up and make your family food culture fun and interesting (and delicious of course!)

Let’s “BEE” advocates for healthy change with a positive attitude and lots of kid involvement.


B = BUZZ

Billions of dollars every year are being spent to market junk food to our kids, we need to create our own buzz for healthy food.

For example:  Instead of offering your kids a smoothie with the news that it’s nutritious, bring some ‘buzz’ – tell the kids that it’s delicious, with a secret hidden ingredient or fruit to discover. The same excitement can be generated at dinner. If you’re making sautéed spinach, say ‘I have a magic trick. Do you think I can make this huge pile of greens fit into this tiny bowl?’

E= Empower

I know that taking your kids food shopping is not always easy, but inviting them to choose some of the fruits and veggies that get purchased helps them get involved.  This way, you’re empowering them to be an active participant in eating healthy, and they become part of the hunting and gathering process.  Just be sure everyone eats before shopping, so there is less temptation in the cookie aisle.

The other part of empowerment is to get them in the kitchen. Giving kids the tools and skills they need to make delicious food is very empowering.

E – Educate

Talk to your kids about how food affects their bodies. We raise kids to know math and how to read and write, but we also need to create food-literate children.

By teaching your kids things like:

  • how to read labels,
  • how sugar affects their body,
  • what food actually grows from the ground and what’s made in a factory
  • and more…

You’re creating an educated consumer who can then make healthy choices on their own.

Also, be sure to educate yourself. You may not have grown up in a family that made healthy choices, or you may have fallen into some unhealthy habits. Get support for yourself. Learn from someone who can guide you in making healthy food happen for you and your family.

For more free tips on how to easily add healthy, delicious foods into your kids diet without a fight go to http://www.1shoppingcart.com/app/?Clk=4846976

If you’re ready to make a healthy change for your family now, join me for the “Make Healthy Happen In Your Family; 5 weeks to feeding your kids well in a world that doesn’t” With fun and ease, I’ll walk you meal by meal into healthier habits http://www.1shoppingcart.com/app/?Clk=4846972

Nina Manolson is the founder of SmokinHotMom.com and HealthyYummyKids.com.  She helps busy moms look and feel their best and teaches them how to make healthy habits come alive in their family. She’s the author of the practical book “Feed Your Kids Well In A World That Doesn’t.  For more information go to: http://www.smokinhotmom.com

Thanksgiving Crafts for Kids – aka Turkeys, turkeys and more turkeys

Pine cone turkey

What holiday would be complete without crafts made by the kids to decorate? And believe me there is no shortage of craft ideas out there for any holiday, especially Thanksgiving. Turkey crafts alone number in the 20’s, with many variations that kids can do. From turkey handprints to pine cone turkeys there is something out there for every age and every possible craft supply you may have.

This is the first year that Luke and Chloe were old enough to do crafts so we tried a (surprise!) turkey craft. The Thanksgiving Handprint Craft is easy and fun, it also creates a bit of a momento if you decide to keep it; as you trace their hand and footprints to make it.

Our nanny, Elaine came up with the craft, which she found on the all kids network. It is an easy craft that can be done with all ages.

Thanksgiving Handprint Craft

Luke and Chloe's Handprint Turkeys

You will need brown, red, yellow, and orange construction paper, googley eyes, glue stick, scissors, pencil.

Trace your child’s foot on the brown construction paper. Depending on your child’s age you may need to assist or cut it out for them.

Trace your child’s hand on the red, yellow and orange construction paper and cut out. Cut a small triangle out of the orange for the turkey’s beak. Also cut little feet out of the orange.

Using glue stick, glue handprints to back of the foot. Glue eyes and beak on the front, with the little feet at the bottom. Use the wider part of the foot for the top of the turkey.

Another version of the handprint turkey is to have the kids write things that they are grateful for on each finger of their turkey, which I think is kind of unique and appropriate, considering the holiday. I also believe that it is important for us to teach our children to be grateful and this is a fun way to do it.

Garland of Leaves and Thankful Sunflower

I discovered 2 other versions of thankful crafts; the Garland of Leaves and Thankful Sunflower.

Garland of Leaves

For the Garland of Leaves you will need red, yellow and orange construction paper, a black marker, mini clothespins and some string or yarn. Kids cut leaves out of the different colors of construction paper and then write things that they are grateful for on each leaf. They also invite guests who come for dinner on Thanksgiving to write what they are thankful for on a leaf. Hang all the leaves on the string using mini clothespins and hang up on the wall to decorate. Then you are surrounded by gratefulness at dinner.

The Thankful Sunflower is a similar concept except it is in the shape of a sunflower and kids write what they are grateful for on the petals of the flower.

Lacing Crafts

Lacing crafts are great for kids 2 years and up, as it helps them with their fine motor skills. All you need is card stock, a hole punch, yarn or ribbon, and a pencil. For Thanksgiving you can find templates for turkey drumsticks, cornucopia, pumpkins, or you can make your own.

Pumpkin Finger Paint

I always like to include at least one craft that includes painting as kids love it! Whether it be with brushes or fingers kids become very focused and attentive to their creations. This craft is very easy to do. You will need orange finger paint, card stock, green construction paper and yarn (if you wish to hang it).

Cut pumpkin out of cardstock and let the kids to paint it orange! Let them enjoy the paint squished between their fingers as they move and create. Let paint dry. Once it is dry cut out green stem out of construction paper, glue it on. Punch hole in top of stem and string through yarn to hang.

Thanksgiving Crown

What a great way to make Thanksgiving dinner more festive for the kids with their own Thanksgiving Crown. A simple construction paper hat, you will need

  • brown, orange, yellow or red construction paper,
  • 2 pipe cleaners
  • pencil
  • scissors
  • tape
  • printer
  • paper
  • tissue paper (orange, yellow and red — but you can use any combination of autumn colors you like)
  • brown thread
  • optional:  stickers, markers, glitter or gel pens to decorate
This craft is very well explained on the dltk website I found it on so simply click the link to take you there for instructions on how to complete it.
With any craft adult/ parent supervision is advised. Let the kids do as much of the craft themselves, but depending on their age may require more assistance with things like cutting. The important thing is to let the kids take their time and feel proud of what they made. It is a great learning for them as it develops their imaginations, creativity and motor skills.
Regardless of what crafts you choose this Thanksgiving, enjoy them and decorate your home with them, proudly displaying what your children can do. Count your many blessings this weekend as  you celebrate with family and friends enjoying the holiday and all the delectable delights that come with it. Happy Thanksgiving!
Tomorrow, guest blogger Nina Manolson talks about how to get your kids to eat healthy without the fight! Be sure to check out tomorrow’s post.