A Teaspoon of Sugar – the Effects of Sugar on our Body

It’s been almost 2 years since we eliminated sugar from our home and about as long that I have been blogging about it, sharing recipes, and talking about alternatives. What I realized the other day is I have not shared the background, the proven effects, scientific research and studies that sugar has on our bodies and why it is so bad for us. I feel that it is important to not only share what we did it but the why behind it (otherwise I just feel like someone up on their soapbox telling you it’s bad and not telling you why).

It’s one thing to think that it is a good idea to take it out but if you are like me, it also helps to have the research to back up your decision from the experts and medical professionals. Because unfortunately we live in a world where a lot of people won’t believe or validate what you are saying/ doing without it. Plus I also believe it is important to be educated about what you are doing in order to make informed choices.

I read an article the other day by Carol Galanty, Natural Foods Chef, titled “Are you a Sugar Addict” where she talks about sugar being an addiction as well as the effects it has on both our physical and emotional bodies. It has been proven that things such as weight gain, mood swings and premature aging are all effects of consuming sugar and that is just the tip of the iceberg.
In my further exploration of refined sugar and it’s effects, I discovered studies conducted in London and Yale University proving these effects and more. The London study was with children who exhibited ADHD symptoms, where they disguised foods that had sugar in them as ‘natural’. The goal of the study was to learn whether how a food looked made a difference in how our bodies processed it. They observed that regardless of how it was presented that all the children exhibited hyperactivity immediately after consuming the sugary foods.

We have all seen examples of this in our lives. In classrooms, where kids are calm and functioning rationally, then they have a class party, which usually includes treats and the kids go haywire soon after; no longer able to focus or listen well. I have observed this with my LIT group when we have a celebration with sugary snacks, the energy level goes up tenfold as well as the chatter and inability to focus. At Halloween we decided to have a no sugar party and the event went quite differently, we did not send wired kids home to parents and the evening was much calmer and more ‘even’ for everyone (and I would even venture to say much more pleasant).

In the University of Yale study they measured children’s adrenaline levels before and after consuming sugar. The amount of adrenaline after consuming sugar was 10 times higher then before! Adrenaline being the chemical in our body that moves us into fight or flight mode – a state where we act on instinct and survival – if it is 10 times higher then no wonder children are difficult to deal with after consuming sugar as they are on heightened defense! It puts them into a state where they cannot rationally respond or make good choices. They also found that after consuming sugar children were irritable, anxious and had difficulty concentrating.

Other university studies have also found links between sugar consumption, aggressiveness and antisocial behaviour.

Now you might say well I eat sugar all the time and I don’t notice these things or my kids seem ok. Do you notice those times of day when you feel sluggish or tired for no apparent reason? Do you ever feel irritable for no reason? Those are the down swings, coming off the sugar high. Now food does affect each of us differently, so one person might be more sensitive or reactive than another. As a result, symptoms may appear to be more extreme in one person than another, and for some they may say they do not really notice.

You also need to keep in mind that we (as a society) are eating sugar all the time, it is in our bread, our concentrated orange juice, various canned goods like tomato sauce, salad dressings, ketchup, not to mention the cakes, muffins, donuts and cookies. Our bodies adjust, get used to it, but it still doesn’t mean that it is not affecting us or harming our bodies.

As an experiment go without sugar for a day, just one day and notice how you feel. Notice your energy levels, your moods, etc. If you don’t notice much the first day, try 2, then 3. By day 3 you will begin to notice changes in your body (whether it be mood swings, irritability or headaches to name a few). With our son Matthew, his moods became calmer, more consistent and stable, and his sleep drastically improved. Some of these changes we noticed right away and some took longer; with his sleep it was almost 3 weeks before we really noticed the difference.

This was due to the fact that Matthew was going through withdrawal and his body needed to readjust. What I think many of fail to realize is that sugar is highly addictive (which our family doctor avidly confirmed this morning), it is like a drug, one as addictive and as harmful as cocaine. Therefore when we reduce or eliminate sugar intake our bodies go through and experience symptoms of withdrawal. These symptoms include anxiety, restlessness, depression, irritability, headaches, poor concentration, headaches and insomnia (which in children often gets diagnosed as ADD or ADHD). So there is going to be a period where one may experience and go through these symptoms until the substance is completely out of the body’s system.

These facts alone are enough for me to stay the course with our decision to eliminate sugar. We have found lots of healthy and natural alternatives to still enjoy our sweet treats. And I believe in eliminating it completely not just reducing it. It’s like to the drug addict who says well I’ll only have a little bit. Really are you free of it’s effects and/ or the harm it has on your body?

Imagine if the whole world moved towards eliminating sugar how do you think that would look? Our classrooms would be calmer with children more engaged and focused, our moods more stable, our level of peace more present and consistent. So why are we not doing it, because it is what we are used to, there is a huge industry out there, and we are all addicted to it and addictions are not always the easiest to break.

I believe we can get there and are moving towards it. Years ago people who chose gluten free or dairy free did not have a lot of options nor was it well accepted in the ‘outside’ world, such as restuarants and schools. But now there are many restuarants who offer gluten free menus and dairy free options. So it’ll come, in baby steps. It takes people to educate, be informed and live that lifestyle and it’ll become more accepted in this world.


Peanut Butter Cookies

peanut butter cookies

I love peanut butter cookies! They are so tender and moist and they melt in your mouth. They are definitely one of my favorite cookies but I hadn’t made them for a while as I hadn’t figured out how to adjust the recipe without sugar in them.

My mother, bless her, since we have chosen to go sugar free, has been experimenting in her kitchen so that she could make treats for the kids when we come to visit. She has adjusted many of our favorite recipes so that we can still enjoy them. She was the one who figured out how to successfully make peanut butter cookies with no sugar. In her first attempt she substituted date sugar, which she found did not work so well as the cookies were dry ad crumbly. Her next attempt proved successful as she uses a combination of coconut sugar and agave nectar, which make a sweet, soft cookie, that literally does melt in your mouth. Luke and Chloe love her peanut butter cookies!

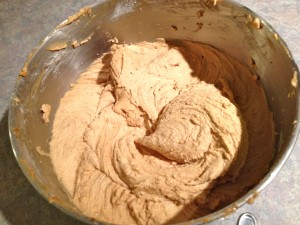
I had been craving them myself for a while so I whipped up a batch last night using my mother’s recipe. I was literally drooling over the batter, my mouth watering as I mixed it up (cause the next best thing to freshly baked peanut butter cookie is peanut butter cookie dough!)

I did resist eating all the dough and baked 5 dozen cookies. Some plain and some with sugar free jam, I make my own, in the middle (I love those best, they are even more soft and moist, peach jam is my favorite).

Matthew even came down after going to sleep as he smelled the cookies baking, the sweet smells wafting up the stairs. (I get an image like in one of those cartoons with the person asleep being ‘carried’ down the stairs along the wafting smell to the kitchen). This morning the twins saw them (even though I thought I had cleverly tucked them out of sight) and wanted some right away. It did not go so well when I said no that we would have some later.

As soon as Luke and Chloe were up from their naps they were asking for cookies. And when Matthew came in the door afterschool and saw a pear on the counter wondered aloud why he wasn’t getting any cookies. (The deal was to eat our pear and then have cookies). We dove in. Ok we had 2 each, though I could have easily eaten 5 or 6, and I am sure the kids would have too. In fact Chloe came bouncing into the kitchen looking for more and when I told her that was it and that she had 2 already she said, “No I didn’t” with the most innocent look on her face. I laughed out loud! How early they start with those things 🙂

Chloe enjoying her cookie

I am sure over the next few days there will be many requests for cookies and I am sure I will indulge as well. In fact I am resisting right now going over to the container and popping 1 or 2 into my mouth… The nice thing is is they do not contain sugar so the kids will not get the adrenaline spike related to it and it is something sweet for them to enjoy. They will also eventually run out, but I can always make more! and might do so 🙂

Peanut Butter Cookies

1c. Earth Balance Vegan Spread

1 c. coconut sugar

1/2 c. agave nectar

2 eggs, slightly beaten

1 c. unsweetened peanut butter

2 tsp. vanilla

2 1/2 c. flour

1/2 tsp. baking soda

1 tsp. baking powder

Cream Earth Balance. Add coconut sugar, agave nectar and eggs. Add peanut butter and vanilla. Mix in flour, baking powder and baking soda until well mixed and mixture is light and fluffy.

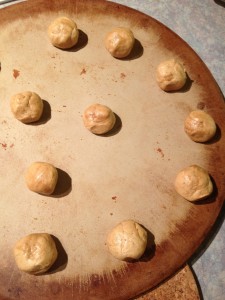
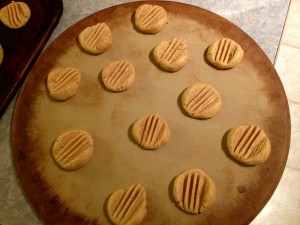
Scoop by the teaspoon and roll into a ball. Place ball on cookie sheet. With a fork press down once gently – dip fork in water so fork does not stick to dough.

Variation: may add a small amount of jam (any flavor you like) in middle of cookie. To do this form ball as above, with finger and press down in the middle of ball. Add small amount of jam in impression. We use sugar free jam that is sweetened with honey.

Bake at 350 F for 10-12 minutes.

Makes 5 dozen cookies.

Wintery Crafts

We all know that kids love crafts! and as a parent/ teacher it is fun to find things that are fun for them while teaching them developing skills. I love searching the internet to find different craft ideas. There are so many different things you can do with simple materials (many you already have around the house) and for little expense. I find that my kids just love making a craft, they are not picky about what it is they are making as long as they get to cut, glue and color; and they are so proud of what they made when they are done that they have to show everyone who comes in the door for the next few days.

Here are a few simple crafts that we have done recently that the kids really enjoyed. With the winter theme many of the crafts are based on snowmen, snowflakes, penguins, and mitts (or other winter wear). There are also some polar bears or other winter themed crafts to be found, but those are the most popular and you can find many variations on them that will meet the needs of any aged child.

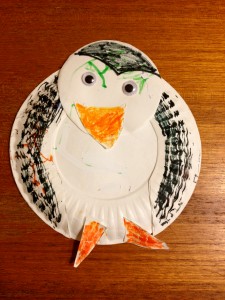
Paperplate Penguins (Luke and Chloe loved this one! They both worked diligently to create it and then proudly showed Daddy – they added a little extra color too)

small paperplates

googley eyes

orange and black markers

white paper

scissors

glue

On piece of white paper trace a small paper plate. On the tracing draw two half circles on the sides for wings and a small circle for the head. On the top third of the small circle draw half circle with a dip or point going down in the middle for the crown of the penguin. On the same sheet of paper, draw 3 triangles, one large one for the beak and two smaller ones for feet. (Depending on the age of the child they can draw these themselves, if not have an adult draw them) Child colors the triangles orange and the wings and crown on head black. Once they have completed coloring them they can cut them out.

Glue the wings onto the backside of the paperplate. Glue the head at the top of the plate and the feet at the bottom. Glue googley eyes on the head to make the face and the beak slightly beneath them in between the two eyes.

Cut Out Snowflakes (one of my favorites!)

white paper

scissors

Fold piece of white paper in half, then in half again and one more time (so that you have folded it 3 times in total). Using scissors cut designs into the paper, child may do this by cutting off a corner, making a half circle on an edge, etc. Child cuts as many ‘designs’ into the paper as they would like. Once they are done child unfolds the paper and they have a beautiful snowflake with various patterns and designs.

Doing this will create a square snowflake. If you wish to have a circular one trace a circle on the paper and cut it out before folding it. You can also do this with smaller pieces of paper (to make smaller snowflakes) and/or colored paper. Children can make more than one and hang on the window creating their own ‘snowstorm’.

Note: Depending on the age of the child an adult may need to assist with cutting the snowflake. This craft is best for children who have good motor control and can use scissors well on their own.

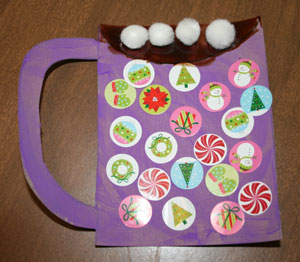
Hot Chocolate Mug (love this!)

lightweight cardboard (cereal box)

paint – brown and any other color

paint brushes

white pom poms small or mini marshmallows

stickers

Draw a picture of mug on cardboard. Cut it out. Paint cardboard mug with color of choice.  Let paint dry.

When the paint is dry the child can then decorate it with stickers. Draw a half moon at the top of the mug. Child paints in the half moon with brown paint and sticks on pom poms (for marshmallows). Let dry. Pom poms should stick onto wet paint without needing to use glue. If when it dries pom poms haven’t stuck then a little glue can be used to secure them.

Note: Colored construction paper can be used in lieu of the cardboard and painting the main part of the mug.

Crafts are not only fun they are great ways to enhance children’s developing motor skills and enable them to learn to grasp things with their fingers. It also feeds their creativity and imagination as well as a sense of pride when they are finished!

In my search for crafts I discovered this wonderful link with some fantastic and innovative ideas. Check it out for more great wintery craft ideas!


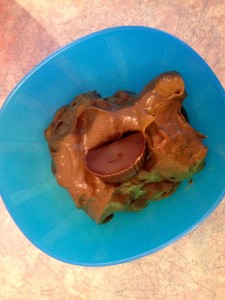
Yummy Raw Chocolate Pudding

Chloe enjoying her chocolate pudding

As a parent who endeavors to provide good healthy snacks for my kids, as I know many of us do, I was thinking the other day about what to provide for snacks other than fruit. Not that there is anything wrong with fruit, but I like variety, and so do my kids. As I think all human beings do, if we have oranges everyday for snack we may start out loving them but eventually be wishing for an apple, or some popcorn.

I read an article once that described things that appeal to kids most in their meals. They were foods that are sweet, salty, or crunchy and that if you appeal to one or more of these when planning meals and snacks you will always have success with them eating whatever you are serving.

So there are some days we make popcorn, others we have fruit, but the other day I realized that I have a great healthy chocolate pudding recipe, made from avocado and bananas. What a great snack option, sweet, chocolate and delicious! So I have added this to our snack list for afterschool. The kids love it, it is a great treat and it satisfies the sweet without the added sugar, cause there is no sugar (or dairy) in it!

And the great thing is because it has avocado in it, it curbs our body’s craving for any further sweets. My mother’s naturopath said that when our bodies crave sweets to have an avocado – and the reason is our body actually wants fat not sugar, and avocados are high in (monounsaturated) fat, so when we eat one we satisfy and give what our body needs.

I also find this pudding to be quite filling, a small portion is enough to enjoy and fill your tummy (which is good because it means there are leftovers for later!) The pudding once made will keep in the fridge for 3-5 days – if it lasts that long.

It is very easy to make, put all the ingredients in the blender and within minutes you have smooth, fluffy and delicious chocolate pudding.

Raw Chocolate Pudding

2 ripe bananas, peeled and sliced

1 avocado, pitted and peeled

2 tbsp. raw cacao powder (please note this is different than cocao powder – they are not the same things)

1 tsp. agave nectar

Put all ingredients in Vitamix blender in the order listed. Start on low, slowly turn speed up to high. Blend for 30 seconds on high or until desired consistency is reached.

Luke's pudding mustache

Makes 1 1/2 c. of pudding

Note: If you do not have a Vitamix blender, you can use your regular blender but you may find that it is too thick to mix well. What I have done is mix it in the mixer first so that everything gets fairly well mixed and then I transfer it to the blender – blending it on high- to make it smooth and fluffy.

5 Minutes for Mom

Chloe, Luke and Matthew

Being a Mom has many duties, demands and challenges, but it also brings us many benefits, rewards and love. My heart just melts when the kids are playing and all of a sudden I turn around and Luke is standing there, he looks at me and says “Mommy I want to give you a hug”, he does and then he resumes playing.

Becoming a parent is job that we sign up for for life, once we are in we can’t decide to quit and look for another, take a vacation or check out. We are there forever, no matter what. But no matter what, we as Moms (parents) need to take care of ourselves so that we can be the best we can for our families. If we are not happy then the family isn’t happy.

I agree sometimes it can be challenging to even find 5 minutes for ourselves, but I have found that with a little creativity, it is easy to do and those little 5 minute breaks, help make the day easy, happy and flowing.

It’s easy to incorporate these into your day (and many of them you can do with the kids so not only do you take care of you, you can do it easily while also engaging the kids)


  1. Breathe – yes we breathe all the time but how often do we stop and take a really deep breath, one that fills the lungs. Deep breathing does wonders for our body and brings us back to a relaxed state. Stop, breathe in for the count of 4 and then release for the count of 4, do this 3 times and you’ll find yourself in a very peaceful state. Even better add a drop of energizing essential oil like peppermint or wild orange in your hands and cup them over your nose breathing in deeply. Doing this will instantly provide you with a natural pick me up.
  2. Dance – moving our body is key to keeping things flowing. Dancing uses your entire body, put on your favorite music and dance away! You can easily do this with the kids but be warned they’ll probably want another song when the first one is done 🙂
  3. Go outside – fresh air does wonders for us. Whether you go for a quick walk, are gardening (getting your hands in the dirt), or you stand out in the backyard for 5 minutes, the fresh air is a great way to regenerate and de-stress. Take a deep breath while you’re out there or do a grounding activity imagining you’re a tree with large roots going deep into the ground (this one especially is fun to do with the kids as they love to imagine and be creative)5 minutes for mom
  4. Chat with a friend -just expressing ourselves or touching base with another person can brighten our day. A listening ear always helps or just makes us feel better.
  5. Smile -this is so simple but makes such a difference in how you feel. You use more energy when you frown, and if you smile the people around you will smile too. It’s contagious!

Of course it is important to also schedule some longer periods of time for ourselves, without the kids, such as going for a massage, bubble bath, coffee, hike or date with a friend; as we need these too to keep our spirits happy, to regenerate and de-stress and be the best we can be for everyone.

Delicious Dairy Free Dips

Matthew and Chloe enjoying a cucumber

While having all the kids at home over the Christmas holidays I discovered that my kids will eat pretty much anything, that they are not fussy eaters. I also discovered that whatever I put in front of them they ate. So even with the surplus of yummy sweet treats around, if I put  fruit or vegetables in front of them that is what they would eat. Not that they did not ask for the sweet treats mind you, I did too at some points. But I noticed that when I was prepping a veggie tray and Matthew came wandering by, he would pick up a carrot or celery stick and start eating – without being asked! – and then he would come back for more. I felt I was onto something…

Now my kids will eat their fruit and veggies regardless if there is a dip to go with it or not. Which is great because sometimes when I am running out of time, the dip is the thing that does not get done! But they and I do enjoy a yummy dip to go with it. In fact, often Chloe will eat only the dip, which I know defeats the purpose, but the dips I provide have good stuff in them too so it is ok. Sometimes though I do use it as a bargaining tool, “more dip if you eat your carrot stick”, not always the best tactic in getting kids to eat I know, but I think you would agree that we all do it to some degree.

So today I am sharing you with some of my favorite dips that are great with a variety of things, fruit, veggies, fish even, depending on the dip. (My sister made a fabulous dinner at Christmas of fish and chips and I could not get enough of dipping my fish in the Peppery Dip, it was delicious!)

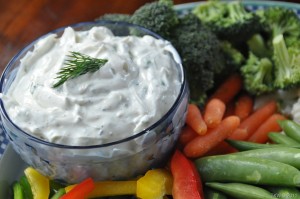
Dill Dipgreat with veggies and/ or tortilla chips

1/3 c. veganaise

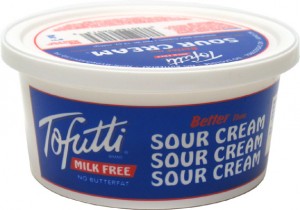
1/4 c. vegan sour cream*

1 tsp. parsley flakes

1/2 tsp. dill weed

1/8 tsp. onion powder

1/16 tsp. celery salt

1/16 tsp. salt

Mix all ingredients in a small bowl. Serve immediately or chill until ready to use.

Recipe can easily be doubled. Makes about 1/2 c. dip

Peppery Dip

1 c. veganaise

2 tbsp. grated onion

2 tsp. tarragon vinegar (can use regular vinegar and tarragon seasoning)

2 tbsp. chopped chives

2 tbsp. chili sauce

1/2 tsp. curry powder

1/2 tsp. salt

1/4 tsp. pepper

1/8 tsp. thyme

Mix all ingredients together. Serve with veggies, also great with fish!

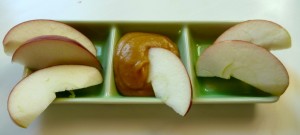
With fruit I use this homemade caramel sauce that is made from dates. It is especially good with apples, but goes with any fruit well. All the dips will keep in the fridge for at least a few days, so make ahead of time or keep until later -that’s if you have any left 🙂

Enjoy and happy dipping!

*when I first started making dairy free dips I used Tofutti sour cream and cream cheese, a soy based product. I discovered that they use sugar in their product and since then have moved to using Earth Island, which has no sugar and I feel is a better product in general. Both work well and is up to you as the cook which one you’d like to choose – or maybe you have another favorite vegan sour cream 🙂

3 Easy Steps to Healthy and Nutritious Eating (The kids will LOVE it!)

Eating well is something that is on many of our minds at this time of year. After the overindulgence over the holidays of food and especially treats, many of us look to make changes in what we eat come January. Whether the goal is to lose weight, feel better or just have the entire family eating well balanced and nutritious meals, here are some quick and easy things you can do to make changes right away.

healthy dips for kids

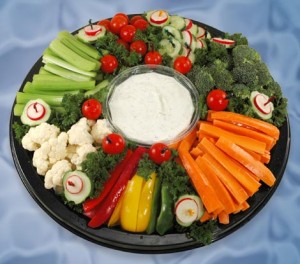
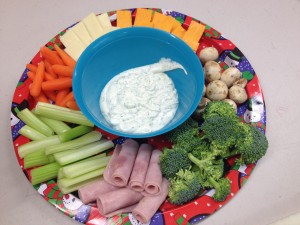
Veggie Cheese Tray

1.Have nutritious snacks on hand. I often find it is not our meals that get us but the snacks we have in between. I have found that my kids will eat what is put in front of them (I have even noticed this for myself as well). If there are veggies and dip out on the counter then that is what they will grab when they are hungry, but if there are cookies near by and accessible then they’ll go for those. So I have started putting together a veggie tray and setting that out afterschool. I like to include variety such as grape tomatoes, mushrooms and snow peas; include your kids faves and watch them disappear. I have some yummy dairy free dip recipes that are easy to make and great with vegetables. You can also do a fruit tray as well with this yummy healthy caramel dip.

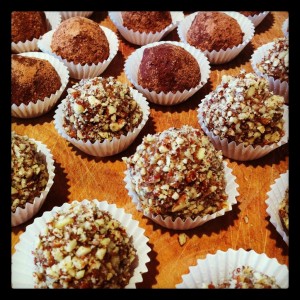
2. Provide sugar free sweet treats. There are lots of great recipes out there for sweet treats that do not contain the refined sugars and use natural sugars instead. My kids love banana candy, which is easy to make ahead and have on hand. Or raw chocolate truffles and chocolate pudding (my mouth is watering already!) We all love our sweet treats, it’s in our nature. By providing healthy ones, we satisfy our cravings for something sweet and can feel good about it – not only for ourselves but for our kids to.

Raw chocolate truffles

3. Plan the menu for the week. If you plan out ahead of time your meals (especially dinner) this will not only reduce your trips to the grocery store and save you money but it will reduce stress and the “I don’t know what to make for dinner so I will grab this quick easy (and often unhealthy) option” -whether it be the frozen dinner or the scrambled eggs.

Starting with these 3 easy steps to healthy eating will put you on the road to eating a healthier and more balanced diet.

Tip: I have found that it is easiest to start small and break things down into steps that you can achieve easily, one at a time. If you take on too much at once and try to radically change everything not only are we more likely to give up because we are so overwhelmed, but those changes probably won’t stick. Aim for easy, aim for success!


Tips for Creating Successful New Year’s Resolutions

New Year, new you right? It’s that time of year when many of us sit down and create resolutions, a list of things we’d like to achieve and create in the coming year. The fact is that statistics show that the majority of us ‘break’ our resolutions within the first month of the year. Not only do they advertise this it’s not really inspiring is it? So what’s the point?

I find in creating success around resolutions you have to take a different approach. The first one may be not to create them in January when the pressure’s on and everyone else is doing it. It’s stressful, everyone is comparing notes, asking what intentions you have set and why and then asking how you’re doing?

Second, we as human beings tend to set really large goals for ourselves. Breaking them down into small achievable goals will create success with ease and not make it so overwhelming.

So where do you start? You know you’d like to make some changes but how do you do that and be successful in doing it?

Here are some quick tips for creating successful New Year’s resolutions each year:

1.Don’t create them in January. When there is so much pressure to do so, instead just relax and take some time for yourself after the holiday rush. Taking that down time and the pressure off will ensure more success when you do set them up. Review the previous year and congratulate yourself on what you’ve done well. Then pick a time of year when it’s comfortable for you to create your goals. Maybe it’s February, might be Spring is the best time. YOU choose, don’t let society dictate.

2.Create goals instead of resolutions. Sometimes just changing what you are calling them is enough to make it stick. The ‘talk’ is that resolutions fail, but goals are usually quite successful.

3.Keep it simple. Create 1-3 goals and stick with those. Once you have achieved those or you are well on your way, add more if you like.

4.Break your goals down into small achievable steps. One of your goals may be to go to bed earlier – say 10 pm, right now you go at 11. Instead of jumping to 10 right away do it in 5 minute increments. 10:55 probably feels a lot more doable then going straight to 10. Do 10:55 for a few nights, when you’re feeling successful with that – back it up 5 more minutes and do that for a few nights. Doing this progressively in 5 minute increments until you reach your goal of 10 pm.

5.Write them down. The power of writing down your goals cannot be underestimated. It gives them more power and helps to make them real. You can also add in detail, which helps define and manifest your goal more quickly. Also your hands are a direct connection to your heart so it puts the power of love and intention behind them.

6.Take action. Pick 1 of your goals and take action towards it right away. One article I read recently suggested you use the 3 second rule. Once you have decided what you want, take an action step towards it. So if you decided you’d like to take that art class at the community center, get up and call to register.

It is also important to share your goals with someone who supports you. This will not only provide you with support but someone to encourage you if you hit a bump in the road and need a little ‘nudge’ to keep going.

There are other things too like keeping a journal or creating a vision board for your goals. These 2 activities are great to do with your kids, especially the vision board, as kids love cutting out pictures, gluing and drawing. Keep it simple for them and frame it in terms that they will understand. It could be as simple as what would you like to do this year (or where do you want to go?) and then get them to draw or create a picture/ vision board about it. It doesn’t matter if they say camping and you are already going, this helps them get in the mindset of creating, which they already do so well. If anything it supports what they can already do and helps them to maintain that ability.

Most important of all, whatever goals you set, have fun! All the best in 2020!

I encourage you to share here in the comments what some of your goals are, when you set them, and tools you used to achieve them. Sharing makes it real, and is a great way to gain support as well.


Shop Art Calendars at Calendars.com