Bonding 40 feet in the Trees

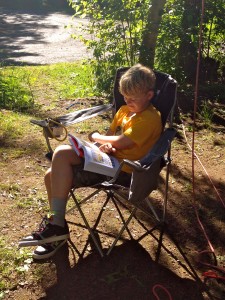
Bonding with my oldest son is a bit of a challenge these days. He’s 11 and into all kinds of things that are not a huge interest to me. I’m 41 and his Mom, so there are not a lot of things that I like that are of interest to him. We do have some common ground of course, we both love board games, especially Settlers of Catan, so you will often find us in the evenings battling it out for the longest road and the most settlements.

Sometimes it’s a timing thing to, I’m making supper, or having to tend to his younger brother and sister. So when we had the opportunity to go to Sky Trek in Revelstoke, British Columbia to do the high ropes course; I jumped all over it.
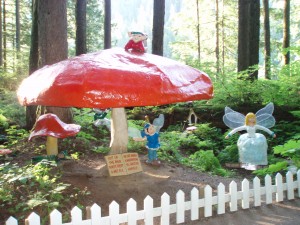
P7290215We had been to the Enchanted Forest next door earlier that morning with my Mom and the twins, which we thoroughly enjoyed. But Matthew and I were both kind of eyeing the course through the trees. I had always wanted to go there since they opened and though Matthew had had the opportunity when he was about 5 to do the kids course, he wanted to get up high in the trees. So when Matthew asked about the course I said well let’s go check it out.

His eyes lit up, he was so excited with just the prospect of ‘maybe’ going. We discovered that the course took 1-3 hours to complete and though reasonably priced we wondered what Gran and the twins would do for that long.

My Mom graciously offered to watch the twins while we went and did the course. So after a quick lunch, off we went! I grabbed my closed toed shoes from the car, which I was glad I had thrown in that morning, as there are no open toed or flip flops allowed. Though I wish I had also had the foresight to put in socks, which would have been much more comfortable.

Matthew and I were both excited and almost ran up to the clerk to get going. First of course we had to fill out waivers, then pay, then meet our guide to get geared up and ready to go.
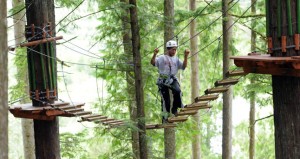
online-skytrek-02The course consists of 4 components, each one getting higher and more difficult as you go. Training is first, where your guide gives you a demonstration of the elements and obstacles, what equipment to use and how to keep yourself strapped in and safe. We all had helmets, harnesses and carabiners. We had 2 that we needed to clip in and each had to be done in a certain way in a certain order. He showed us how to use our zipline attachment as well as telling us only 3 people to a platform and to remember to call clear after we completed an element – which was the cue for the next person to go.

Then there’s the green, blue and black courses, each one getting higher and more difficult as you go. So by the time you hit the black course you are 40 feet in the air and challenged!

Matthew went first and I was following along behind him. At points when we were waiting for others in front of us we would chat or connect, discussing the last element or what was coming up; continually moving higher and higher. I found the first 3 parts comfortable and easy to navigate, but by the time I hit the black I was not only tired but a little freaked out. Some of the elements were pretty tricky and they definitely pushed my comfort zone.

The very last leg of the black course you could choose to do the double black diamond or stay on the single. The double black offering shorter lengths, more rests, but more challenging (lots of swinging obstacles), while the single black was one long haul across a rope net, which was more tiring but a lot easier to do.

Matthew, the trooper, chose the double black. In fact in his mind there was no question as to whether he would do it or not. I applauded him, but said I was going to stick to the single. Matthew did very well, I was so proud of him. The last leg on the double black he was there legs spread apart between two triangle elements, and ‘resting’. I could tell he was tired, but he was almost there and he was determined. It was one of many moments that I was proud of him or maybe got a little teary eyed watching him and how he confidently navigated the course, though at times I knew he was a little freaked out like I was.

We completed the course with one final zip line to the bottom and high fived each other on the ground. We were surprised to discover that it had indeed taken us 3 hours to complete the course. No wonder we were tired!  And thirsty! as you can’t take water or any extra stuff up there with you. In fact I asked a lady on the ground if she would take a few photos of us and send them to me (unfortunately I don’t have them yet), as though there were times when I could have taken a really nice picture or two, there was no way I would have been able to carry the camera!

Some people may argue that because it was an individual activity that it was not really a bonding experience. But I would disagree. We connected and shared an experience where we both pushed our limits and can now share and discuss this experience. I also have etched in my mind some of those great ‘shots’ of him in the trees which will last forever in my mind.

I enjoy experiences like that with my kids and hope I get to have all kinds with each one of them. And I hope that they enjoy them to and that they will stand out in their minds as some of the best experiences they had, even though it was with Mom.

The Enchanted Forest

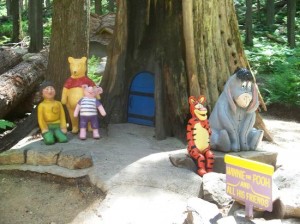
Winnie the Pooh and Friends

Winnie the Pooh and Friends

One of the most magical places on earth is The Enchanted Forest. Found along the TransCanada highway between Revelstoke and Sicamous, this beautiful old growth forest is like a child’s dream.

No matter how many times I there I always enjoy it. The beauty and energy of the old growth forest is calming and peaceful. With the delightful storybook and nursery rhyme characters in amongst the trees it truly makes for a magical and wonderful experience.

enchanted-forestIt is a must stop for our family and every time we drive by on the way to Oliver, BC the kids are asking if we can stop there. This summer was the first time for Luke and Chloe. Being 4 years old this was the perfect age for their first experience.

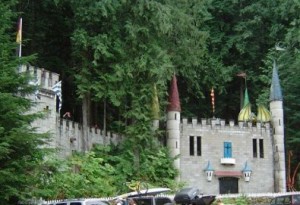
Once you enter your first stop is the Enchanted Castle where the resident wizard welcomes you. You can clamp yourself in the gallows (or any misbehaving children) or explore the dungeons below. Word of caution: the dungeons I find to be dark and scary and definitely not for small children.

Tea for Two

Tea for Two

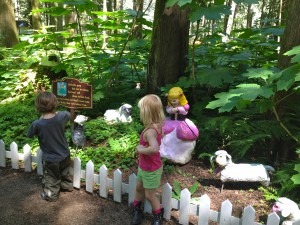
You can climb the stairs to the tower and enjoy being ‘King of the Castle’, before you continue along the path through the forest. The path then takes you around the forest with stops along the way to play and enjoy the fairytale characters. There is everything from the Three Little Pigs, Snow White, and Winnie the Pooh, to Hansel and Gretel, Old Mother Hubbard and the Cow that Jumped over the Moon.

The forest also hosts the biggest Tree house in British Columbia, with 3 levels and a gorgeous view at the top.

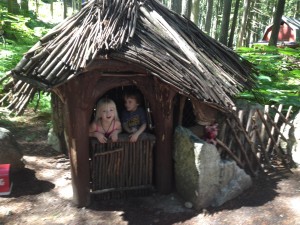
The Three Little Pigs House of Sticks

The Three Little Pigs House of Sticks

There is also a Nature Trail which takes you back further onto the property with opportunities to see beaver dams, row boats and explore other nature items.

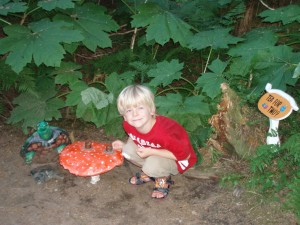
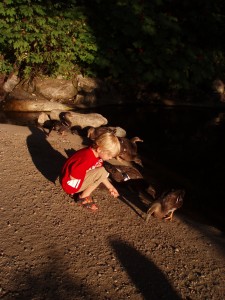
Luke and Chloe dashed and explored everything. Checking out the houses, which are just the right size for 4 year olds, going down the slide at the Old Lady in the Shoe’s house and enjoying the cage at the witches house (Hansel and Gretel). At the end of the trail there is a duck pond where you can buy duck food for 25 cents to feed the ducks.

IMG_3270

Little Bo-Peep

You can easily spend a couple of hours in there and not feel rushed. The great thing is once you’ve paid your admission you can return to the forest throughout the day if you choose to. We went through it twice and they wanted to go a third!

Even my oldest who is almost 11, and has gone many times, still enjoys exploring here. Whether you are exploring the Revelstoke area or just passing through, the Enchanted Forest is a must see for all ages, children and adults alike.P7290227

Camping Desserts – Cinnamon Apple

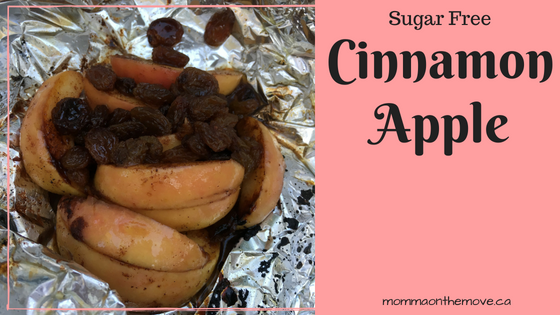
sugar free cinnamon apple

I love the variety of neat camping recipes there are. Especially ones that you can do over the fire that are yummy, sweet and delicious. Usually done over hot coals and in tin foil it makes for even less dishes and a delicious treat or meal.

Our family camping trips always involved TFD’s, or Tin Foil Dinners, which my father usually requested that we have at least twice. But I often enjoyed the dessert options, like s’mores, banana boats and cinnamon apples. Cinnamon apples have always been my favorite, as the brown sugar would melt and make a nice sticky syrup over the apples and raisins, so much that I would often lick the tin foil to make sure I did not miss one drop! Until recently, these camping desserts were something that I had to forgo – until I figured out how to do it sugar and dairy free.

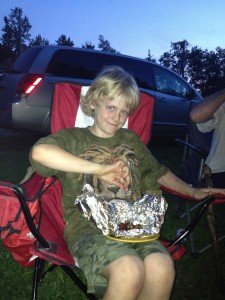
Matthew enjoying his Cinnamon Apple

Matthew enjoying his Cinnamon Apple

As with any recipe I am ‘transforming’, my goal is to figure out how to make so that it is the same as the original, or only a slight difference in taste. My Mum was actually the one who figured this one out. A couple of summers ago she bought coconut sugar and tried it out with the cinnamon apple. It worked perfectly! (Coconut sugar is an excellent natural substitute for brown sugar. It melts just like brown sugar and gives you the syrupy juice.)

I have also figured out how to do banana boats sugar free, also very good, but have yet to try it out on the campfire. (Will post it once I do! )I believe though that it will turn out just as yummy.

Cinnamon apples are easy to make sugar free without compromising the taste! Worth a try on your next camping trip this summer.

Sugar Free Cinnamon Apple

1 apple

cinnamon

coconut sugar

raisins

spoon of Earth Balance vegan buttery spread

heavy duty tin foil

Tear off a large square of heavy duty tin foil. With the shiny side up do the following:

Using Earth Balance, butter middle of tin foil, spreading evenly around. A spoonful is good but if you like you can use more. Slice and core apple, put apple on top of buttered area spreading out slices so they are not on top of each other. Best to slice apples thinly as opposed to in chunks as they soften and cook more quickly. Sprinkle with cinnamon to taste, add raisins. Sprinkle a couple of spoonfuls of coconut sugar over apple mixture. The more coconut sugar you use the more juice you will create. You may add a few dollops of Earth Balance on top also to create more juices.IMG_3357

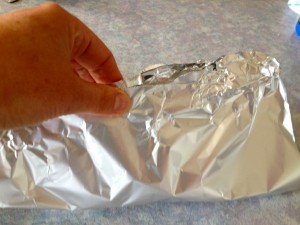
Close foil by matching the edges and folding it down until it is tight.IMG_3361

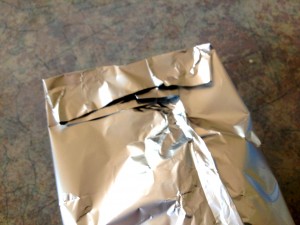
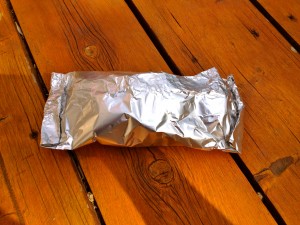
Then fold over and close each side.IMG_3362

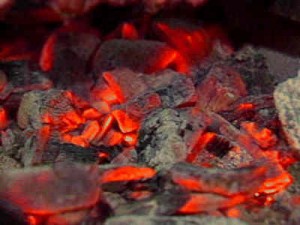
Place foil packet on top of hot coals. Important – ensure that there is no flame amongst your coals otherwise it will burn. Let cook for 5 minutes, then flip over using tongs. You’ll hear the apple sizzling. Check after a few more minutes. Apple should be soft and coconut sugar and butter melted. If it’s not ready wrap it back up and put it back onto the coals and cook for a few more minutes.Bed-Of-Hot-Coals

Once ready unwrap and enjoy! Caution Cinnamon Apple will be very hot. If giving it to small children unwrap and let it cool some before they enjoy.

Strawberry Rhubarb Pie

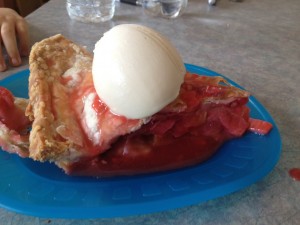
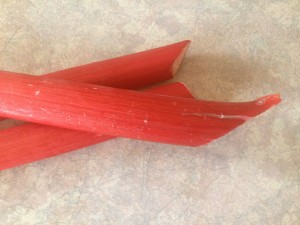
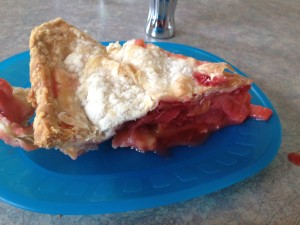
IMG_3349The other day one of my neighbors offered me some fresh rhubarb from her garden. I am not a big fan of rhubarb (and don’t really know a lot about what to do with it) but I do really enjoy strawberry rhubarb pie (and I love making things with ingredients fresh from the garden). Years ago I had found a recipe and tried it. So when Matthew came in and said the neighbor asked if we wanted some I said yes! right away.

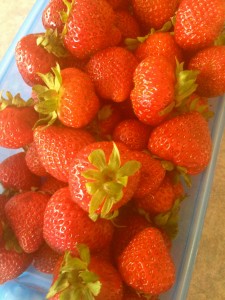
IMG_3330Rhubarb is a tart fruit that on its own is not to my liking but combined with strawberries I find the whole thing delicious. Now those years ago when I first made this pie it was the traditional white sugar filled filling, so this was my first attempt making it sugar free. I was a little nervous because it called for mixing the flour and sugar together but thought that would not work well with the agave nectar (what I chose to substitute for the sugar) being a liquid.

What I decided to do was to mix the flour and salt together and then once everything was in the pie shell to then pour the agave over top, letting it fill in the holes, as well as being on top.

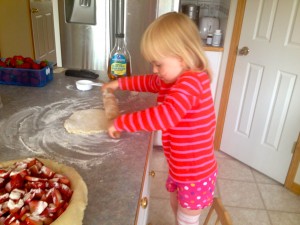
IMG_3335The kids of course love pie, so it didn’t matter to them what kind of pie I was making, just that we were having pie after supper. Chloe actually helped me make the pie and enjoyed assisting in rolling out the pie crust. She also watched me cut the fruit and asked many questions along the way as to why I was doing this or that.

Once the pie was in the oven, everyone settled down. But as soon as it came out after supper I barely had time to let it cool before everyone was asking for a piece. I would have prefered to let it cool much more to allow for the filling to set but they weren’t having any of it. So I cut pieces for everyone and topped it with ice cream.

Oh. my. God. It was delicious! In fact it was even better than the sugar version I had made before. The kids licked and practically ate the plates it was on. And then promptly asked for more!

I feel that anything made fresh and with fresh garden grown ingredients is going to turn out quite well. But this was beyond my expectations, it was sooo good. With just the right combination of sweet.

Strawberry Rhubarb Pie

2-9 inch pie crusts (one for top and bottom)IMG_3331

2/3 c. agave nectar

¼ c. flour

¼ tsp. salt

3 c. chopped rhubarb

3 c. sliced strawberries

Mix flour and salt together, put 1/3 of mixture on the bottom of the pie crust. Add fruit in pie shell, leave slight mound in the center, and pour remaining dry ingredients on top. Pour agave nectar over top of fruit and dry ingredients. Cover with top crust. Pinch edges together to seal. Cut small slits in top of crust.

Bake at 425 F for 10 minutes, then reduce heat to 350 F and bake for 40-50 minutes. Let pie cool for at least 15 minutes before serving to allow the juices to cool and set.IMG_3345

Camping Essentials – Making your own Firestarters

IMG_3240I’m an avid lover of camping. All my family vacations growing up were camping and exploring different places in the Maritimes and I have many fond memories of those trips. Luckily my kids are also avid campers and when I introduced camping to the twins last summer, we kicked off the ‘rebirth’ of camping in our family (after a short siesta between when the twins were born and still quite little). We got out quite a bit last season and even snuck in one final night in mid September.

So when this season kicked off I started looking at the calendar to plan in as much camping as possible between my part time work schedule and other regular commitments. I’m pretty impressed with myself as so far in about 2 weeks we have done 3 different camping trips and places. Some old some new, but loving it all the same.

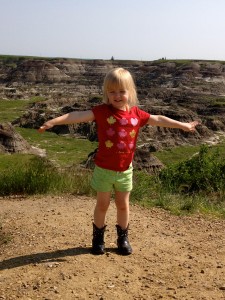
Drumheller, AB

Drumheller, AB

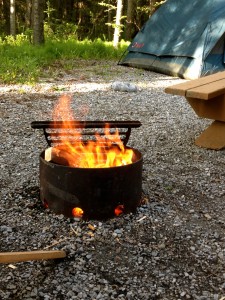
I think everyone in our household (and probably most campers) would agree that one of the best things about camping is having a fire. Whether you are cooking on it to make dinner or just sitting around and enjoying it, it really is essential. It’s so lovely to sit around the fire on a summer evening and relax, chat or just hang out.

Even when its raining, if you can get a fire going it just makes that camping experience so much nicer. When I was in Girl Guides growing up, of course one to the things I learned was fire building. There is the traditional log house or teepee style, some use newspaper or  dry moss to start the fire. But the best thing that I have ever discovered (and did learn how to make these in Girl Guides) is a firestarter. Made out of materials that you have around the home anyway, these firestarters will burn for 20 minutes and will work easily in the rain. They make starting a fire quick and easy and I won’t go camping without them!

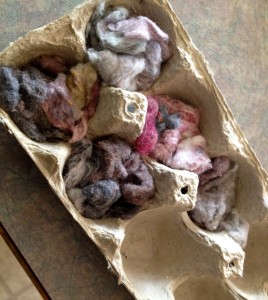
IMG_3059All you need to make them is a cardboard egg carton (stryofoam ones do not work), some dryer fluff and some wax (you know all those candle ends and bits of wax you throw out? Keep them in a ziploc bag and save it for making firestarters). See easy. And you’re probably thinking wow that’s great that I can use dryer fluff for something other than just throwing it out!

Here’s how you do it:

  • cardboard egg carton
  • dryer fluff
  • melted wax
  • newspaper
  1. Cut top off of the egg carton.
  2. Place egg carton on top of a sheet of newspaper.
  3. Fill each hole in the egg carton with dryer fluff. Be generous and stuff them full!
  4. Then pour melted wax over the egg carton – ensuring that each ‘hole’ is filled with wax and has soaked through all the way to the bottom. This is very important as the wax needs to cover it in it’s entirety in order for the firestarter to work properly.
  5. Leave egg carton on newspaper and let wax dry completely.
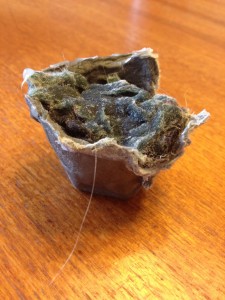
  6. Once wax is dry cut between the holes in the carton to make 12 firestarters. Store in a large ziploc bag and voila! Done!

IMG_3062You can do more than one egg carton at a time depending on how much dryer fluff and wax you have available. I made 2 dozen last week and that’ll likely be enough for the summer.

I also recommend that you melt the wax slowly on low heat on the stove. And once you use that pot designate it as the wax melting pot and just keep it for when you make more.

I was amazed how easy and well these worked when I first discovered them. I don’t remember who exactly in Girl Guides came up with it, but thank you so much they are awesome!

IMG_3068

Completed Firestarter

So if you’re going camping this summer, or just like having an outdoor fire, make some of these and give them a try.